.png)
Method 1: User‑Based Linking (via Security Settings)
Best for: Individual users linking their own accounts if SSO is already set up within the environment.
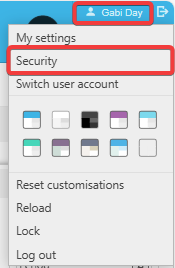
- Go to your username in the top‑right corner.
- Select Security.
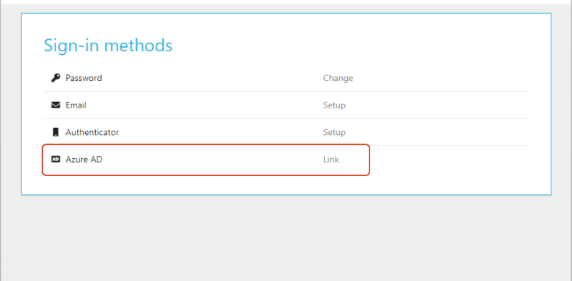
- A new window will open.
- On the Azure AD line, click Link.
- Follow the on‑screen steps to authorise the connection between Azure AD and iplicit.
Once complete, the Azure AD field will display the user’s email address instead of the Link button.
This confirms the link is successful and the user can now log in via SSO.
Method 2: Admin in iplicit (but NOT an Azure Admin)
Best for: Bulk linking when the iplicit admin does not have Azure admin rights
Step 1 – IT Team Prepares the CSV
The IT team must export the following for each user:
- Email address
- Azure AD Object ID
Step 2 – iplicit Admin Imports the CSV
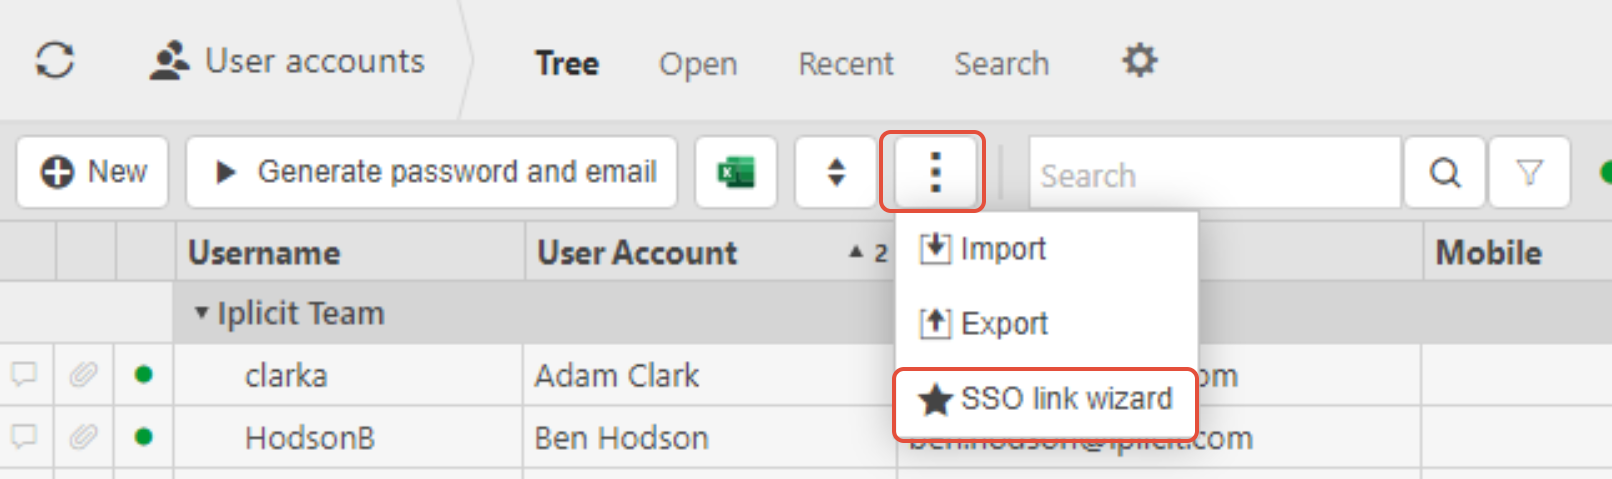
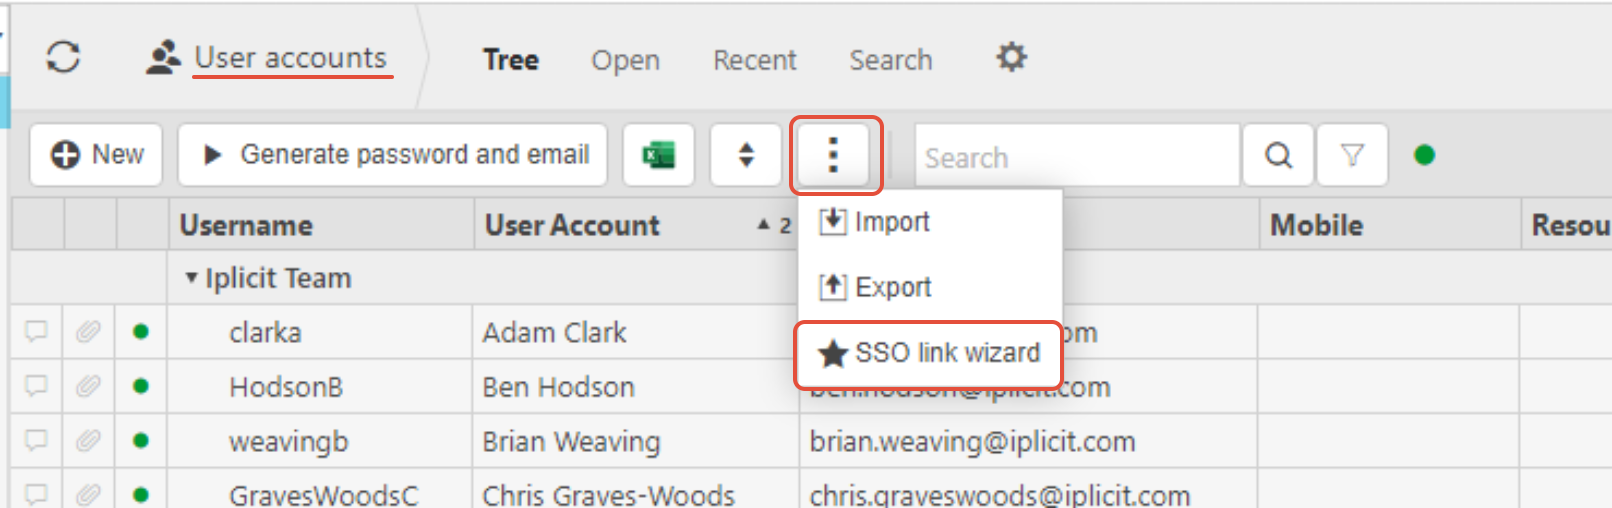
- Go to User Accounts.
- Click the three dots menu.
- Select SSO Link Wizard.
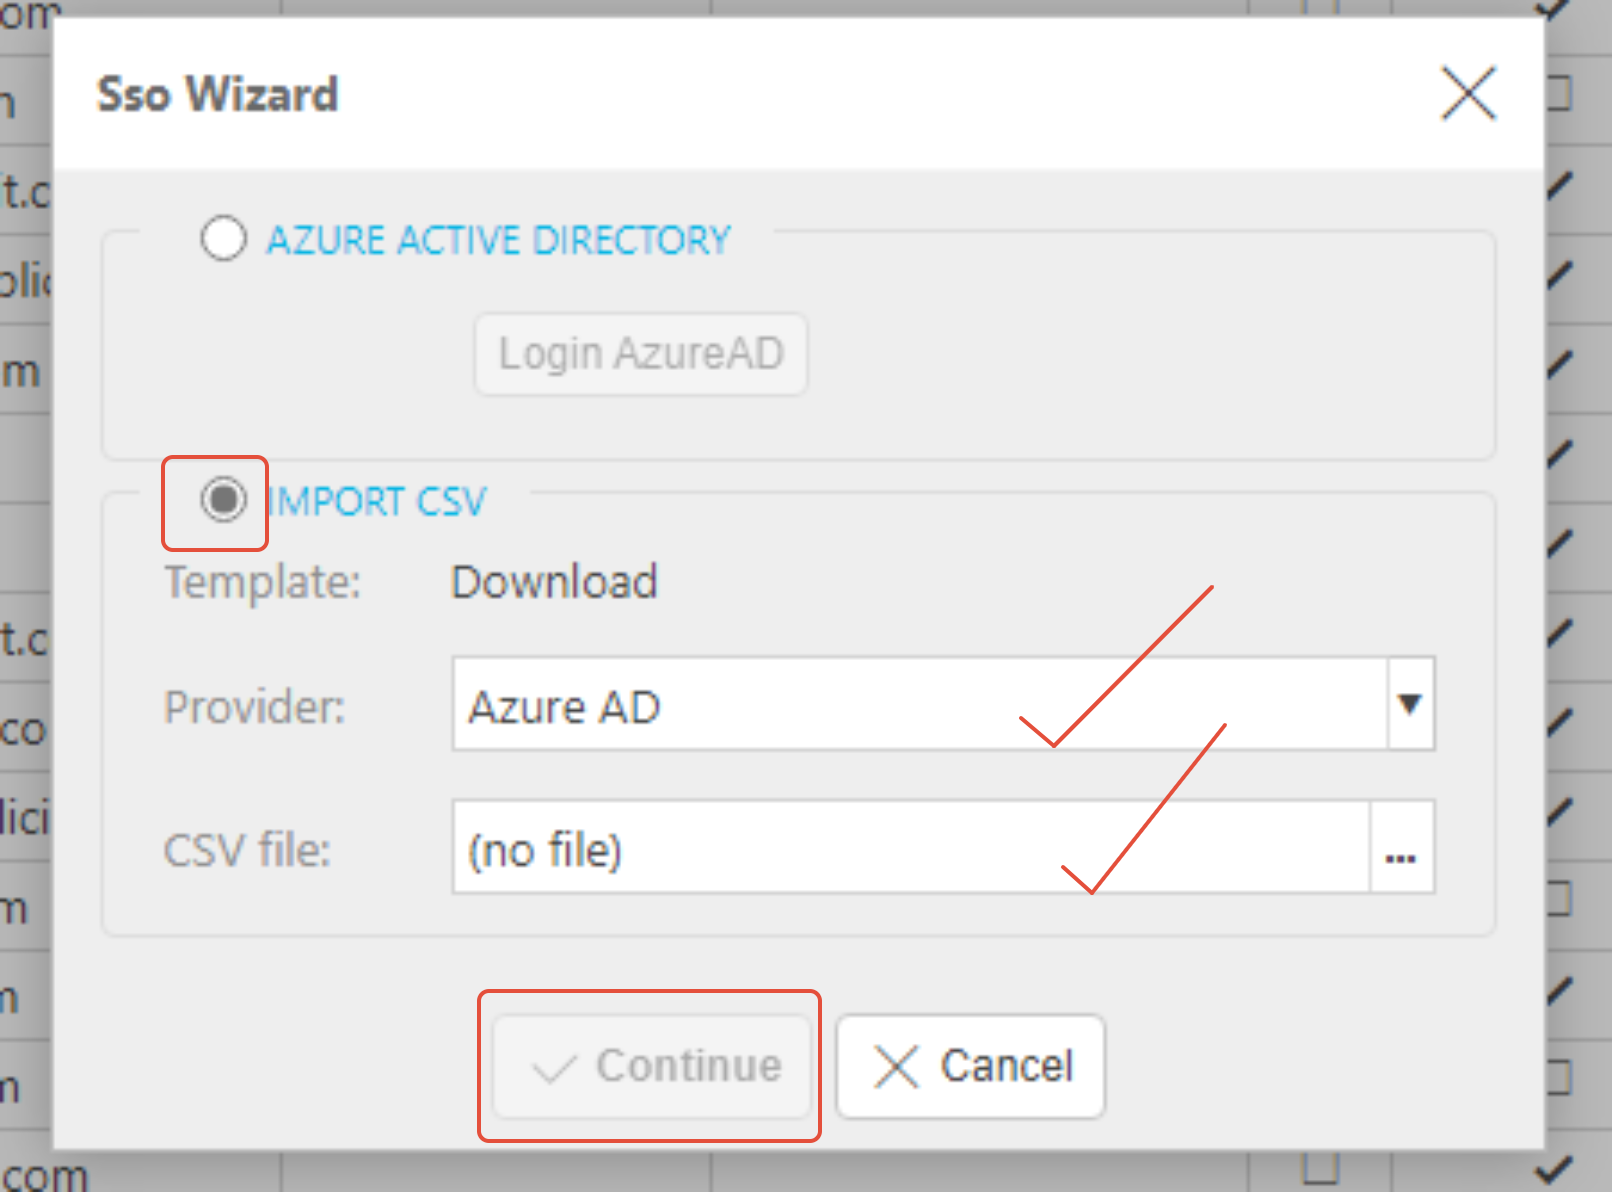
- Ensure the correct provider is selected (usually defaults correctly).
- Upload the CSV file and click Continue.
iplicit will then link each user to their Azure AD identity based on the CSV data.
Method 3: Admin in BOTH Azure and iplicit
Best for: Organisations where one person manages both systems
Required iplicit Permission
The user must have the User: Admin permission.
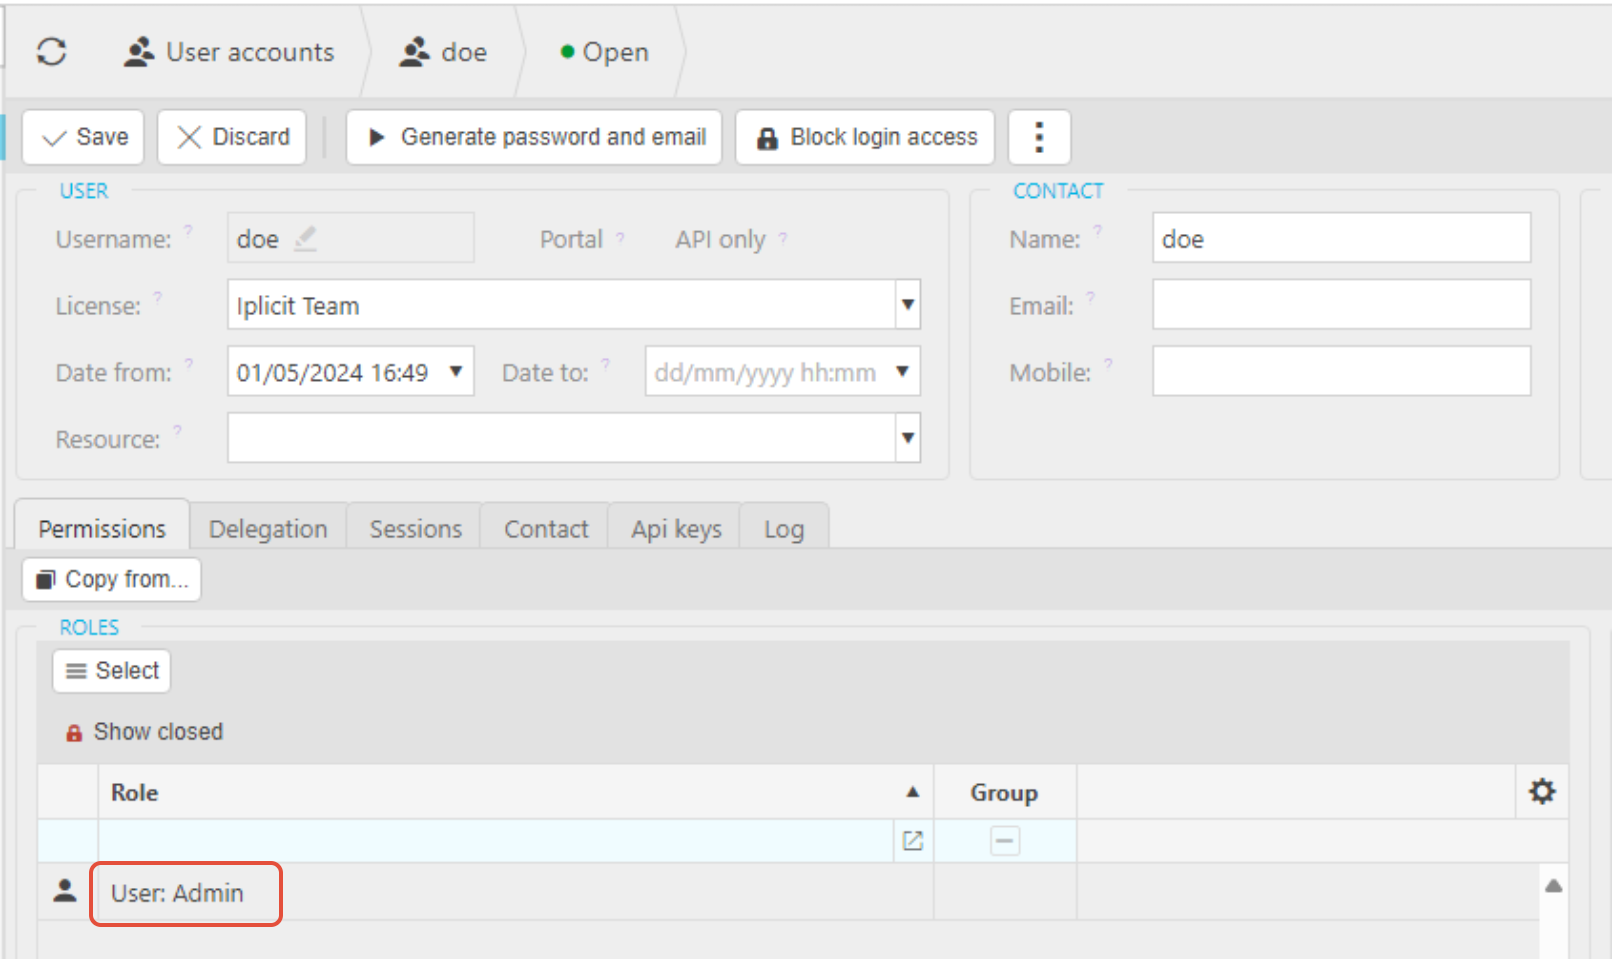
This allows them to:
- View users
- Add/remove users
- Access the SSO Link Wizard
It does not grant full system admin rights, but you should still test this permission in a sandbox environment to ensure it’s appropriate for the user.
Linking Process
- Go to Users.
- Click the three dots menu.
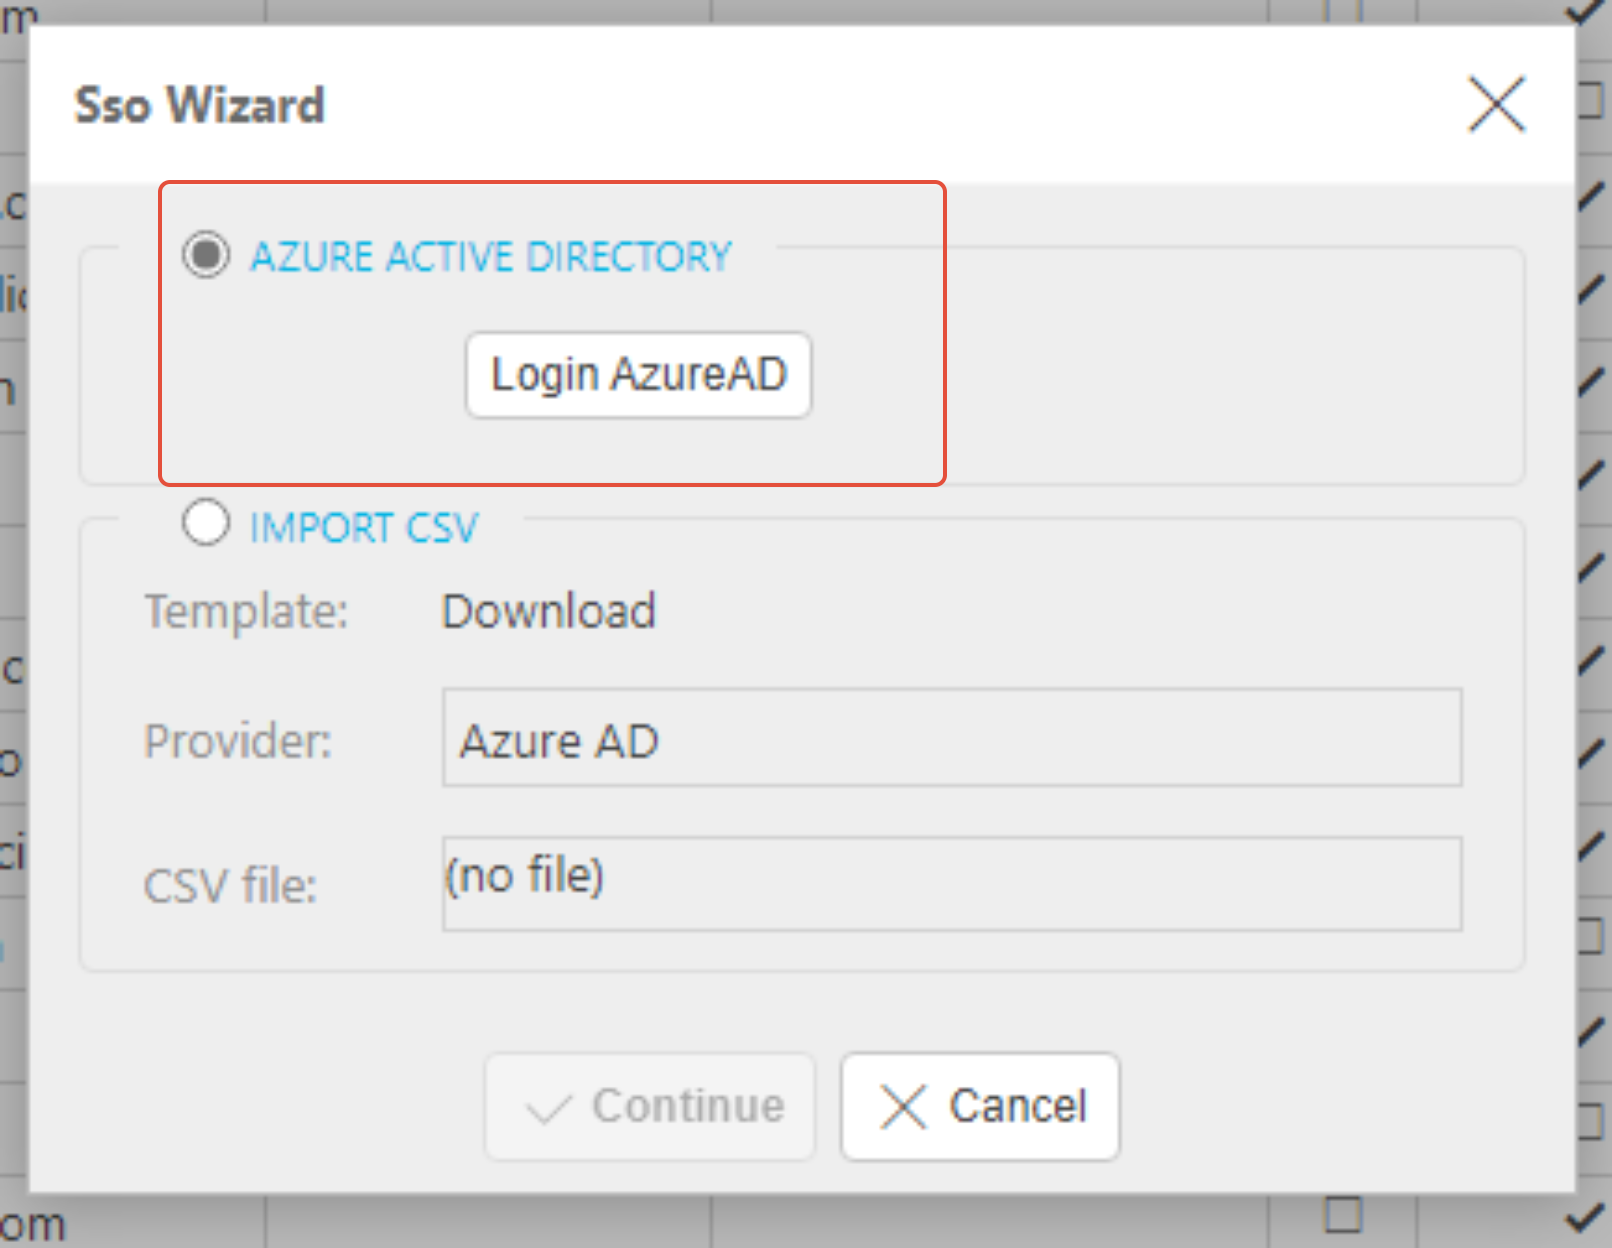
- Select Link Wizard.
- Choose Azure Login.
- Follow the steps to authorise and link users directly.
This method allows the admin to link users without needing a CSV file.