

This article covers changing a posting attribute, such as Department or Cost Centre, on a posted document. The steps below use a Sale invoice as an example, but the same 'Corrections' path applies to other document types, including Purchase invoices, wherever posting attribute corrections are supported.
How to change a posting attribute on a document
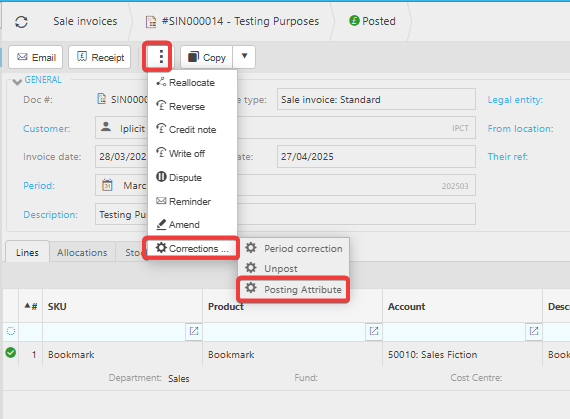
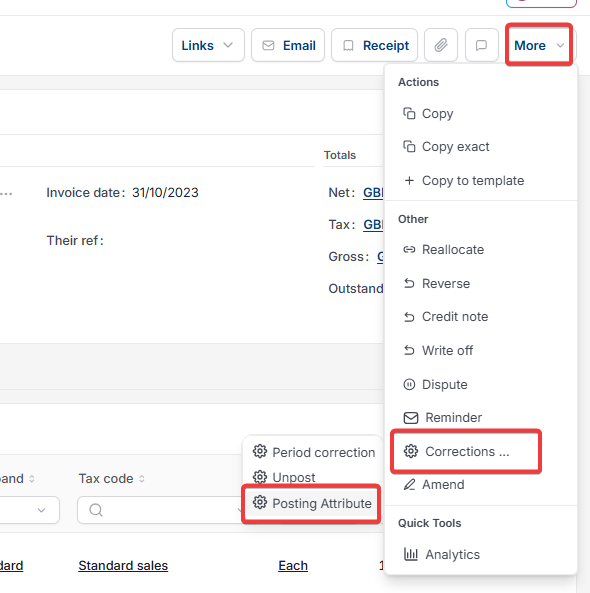
- Open the document you want to update. Depending on your screen, select the ellipsis (the three dots) or the 'More' menu, then select 'Corrections'
- Select 'Posting Attribute'
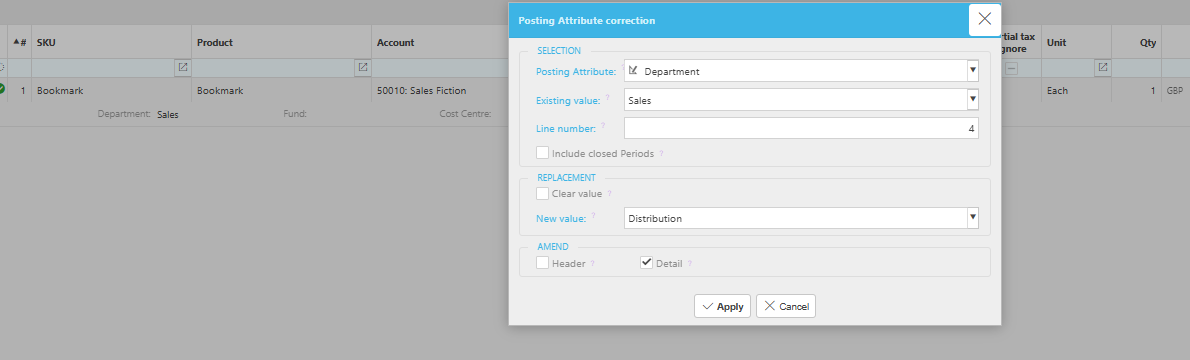
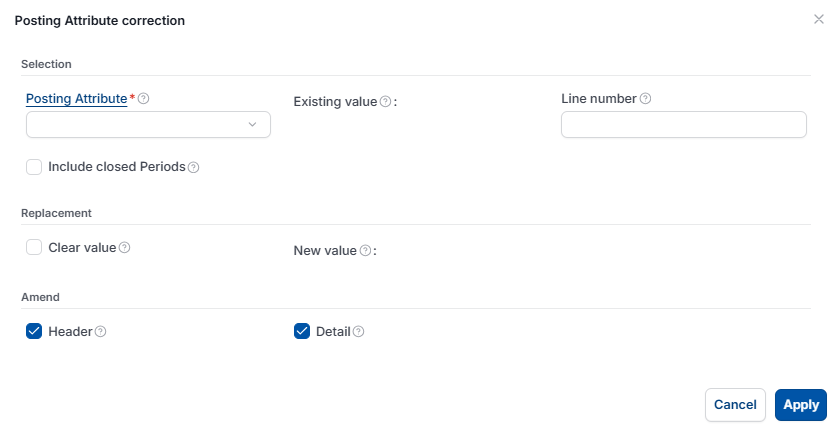
- In the 'Posting Attribute correction' window, complete the following fields:
- 'Posting Attribute': select the attribute you want to change, for example 'Department'
- 'Existing value': the current value you want to change, for example 'Sales'
- 'Line number': the specific line to change. Leave this blank to apply the change to every line with that existing value
- 'Include closed periods': tick this to update the posting attribute in closed periods. Financial years that have already rolled over are ignored
- 'Clear value': tick this to clear the existing value instead of replacing it
- 'New value': select the new value, for example 'Distribution'
- 'Header' or 'Detail': choose whether the change applies to the document header or the line detail.
- Select 'Apply'.
Once applied, the document updates with the new posting attribute settings.
When a posting attribute correction isn't available on a document
If the document is a Multi-co or Inter-co document with linked documents, the posting attribute correction isn't possible. In this case, 'Posting Attribute' no longer appears as an option under 'Corrections'.
How to make corrections on a document
Change posting attribute
Correct department or cost centre on document
Posting attribute correction
Clear posting attribute value