This article explains how to create and configure a Legal Entity within iplicit and configure data entry and access controls if those are enabled in your system.
1. Creating a New Legal Entity
- Search for Legal Entities.
- Click New to create a new legal entity.
- Fill in the mandatory details marked with a red cross.

4. Continue filling out the remaining fields:
- Tick Interco if this entity will trade with other legal entities in iplicit. Ticking the Interco box will give you an extra tab where you can select the legal entities that will have a relationship with this one.
- Select the types of documents to allow (typically all document types).
2. Setting Default Bank Accounts
- Go to the Bank Accounts tab.
- Set the default bank account for bulk payments or specific document types such as Sales Invoices.
- If no bank accounts exist yet, create them first in the Bank Accounts section.
3. Adding Logos and Stationery
- Open the Stationery and Images tab.
- Upload or assign logos (for example, Logo 1 for invoices, Logo 2 for email templates).
- Logos and stationery can first be added in the Images section of iplicit.
4. Configuring Advanced Settings
Navigate to the Advanced tab to manage the following:
- Tax Adjustment Tolerances: Example: Limit tax adjustments to £0.05 on invoices.
- AP Automation Alias: If vendors use an alternate name when invoicing you, enter it here so iplicit can match it automatically.
5. Tax Registrations
- Go to the Tax Registrations tab.
- Click Add, then select the relevant Tax Group from the dropdown list.
- Save your selections.
6. Locations and Emails
- Locations Tab: Add stock or office locations if applicable.
- Emails Tab: Reference the email accounts associated with this legal entity (these are usually configured directly in the Email Accounts section).
Note: If your system has Data Entry Control (DEC) and Data Access Control (DAC) enabled, please consider the following configurations. Failure to correctly configure these controls may result in users being unable to:
- Enter or post transactions for certain legal entities (if DEC mappings are incomplete).
- View or access specific legal entities or data (if DAC permissions are not assigned).
In other words, if DEC or DAC are enabled but not properly configured, users may lose access to data or be blocked from performing key financial processes.
7. Setting Up Data Entry Control (DEC)
Data Entry Control ensures consistent relationships between multiple attributes (for example, Legal Entity and Chart of Accounts). If you already have DEC rules set up you need to update them with the new legal entity you have created or create a new rule if this if the first time mapping DEC.
- Search for Data Entry Control and open the screen.
- Click New, and select Manual Value. (If you already have DEC rules set up you can simply updated them)
- Choose the attributes to link (for example, Legal Entity → Accounts).
- Click Apply and Create your link before selecting anything.

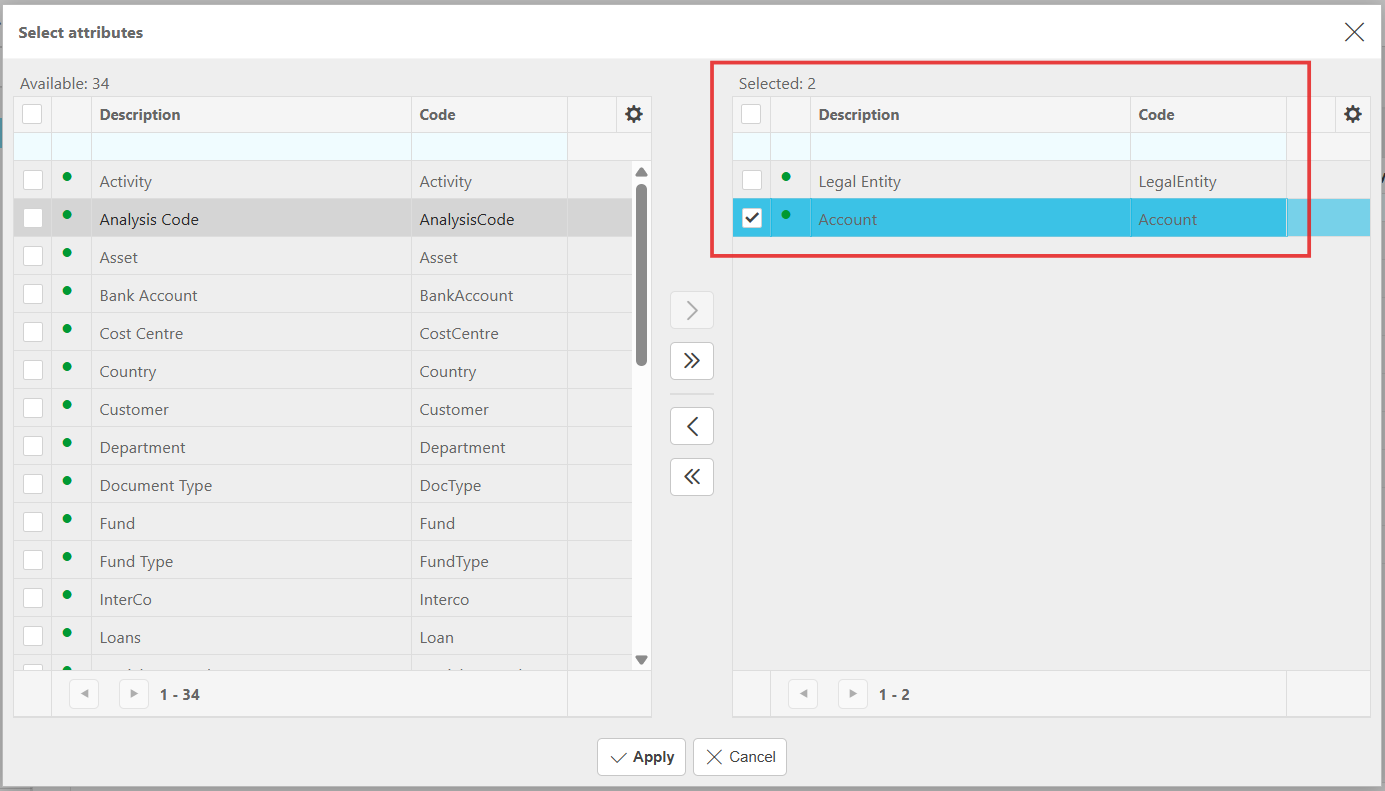
5. Go back to the list and reopen the link you have just created.

6. Now select the Legal Entities and map across which accounts will be visible to used with each legal entity.

Important: Data Entry Control is all or nothing — you must assign all entities, otherwise unassigned ones will not have access.
Click Save, then make sure you click Enable.
Reload iplicit to apply changes system-wide.

8. Setting Up Data Access Control (DAC)
Data Access Control manages which users can see or work with specific legal entities. If you already have DAC rules set up you need to update them with the new legal entity you have created or create a new rule if you wish to use Data Access control in your system.
- Go to Environment Defaults to enable Data Access control, if not already.
- Tick Data Access Control and click Save.
- Refresh the screen to activate the feature
- Search for Data Access Control.
- Click New and select Legal Entity. (If you already have DAC rules set up you can simply updated them)

6. Select which Legal Entities to include. For example, if you have created a new legal entity select it here.
7. Assign Users who should have access. For example, if you want to be able to see the legal entity you have created select yourself.
8. Click Create
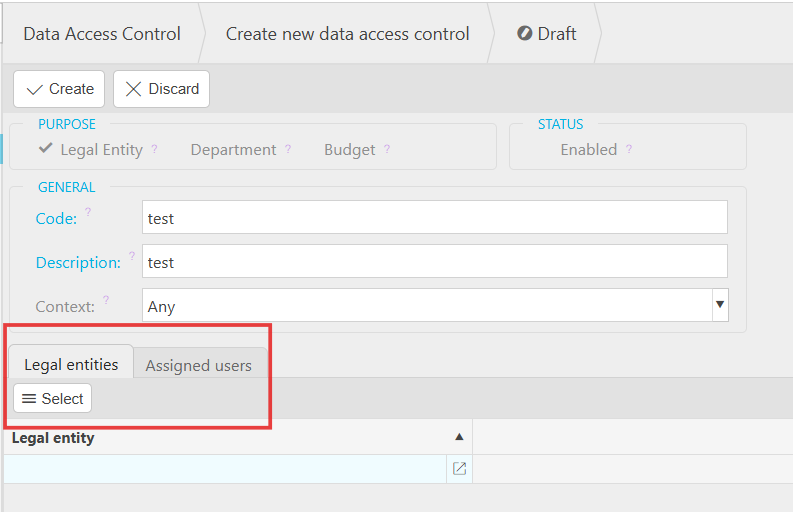
9. It will save as a Draft. Go to the Draft section and enable it to apply the changes to your system.

Once enabled, users will only see the entities they have been granted access to.
Important: If DAC is enabled in your system, any entities not included in a Data Access Control group will be invisible to all users. Data Access Control is all or nothing.
9. Summary
By following these steps, you can:
- Create and configure a legal entity
- Set up intercompany relationships and defaults
- Manage data entry and access restrictions effectively
Tip: Always reload iplicit after enabling Data Entry or Data Access Controls to ensure system-wide updates are applied.
For a full walkthrough of these steps and video demo within iplicit, please refer to this: How to Set up a new Legal Entity (with DEC and DAC options).
New legal entity
New company
Set up legal entity
Legal entity not showing
_______________________________________________________________________________________