

Custom Posting Attributes let you capture additional information on posting lines – for example a project reference, a cost centre, or any custom identifier your team needs. The attribute can be a free-text field or linked to a catalog to offer a drop-down list of values. This article covers how to create a Custom Posting Attribute and make it available on the posting lines that need it.
Step one – Create the Custom Posting Attribute
- Navigate to Attributes
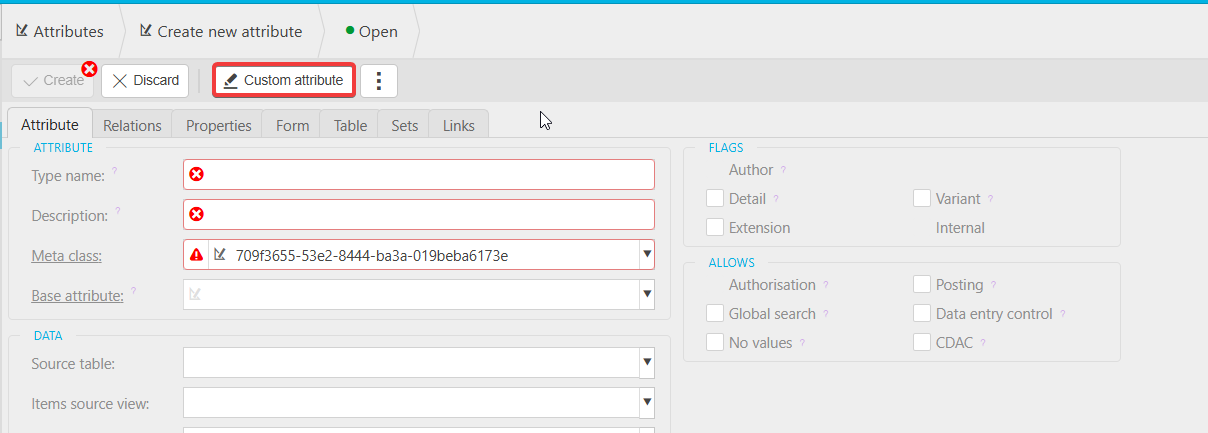
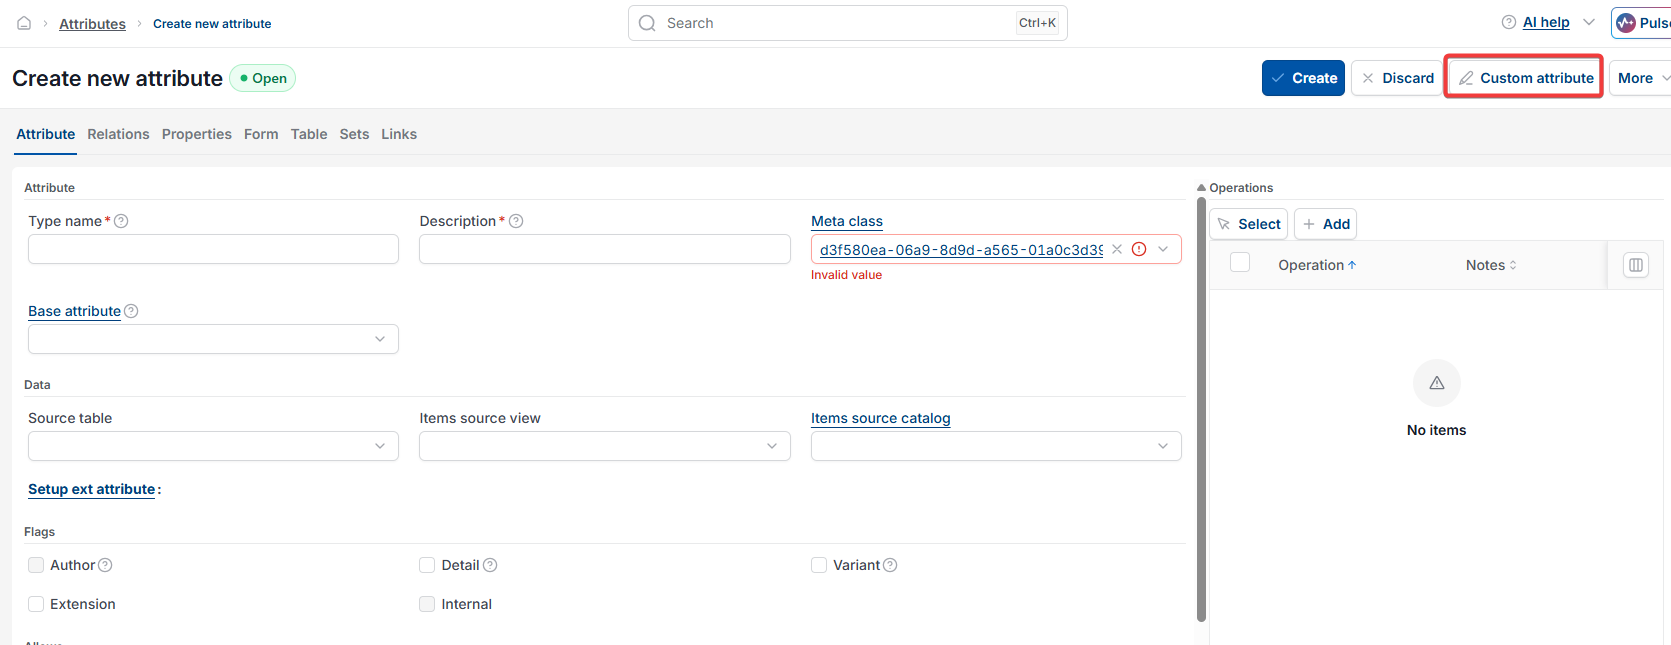
- Select 'New' and choose 'Custom Attribute'
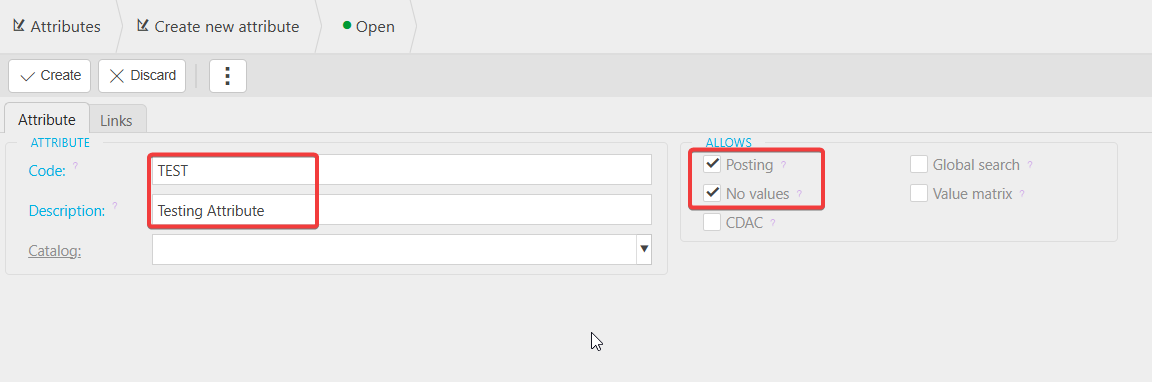
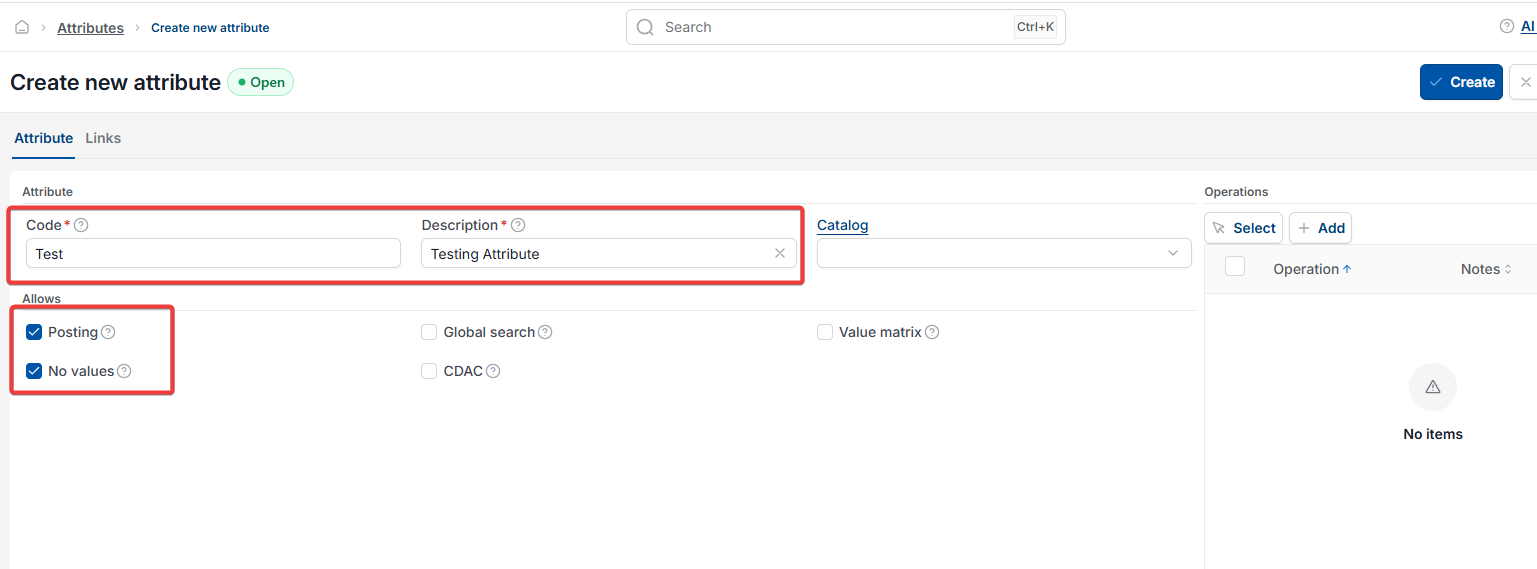
- Give the attribute a clear name – this is what users will see on the posting line
- Decide how you want the field to behave:
- Leave 'No Values' ticked if you want the attribute to accept free-text entry
- Untick 'No Values' if you want to link the attribute to a catalog, so users pick from a defined list. See 'How to create and manage Catalogs' for the full steps on creating a catalog and linking it to the attribute
- Save the attribute
Step two – Add the attribute to a Chart of Account Rule
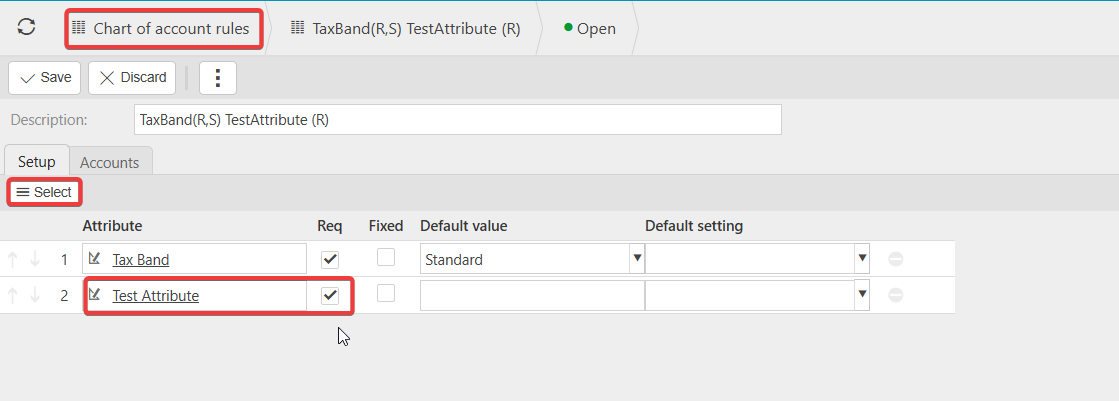
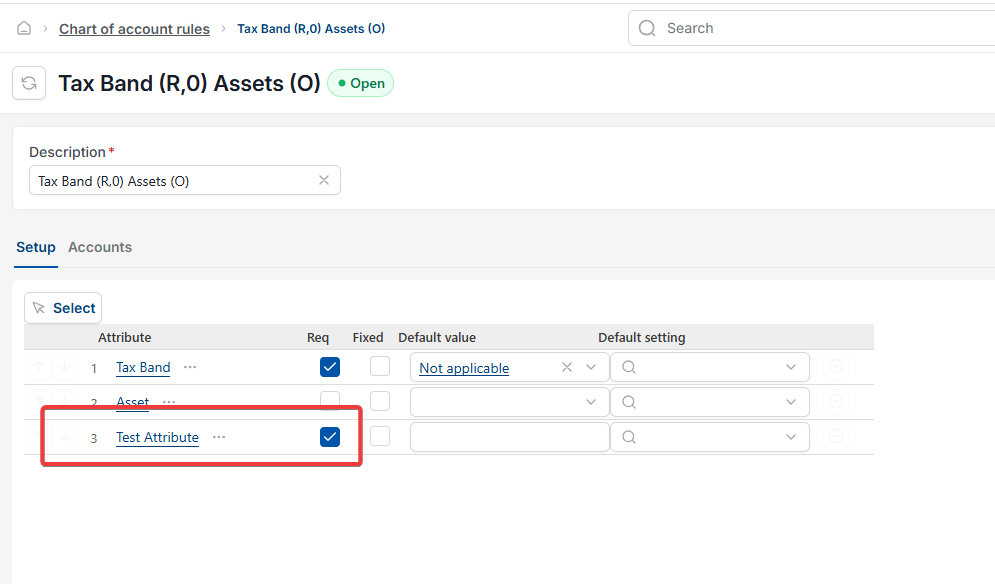
For the Custom Posting Attribute to appear on a posting line, it needs to be added to a Chart of Account Rule. Any Chart of Account using that rule will then display the attribute when posting.
- Go to Chart of Account Rules
- Select 'New'
- Select the attribute you created in step one and add it to the rule
- Save the rule
Step three – Check the attribute is showing
Any Chart of Account using the rule you set up will now display the Custom Posting Attribute when posting transactions. Open a test document, code a line to an affected account, and check the attribute appears as expected.
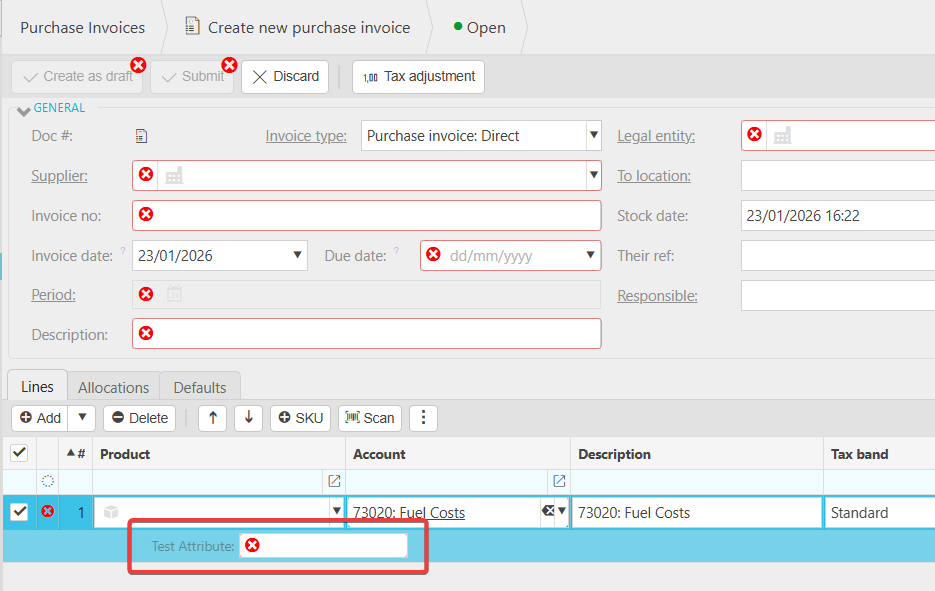
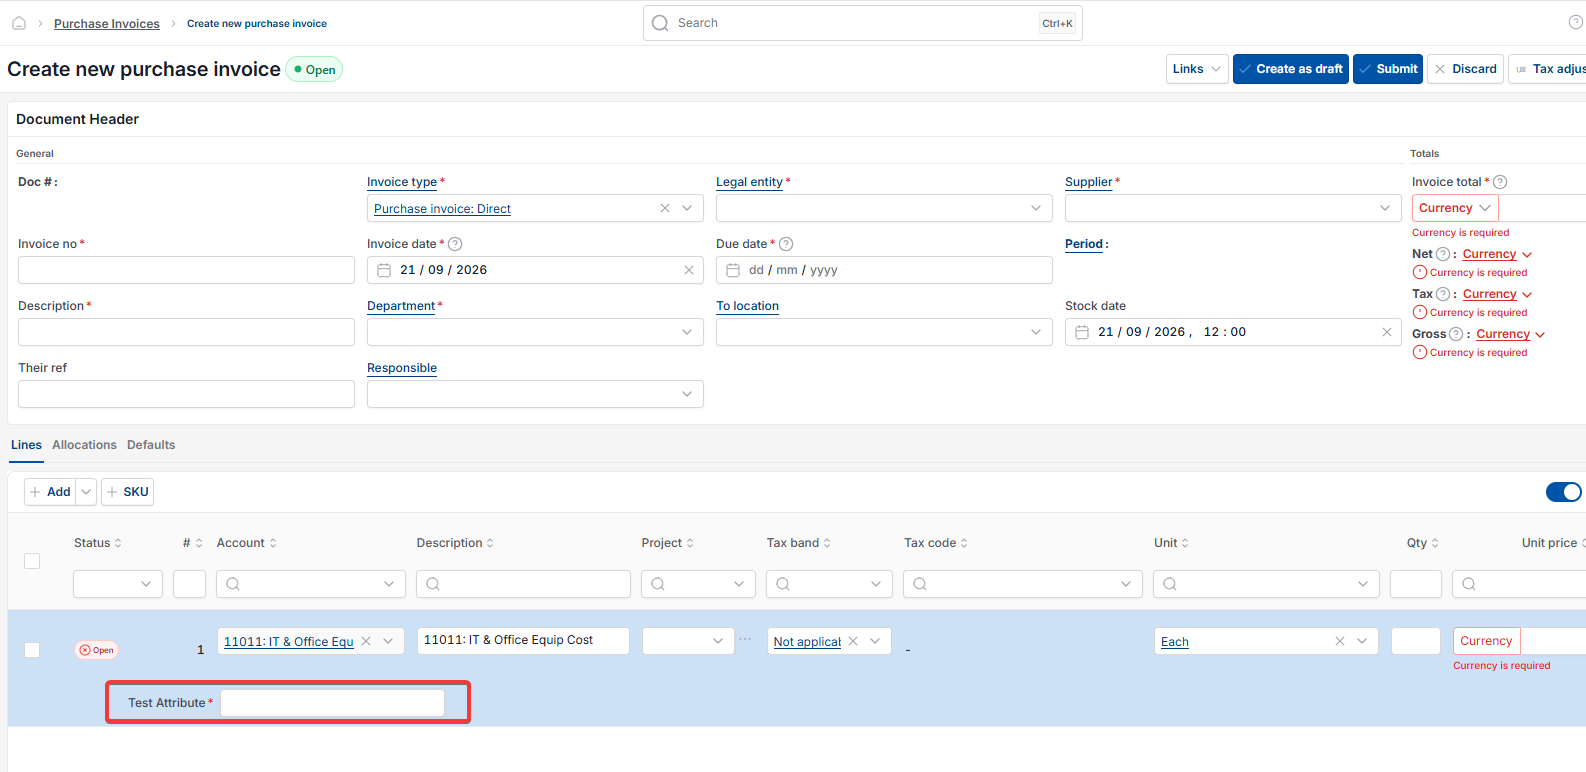
Custom attribute
Custom reporting attribute
Free text posting line
Document line custom field