This article covers the full process for issuing a refund to a customer within the Sales Ledger in iplicit. A customer refund requires three steps: raising a credit note, creating a sales refund document, and matching the refund movement in bank reconciliation. The original invoice and its payment are not affected — those transactions have already been posted and matched.
Raise a credit note in the Sales Ledger
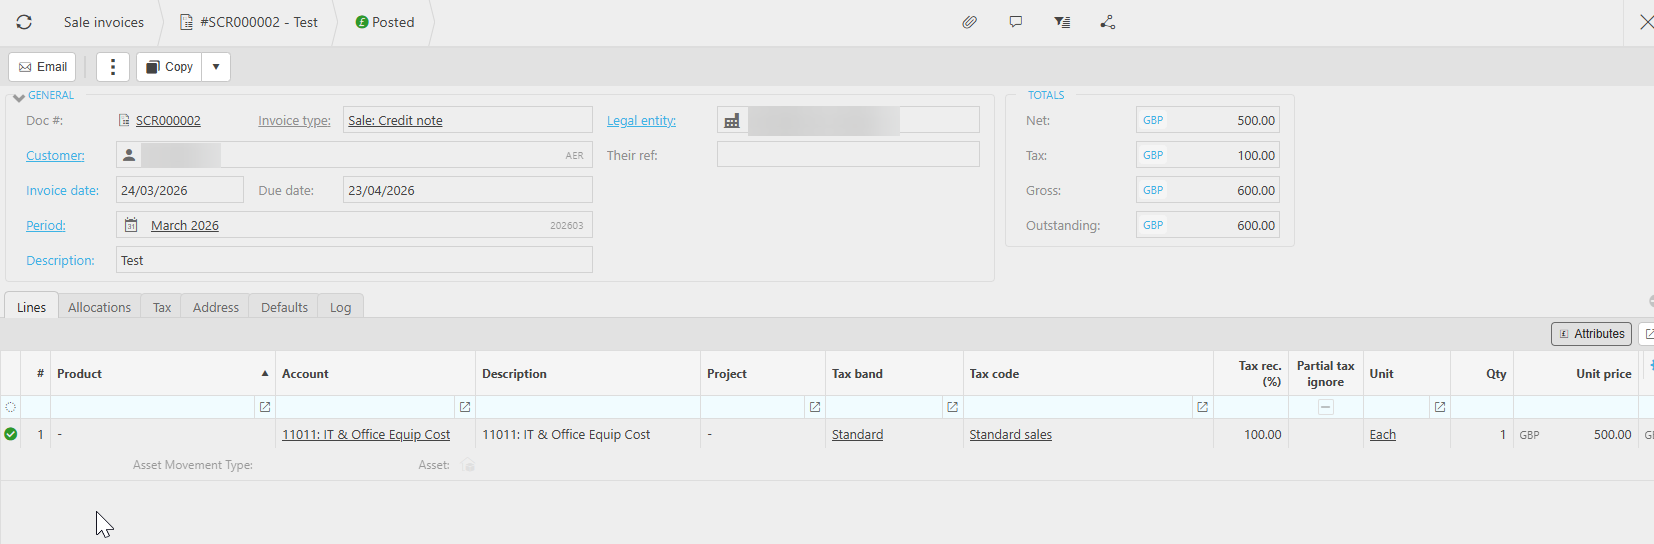
Before you can issue a refund in the Sales Ledger, you need a credit note recorded against the customer account. The credit note reflects the value being refunded and the reason for it.
- Navigate to Sales > Invoices.
- Create new 'Sales Credit Note' as the document type.
- Choose the customer account the refund applies to.
- Enter the credit note details - these should reflect the original invoice line items being refunded, including the correct tax treatment.
- Complete and post the credit note.
The posted credit note now sits on the customer's account as an open credit, ready to be matched against the refund.
Create a sales refund to match the credit note
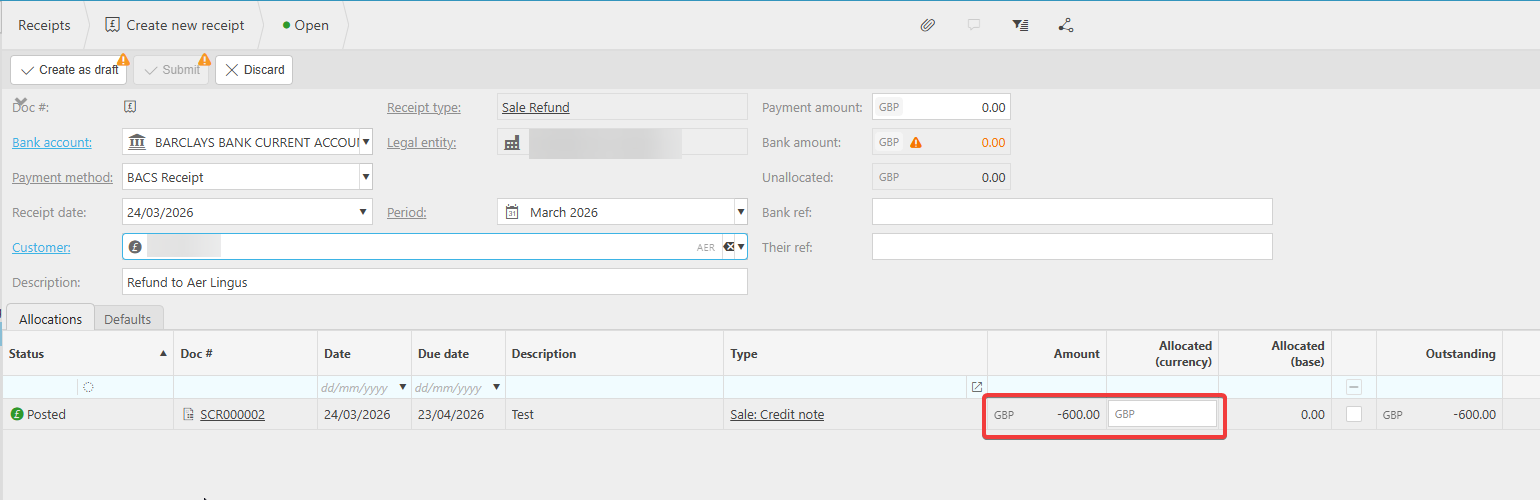
With the credit note posted, the next step in the Sales Ledger refund process is to create a sales refund document. The sales refund represents the actual payment leaving your bank account and going back to the customer.
- Navigate to Sales > Receipts.
- Create new 'Sales Refund' (or 'Sales Refund Cash' depending on your configuration) as the document type.
- Select the same customer account.
- Enter the refund amount, which should match the credit note value.
- Allocate the refund against the open credit note. This will appear at the bottom for you to allocate.
- Post the sales refund document.
The credit note and refund are now matched on the customer's account. The original invoice and its payment remain untouched - those transactions were already completed and reconciled.
Match the refund in bank reconciliation
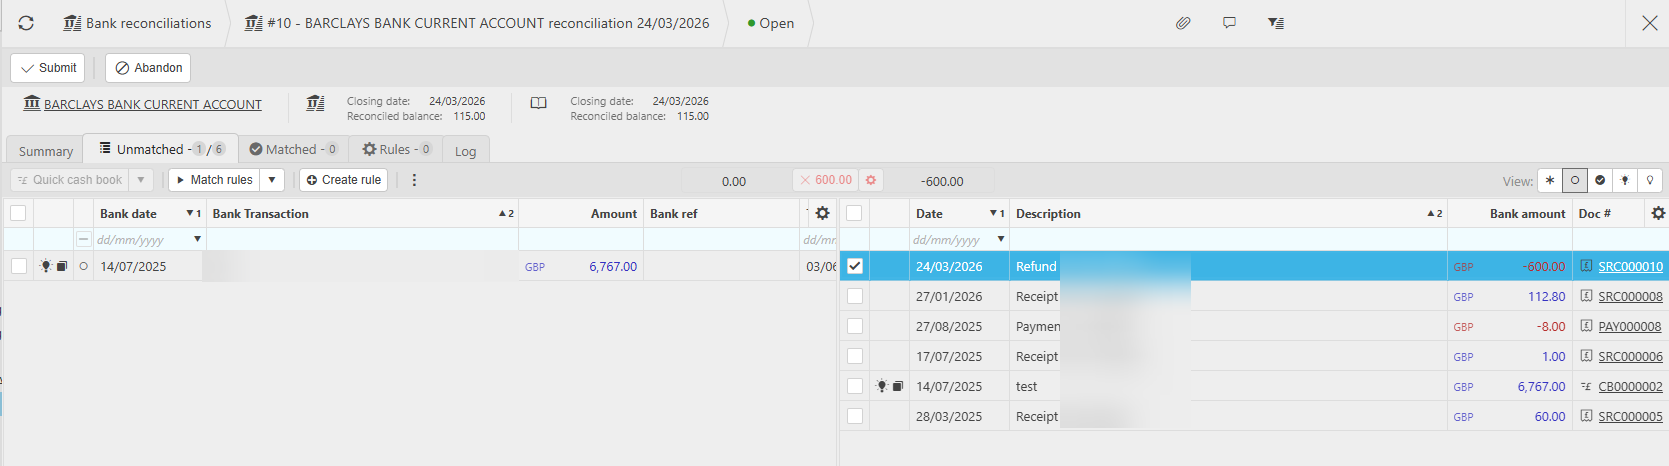
The final step is to reconcile the refund movement in Bank Reconciliation. When the refund appears on your bank statement, it needs to be matched against the sales refund document you posted.
- Navigate to Bank Reconciliation.
- Open the reconciliation for the relevant bank account and period.
- Locate the refund payment on the bank statement side.
- Match it against the corresponding sales refund transaction on the cash book side.
- Complete the reconciliation as normal.
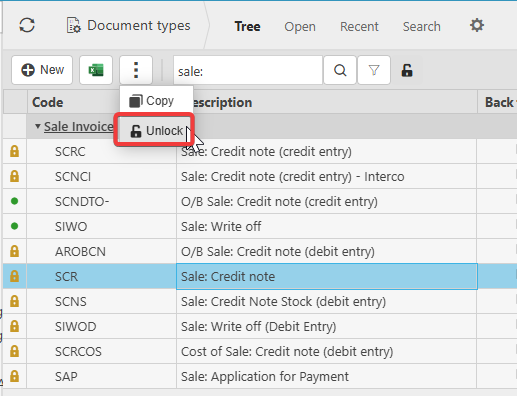
Unlocking document types if the credit note or sales refund is not available
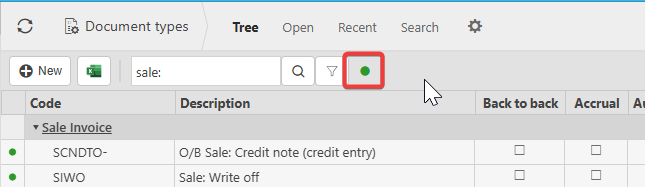
If you cannot find 'Sales Credit Note' or 'Sales Refund' when creating a new document in the Sales Ledger, the document type may be locked or may not have an active document series assigned. You need to unlock it and ensure a document series is in place before you can raise the document.
- Navigate to the Document Types screen.
- Search for the document you need - for example, 'Sales Credit Note' or 'Sales Refund'.
- If the document type is locked, you will see a green dot indicator. Click the green dot to expose the locked document.
- Select the three-dot menu at the top of the screen and choose 'Unlock'.
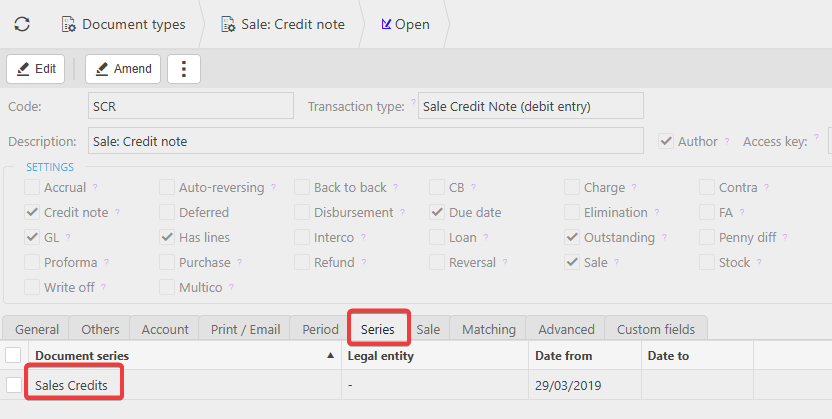
- Once unlocked, check that an appropriate document series is assigned to the document type. Without an active document series, you will not be able to create new documents of that type.
- Return to Sales > Documents and confirm the document type is now available for selection.
Refund customer
Sales refund
Credit a customer
Refund payment
Customer refund process