

This article covers how to configure penny difference automation (also called penny correction) in iplicit. Penny difference automation detects small rounding discrepancies that can occur when values are split across multiple lines, or tax calculations, and applies an automatic adjustment so totals reconcile correctly.
What penny difference automation does
When iplicit calculates values across multiple lines, currencies, or tax steps, rounding can occur at different stages. This occasionally produces a small discrepancy between the expected and actual total.
Penny difference automation detects these rounding differences and applies a small automatic adjustment so totals remain accurate. Each adjustment is recorded as a separate document, keeping it traceable and visible in reporting, invoicing and allocation processes where exact totals are required.
Once configured, penny difference automation runs in the background. You do not need to identify or correct rounding differences manually.
Before you begin
Three conditions must be met before penny difference automation will apply to any transaction in iplicit:
- The penny difference settings must be configured in Environment defaults, including the maximum tolerance
- The penny correction option must be enabled on the relevant document type
- The penny correction GL account must be set in Account defaults for Debtor/Creditor transactions.
Configuring penny difference settings in Environment defaults
Penny difference automation settings are configured in Environment defaults in iplicit.
- Navigate to Environment defaults
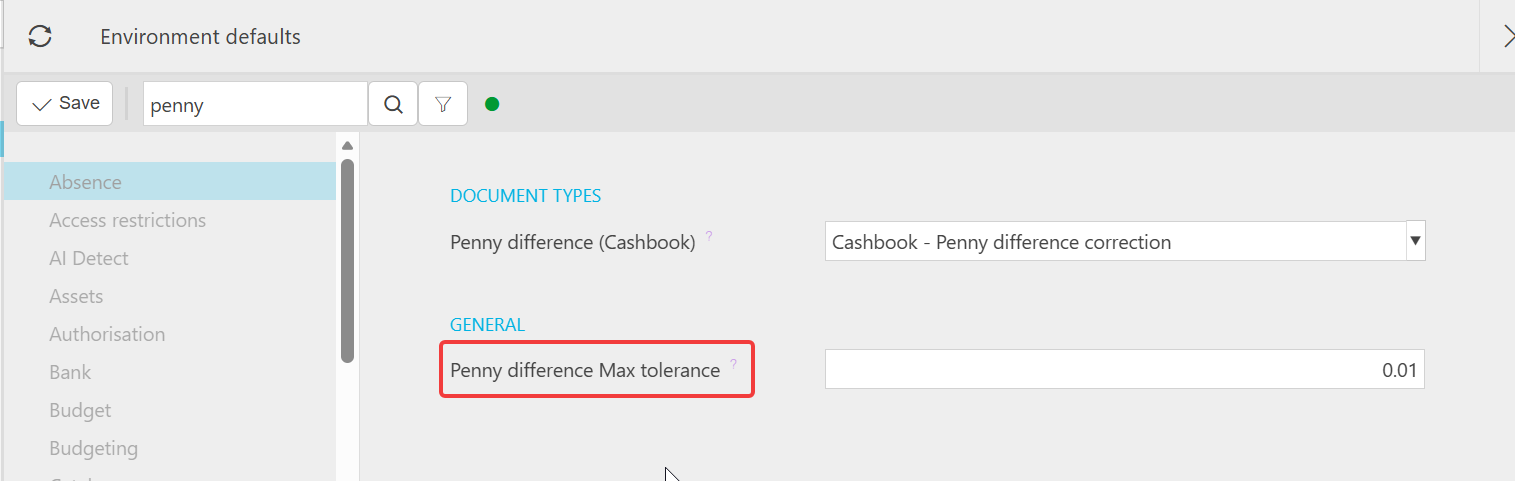
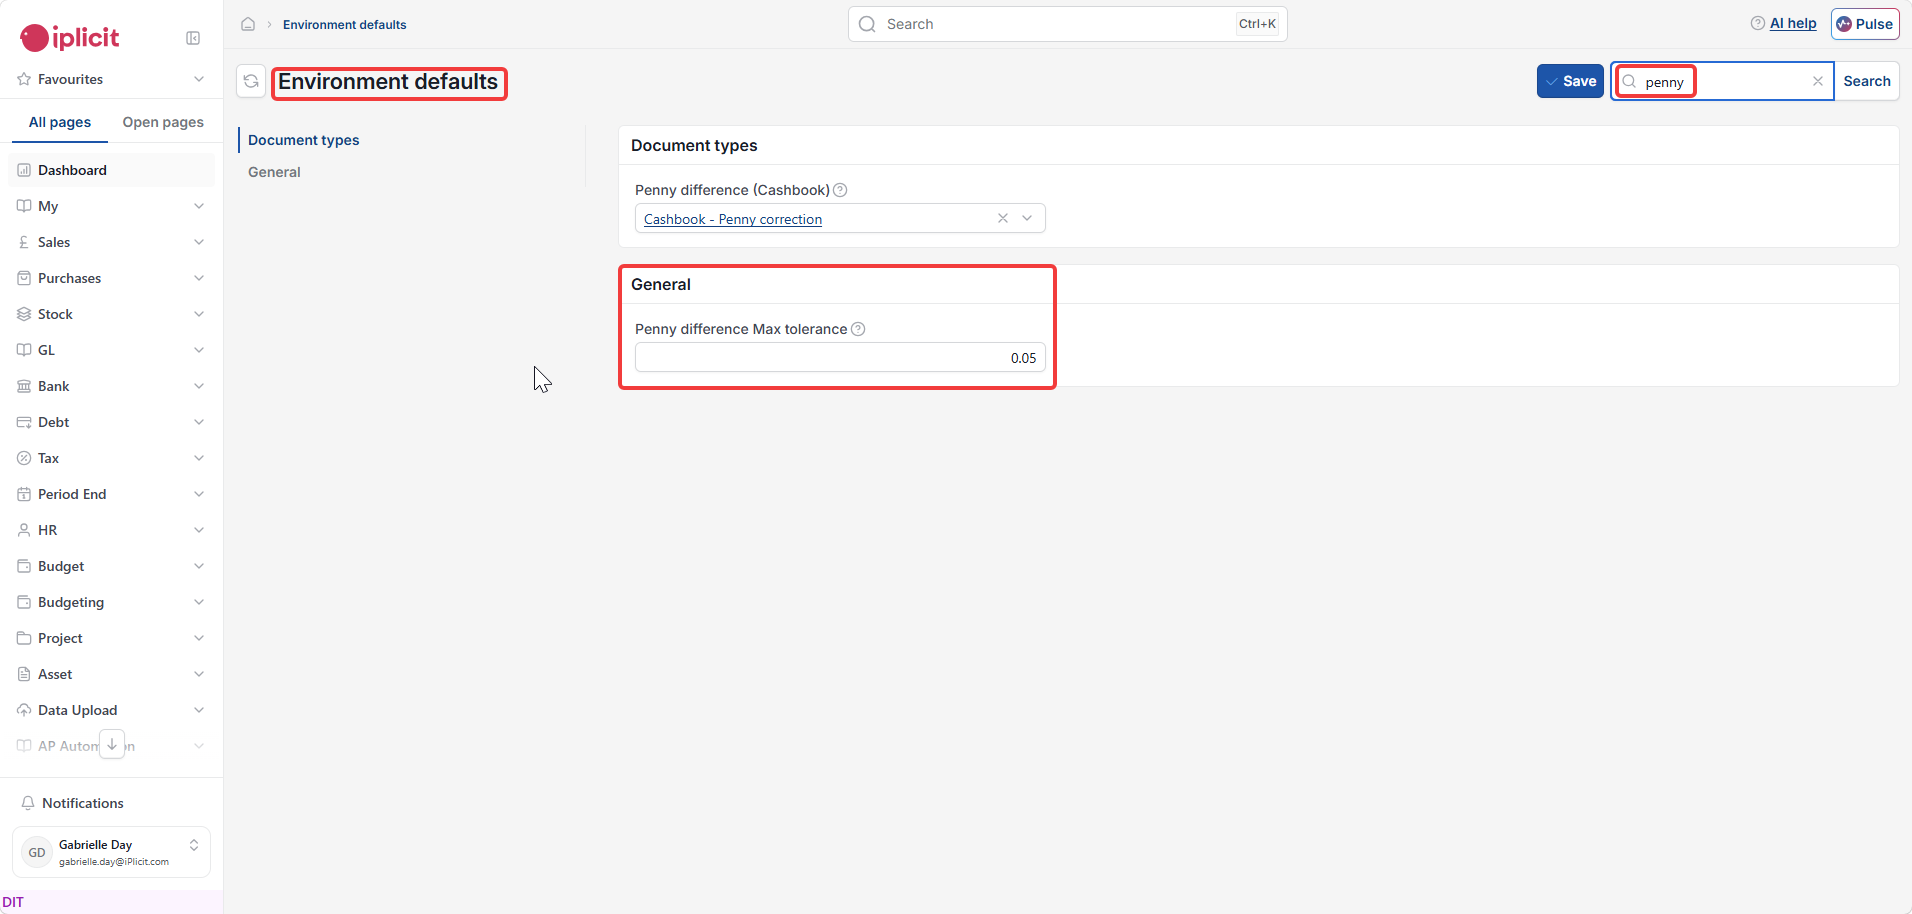
- Search for 'penny' using the search field at the top of the screen – this filters the settings to show only penny-related options
General section
The 'Penny difference Max tolerance' field defines the maximum rounding difference iplicit will correct automatically. The default value is 0.01 (one penny).
- Set 'Penny difference Max tolerance' to the maximum value you want iplicit to correct automatically. The default of 0.01 is appropriate for most organisations
- Select 'Save'.
Setting the penny correction GL account in Account defaults
The GL account that penny difference adjustments post to is configured in Account defaults in iplicit. There are two penny correction account defaults to set – one for Cashbook transactions and one for Debtor/Creditor transactions.
- Navigate to Account defaults
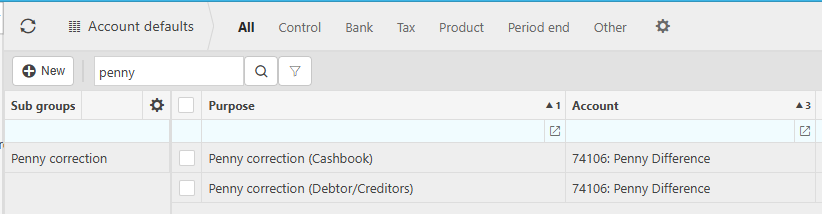
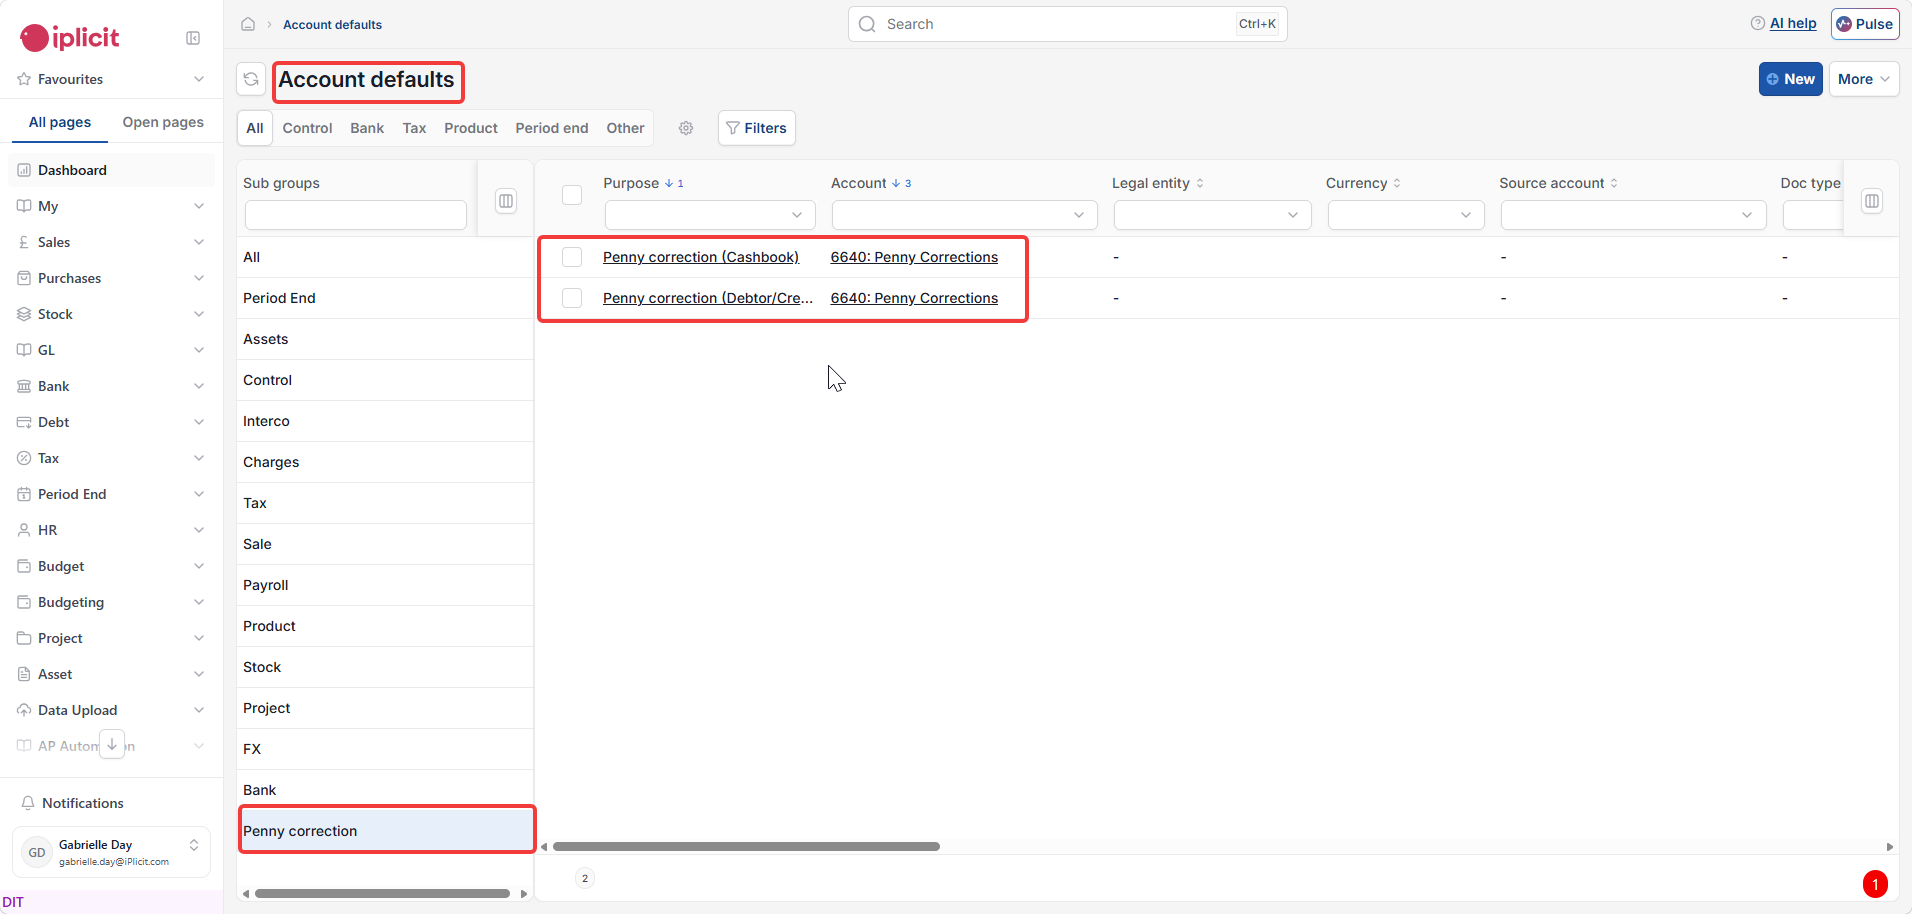
- Search for 'penny' using the search field – this filters the list to show only penny correction entries
- Select 'Penny correction (Cashbook)' and set the 'Account' field to the GL account you want penny difference adjustments to post to for Cashbook transactions
- Select 'Penny correction (Debtor/Creditors)' and set the 'Account' field to the GL account you want penny difference adjustments to post to for Debtor/Creditor transactions
- Save each record.
Enabling penny correction on a document type
Once Environment defaults are saved, penny correction must also be enabled at the document type level. Without this, the automation will not trigger even if the tolerance is correctly configured.
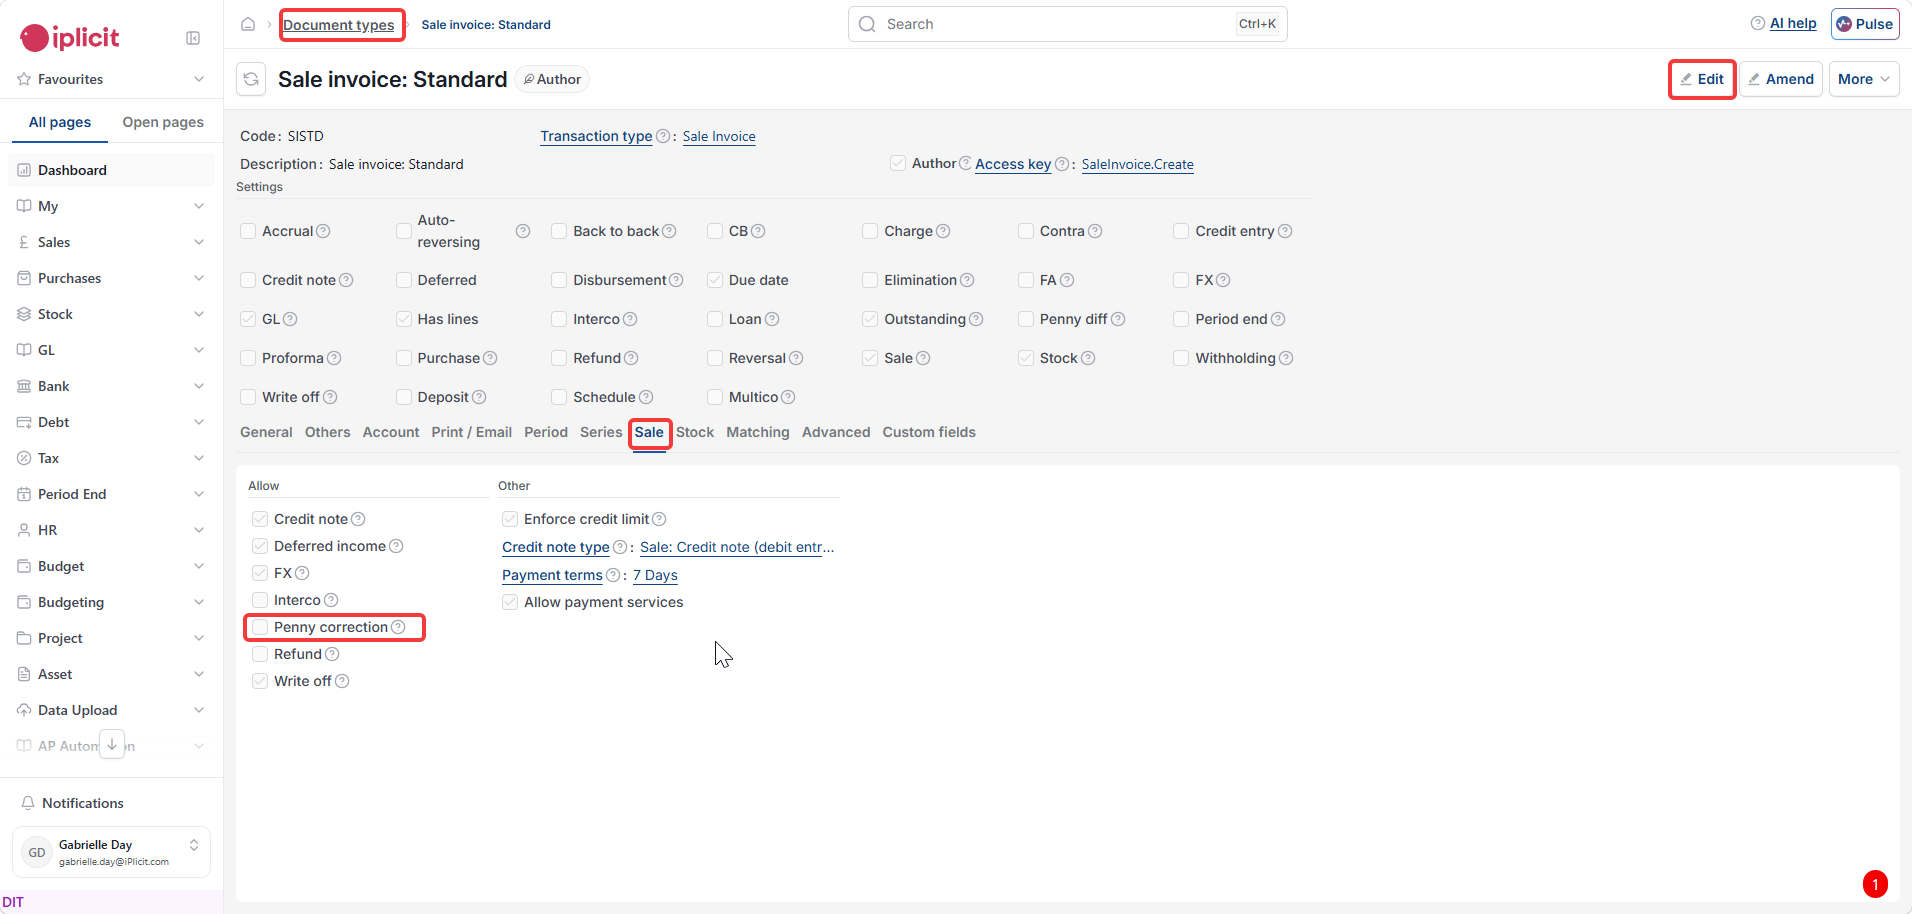
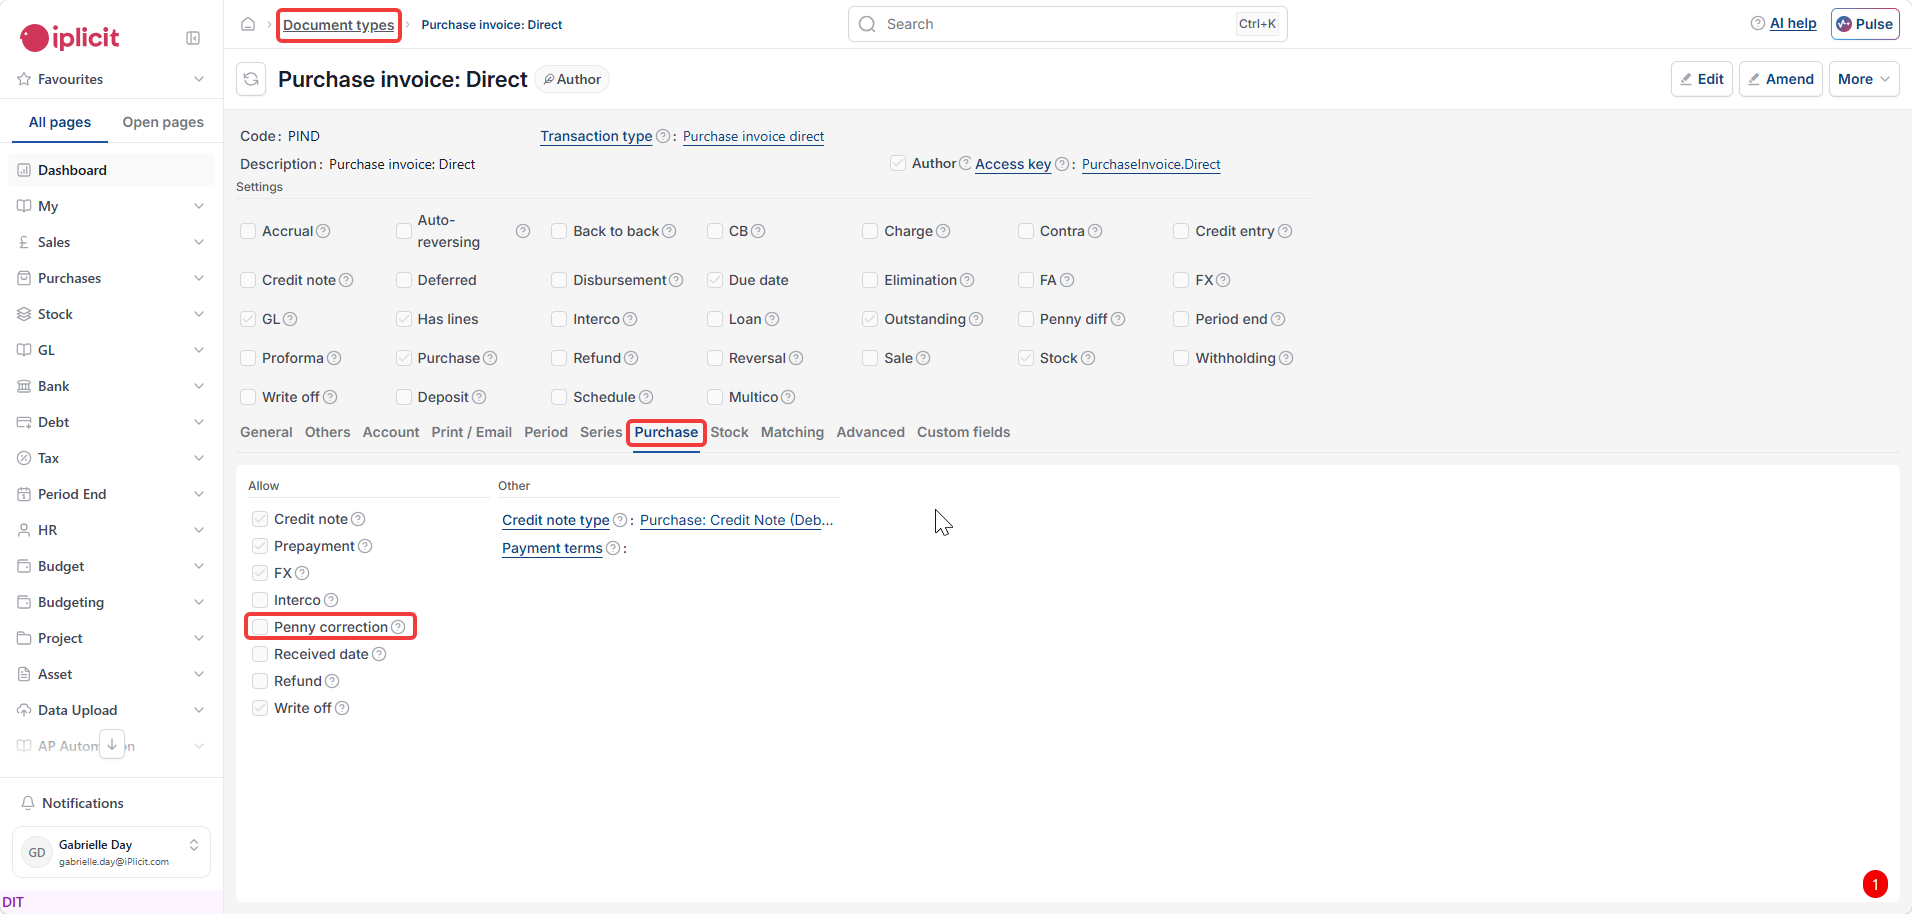
- Navigate to Document Types
- Open the relevant document type
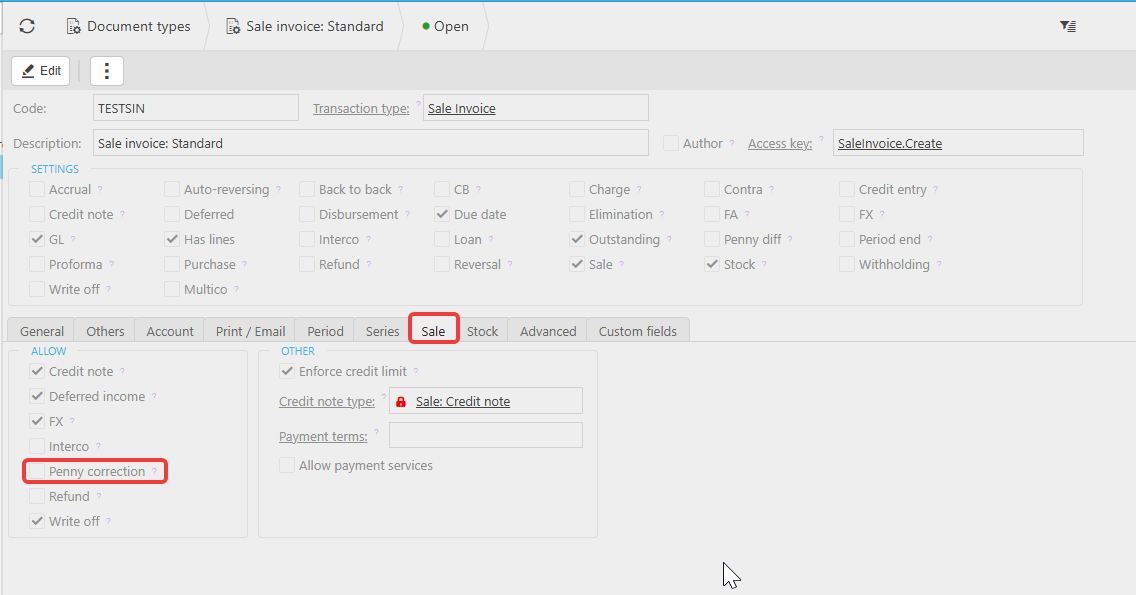
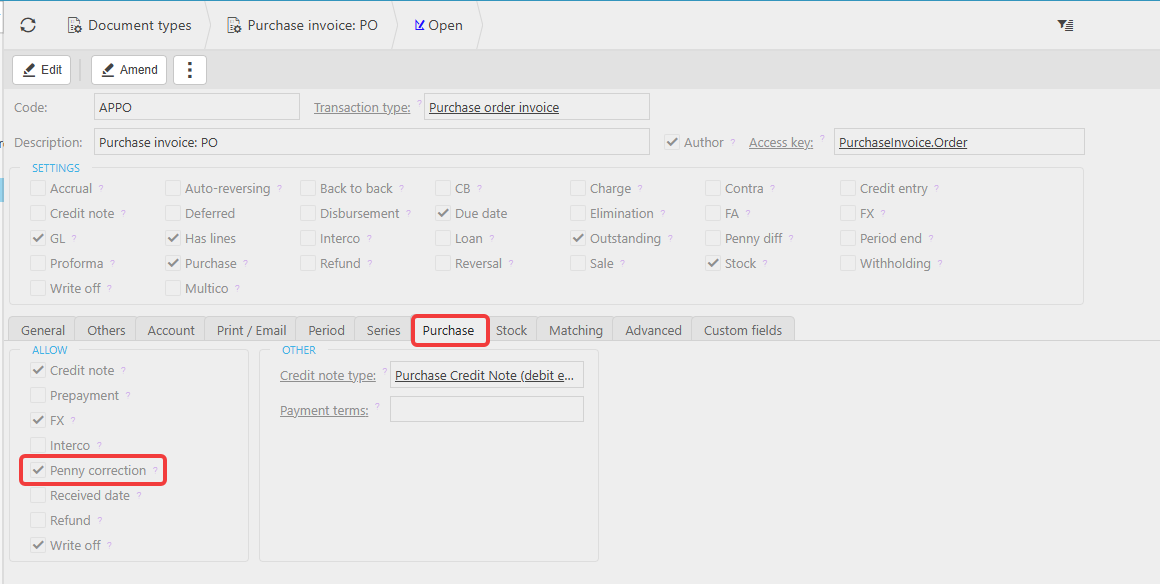
- Enable the penny correction option within the 'Sale/Purchase' tab
- Save the document type.
Repeat this for each document type that should trigger a penny difference correction – typically one for Purchase documents and one for Sale documents.
Setting up penny correction automations
Penny correction automations are configured in the Automations screen in iplicit. You need two automations – one for Purchase documents and one for Sale documents.
Navigate to Automations and search for 'penny' to check whether these automations already exist in your environment. If they do, you can edit them to confirm the settings are correct. If they do not exist, create them as follows.
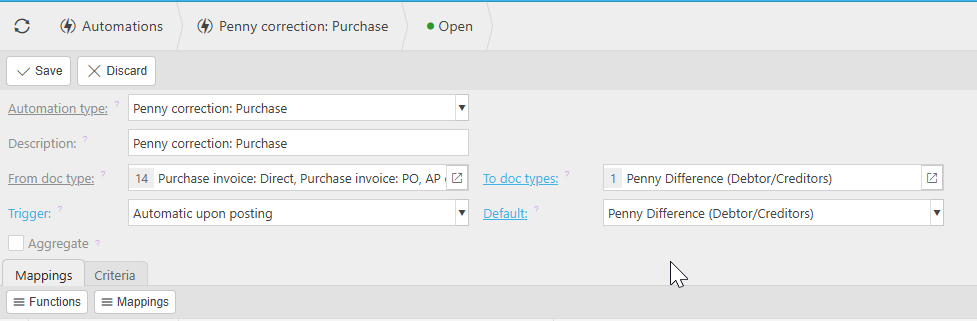
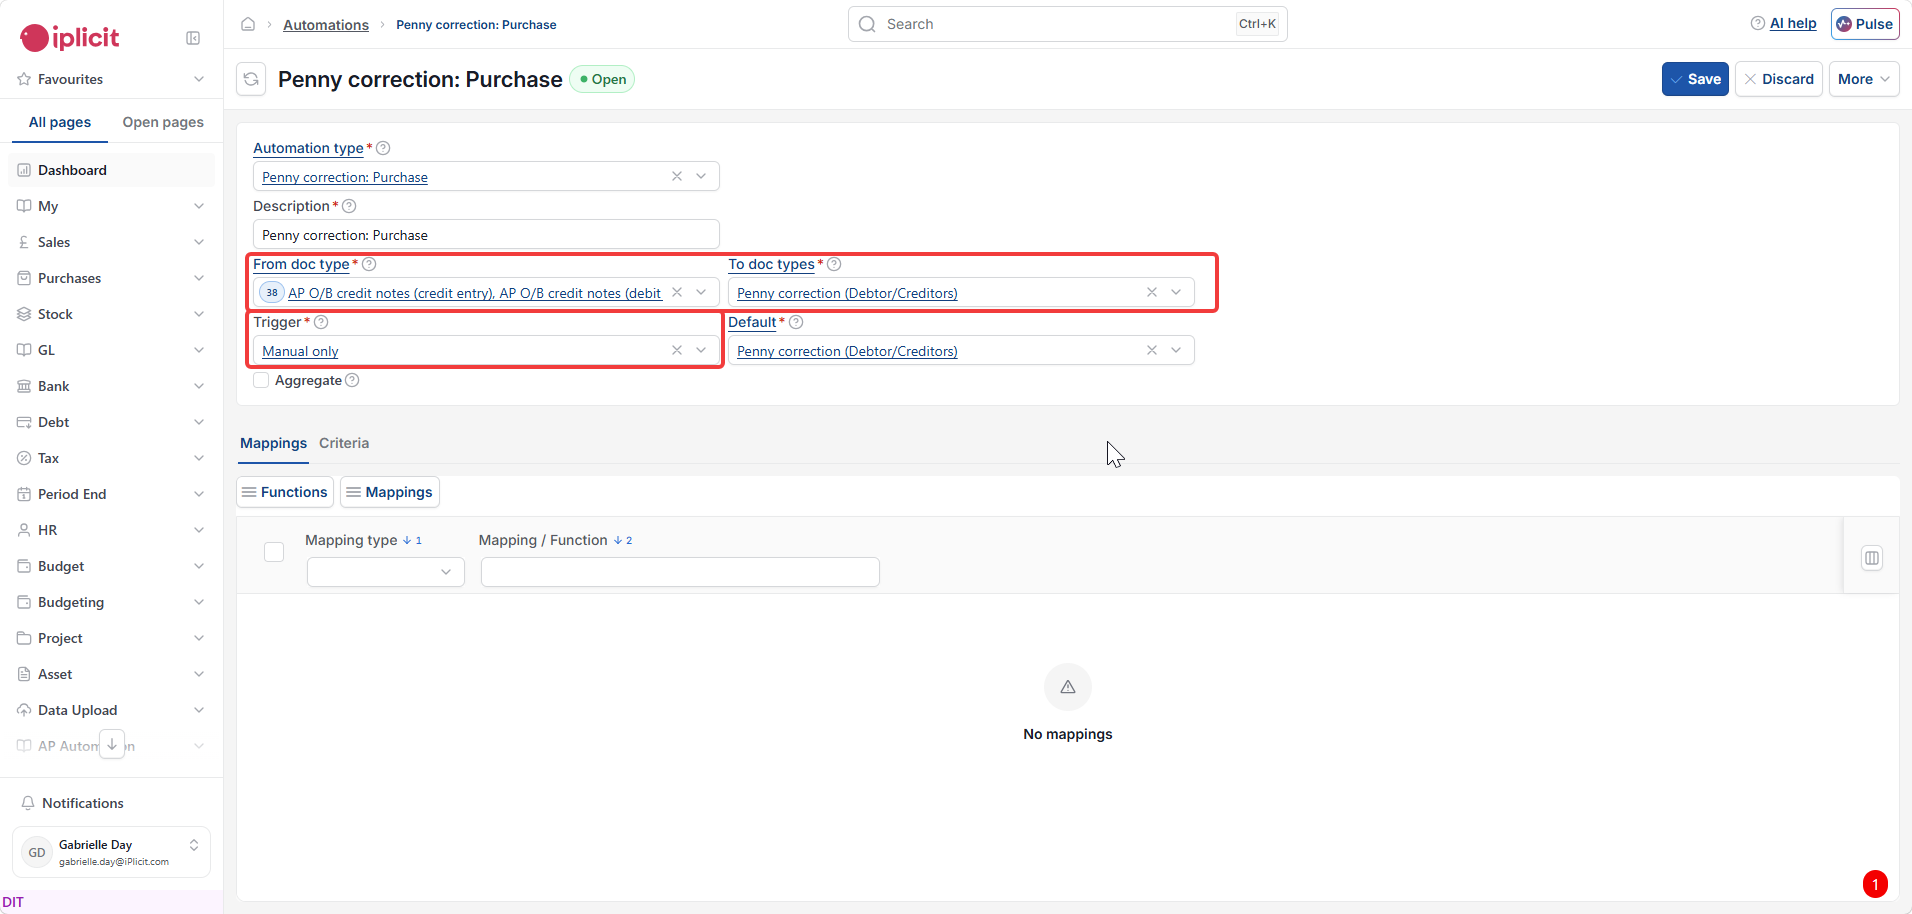
Creating the Purchase automation
- Select 'New' to create a new automation
- Set 'Automation type' to 'Penny correction: Purchase'
- Set 'From doc type' to the Purchase document types this automation should apply to – for example, Purchase invoice: Direct, Purchase invoice: PO and AP opening balance
- Set 'To doc types' to 'Penny Difference (Debtor/Creditors)'. If this document type is not available for selection, navigate to Document Types, locate 'Penny Difference (Debtor/Creditors)', unlock it and ensure a document series has been added, then return to the automation
- Set 'Default' to 'Penny Difference (Debtor/Creditors)'
- Set 'Trigger' to either 'Automatic upon posting' (iplicit applies the correction when the document is posted) or 'Manual only' (you run the automation manually)
- Select 'Save'.
Creating the Sale automation
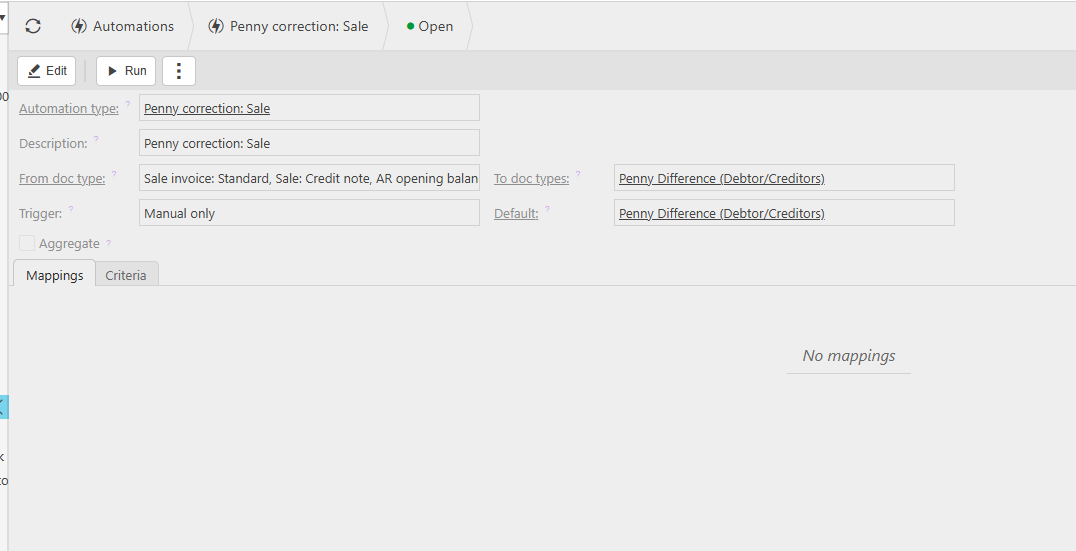
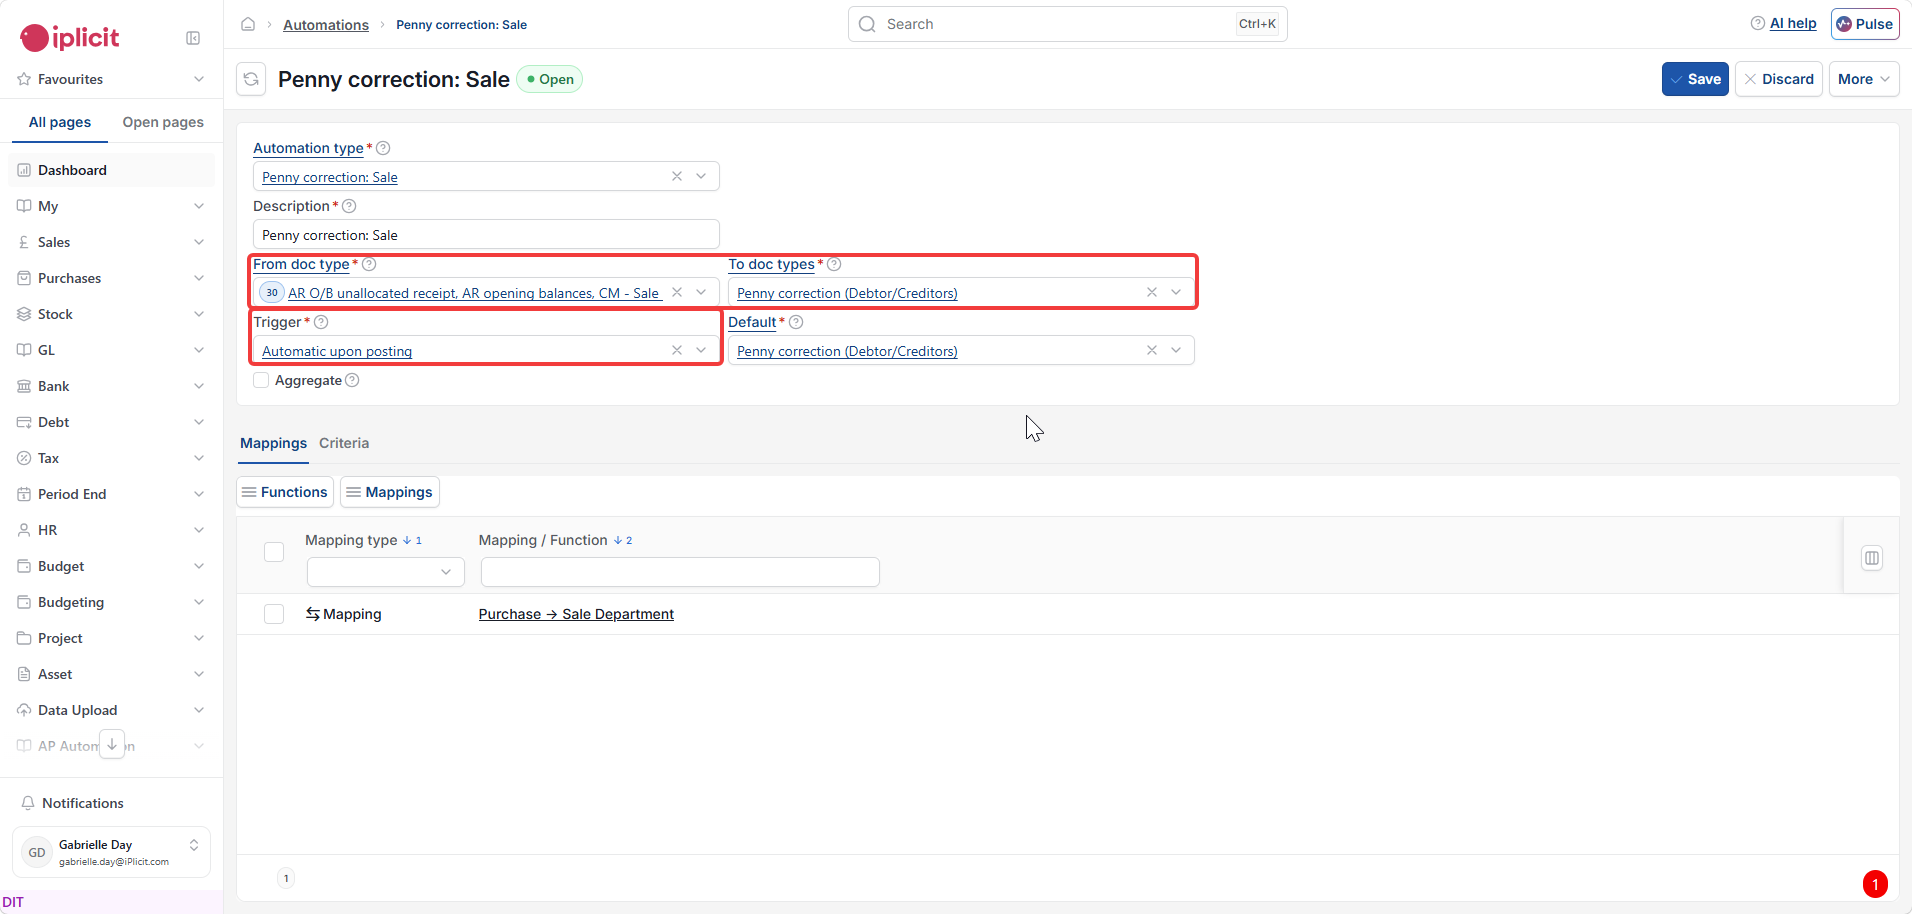
- Select 'New' to create a new automation
- Set 'Automation type' to 'Penny correction: Sale'
- Set 'From doc type' to the Sale document types this automation should apply to – for example, Sale invoice: Standard, Sale: Credit note and AR opening balance
- Set 'To doc types' to 'Penny Difference (Debtor/Creditors)'. If this document type is not available for selection, navigate to Document Types, locate 'Penny Difference (Debtor/Creditors)', unlock it and ensure a document series has been added, then return to the automation
- Set 'Default' to 'Penny Difference (Debtor/Creditors)'
- Set 'Trigger' to either 'Automatic upon posting' or 'Manual only'
- Select 'Save'.
How penny difference adjustments are recorded
Each correction iplicit applies generates a separate document based on the 'Penny Difference (Debtor/Creditors)' document type configured in the automation. This keeps adjustments clearly recorded and separate from the original transaction, and ensures they are visible in reporting, allocations and invoicing processes where exact totals are required.
Penny corrections setup
Penny difference iplicit
Rounding difference settings
Penny correction max tolerance
Pence adjustment