

This article covers setting the rejection email on an authorisation workflow within 'Authorisation workflows'. The 'Reject' field controls which email template sends when a workflow is rejected (sometimes called declined or refused).
Before you start
The rejection email template already exists on the 'Communication setup' page. In this example, the template is called 'Authorisation - rejected (generic)'.
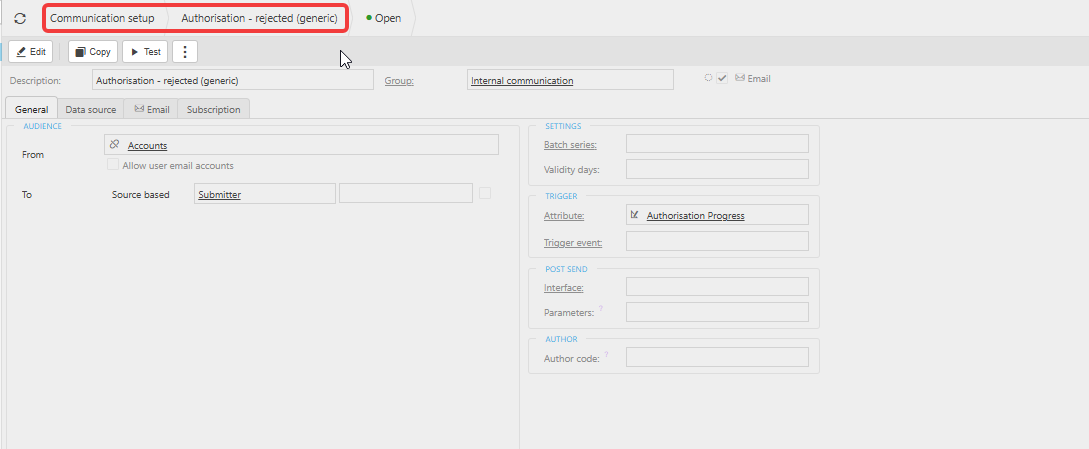
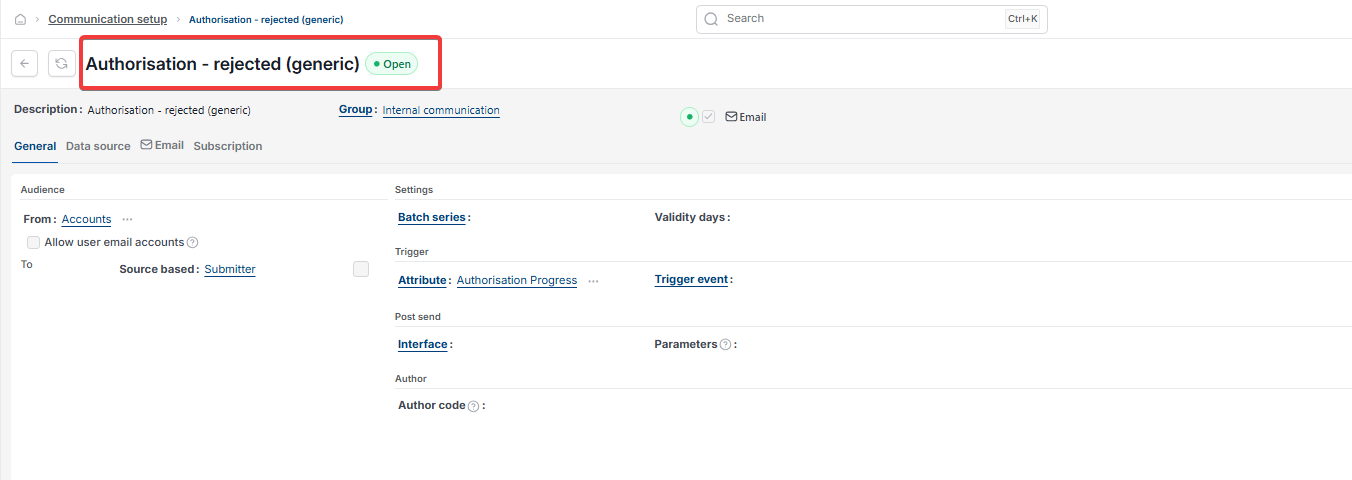
Setting the reject email on an authorisation workflow
- Navigate to 'Authorisation workflows'
- Select the workflow you want to configure
- Find the 'Communications' section on the workflow
- In the 'Reject' field, select the email template to send when this workflow is rejected – for example, 'Authorisation - rejected (generic)'
- Confirm the other communication fields are set as expected: 'Send' fires when a request goes out for approval, 'Approve' fires when a request is approved, and 'Catch' fires when there is a problem with the workflow
- Select 'Submit' to save the workflow, or 'Create as draft' if you are not ready to publish it yet.
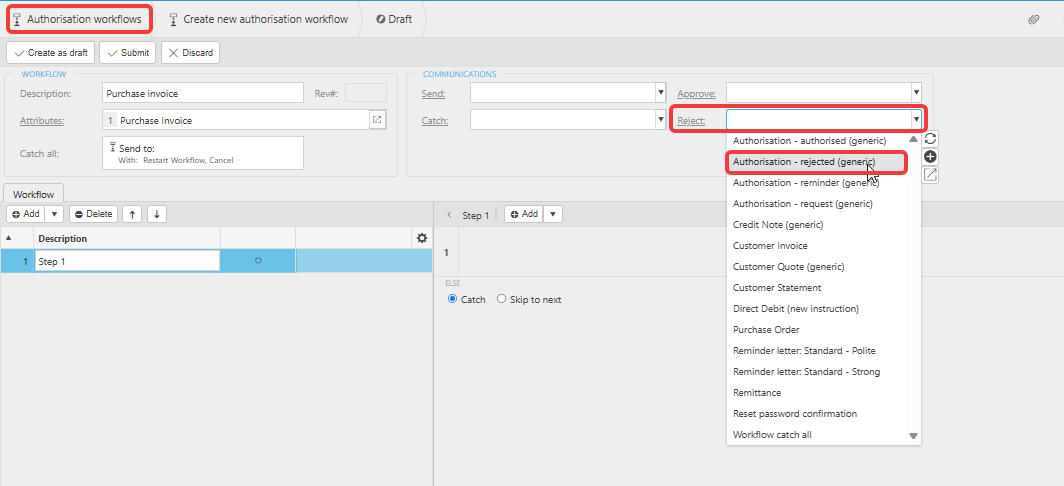
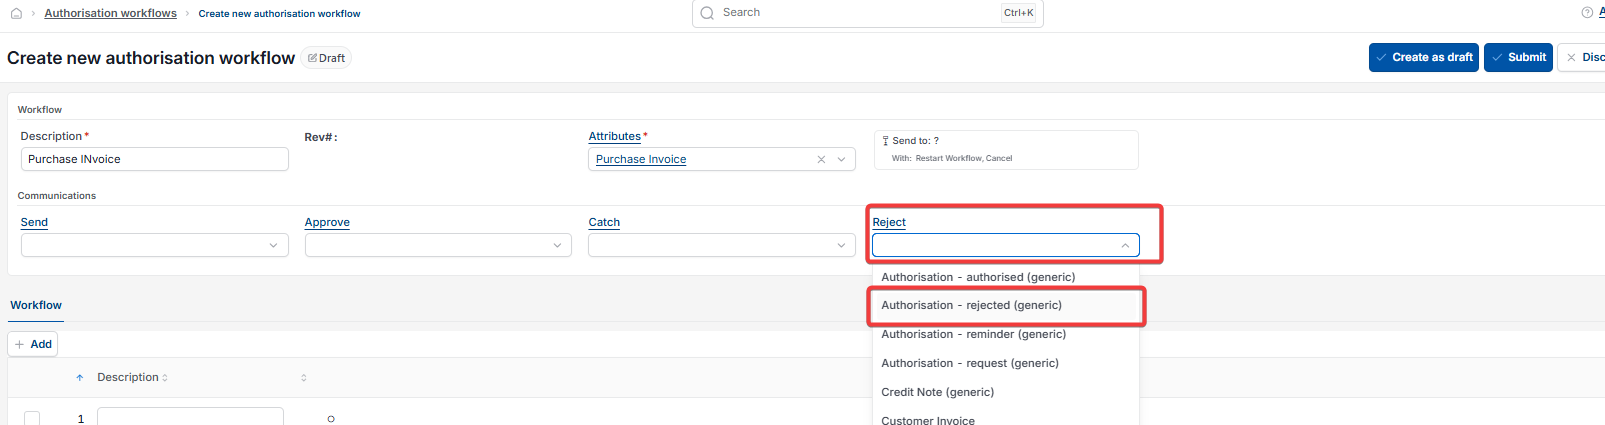
Opening the reject email template from the workflow
To jump straight to the template's configuration from the workflow, hold 'Ctrl' and select the template name in the 'Reject' field. This opens the 'Communication setup' record for that template directly – for example, 'Authorisation - rejected (generic)'.
Troubleshooting a rejection email that isn't sending
If the rejection email isn't sending, check the following on the authorisation workflow and its template:
- The 'Reject' field on the workflow has a template selected, and isn't left blank
- The workflow revision containing the rejection email is the active revision, not an earlier one
- The template itself is active on the 'Communication setup' page
- The user expected to receive the email has a valid email address on their user account.
If the email still doesn't send after checking these, contact iplicit support.
Workflow rejection email setup
Setup reject email
Authorisation reject email
Decline email for workflows