This article covers how to allocate a refunded expense in iplicit's Expenses module. A refund is processed by creating a credit entry - a document with a negative value - and then matching it against the original expense to clear the outstanding balance. This is different from deleting or editing the original expense.
What is a credit entry?
In iplicit's Expenses module, a credit entry is a document type that lets you record a negative expense value. Think of it like a receipt for money coming back to you rather than going out. When you match this negative value against the original positive expense, the two cancel each other out and the original expense is marked as paid.
If you cannot see a credit entry document type when creating an expense, it may be locked. The next section explains how to unlock it.
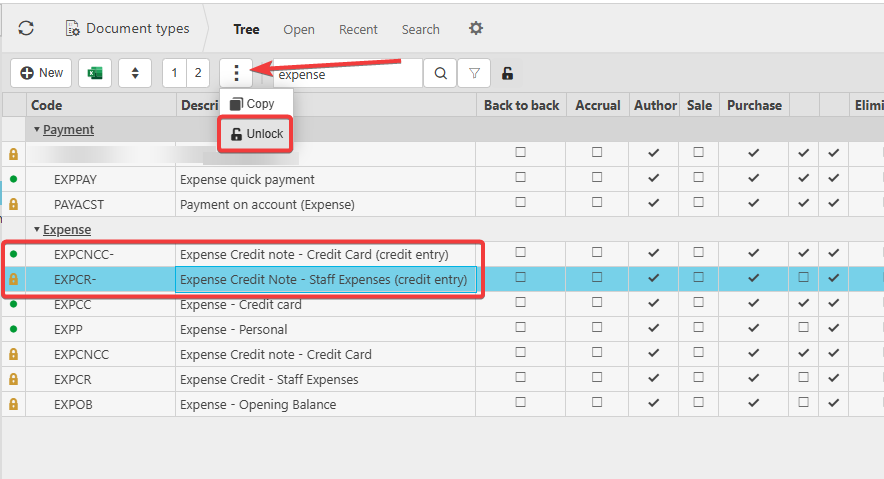
Step 1: Unlock the credit entry document type (if needed)
If the credit entry document type is not available in the Expenses module, it is likely locked.
- Go to the Document Types screen
- Find the credit entry document type in the list, if you cannot see this you may need to click the green dot next to the filter button to expose any locked documents
- Select the three dots menu next to it
- Select 'Unlock'.
The document type is now available to use.
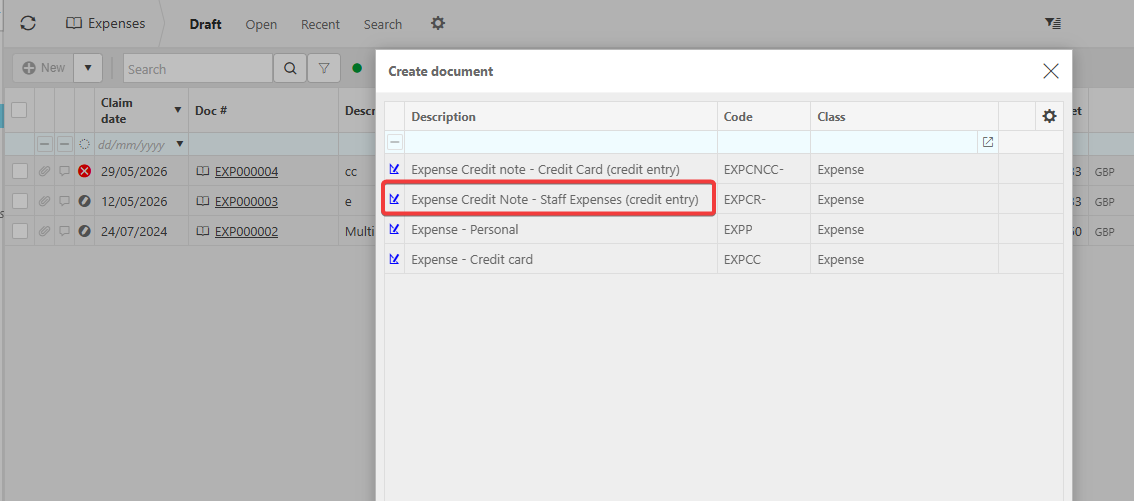
Step 2: Create the refunded expense using a credit entry
- Go to the Expenses module and select 'New'
- Select the credit entry document type from the list
- Enter the expense details - use the same description, category and date as the original expense where possible
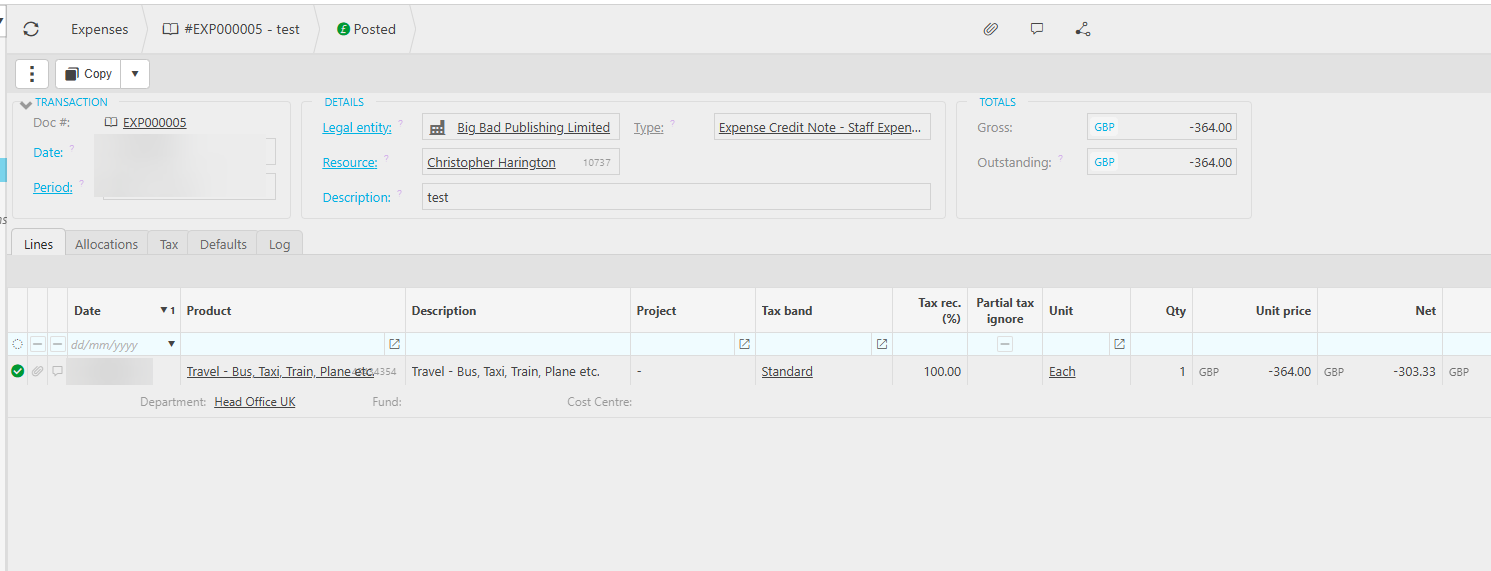
- Enter the refund amount as a positive number - iplicit will record it as a negative value automatically
- Submit the expense
iplicit posts the credit entry and it becomes available for allocation.
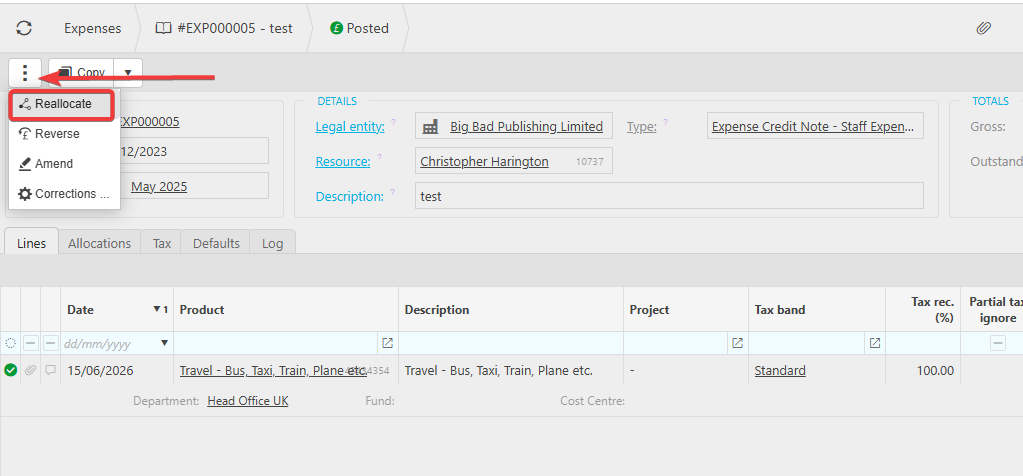
Step 3: Allocate the refunded expense against the original
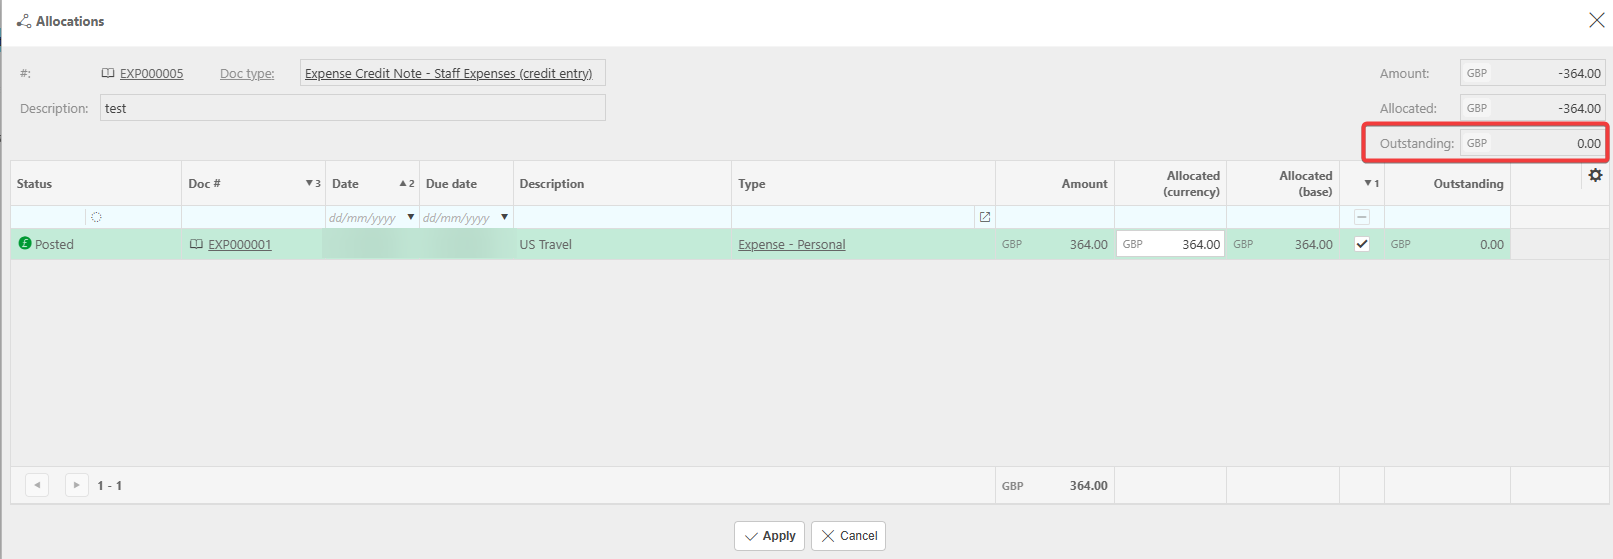
Once the credit entry is posted, you can match it to the original expense. This clears the outstanding balance on the original expense.
- Open the Expenses module and find the original expense - it will show an outstanding balance
- Select the three dots menu on that expense
- Select 'Reallocate'
- In the allocation screen, find the credit entry you just created
- Double click to match it against the original expense
- Confirm the allocation
The original expense now shows as paid. There is no remaining balance.
What this achieves
Allocating the refunded expense in iplicit's Expenses module ensures your financial records accurately reflect the refund. The original expense and the credit entry offset each other, so neither appears as an outstanding cost in your reports. If you skip this step, the original expense will continue to show as unpaid and your expense reports may overstate costs.
Expense refund
Expense credit entry
Negative expense value
Expense not clearing
Refund against expense