

This article covers reversing a posted credit note in iplicit. The steps are the same whether the credit note is a sales credit note (raised to a customer) in the Sales Ledger, or a purchase credit note (received from a supplier) in the Purchase Ledger. Both use the built-in 'Reverse' function directly on the document – you do not need to raise a separate correcting document.
Reversing a sales credit note (Sales Ledger)
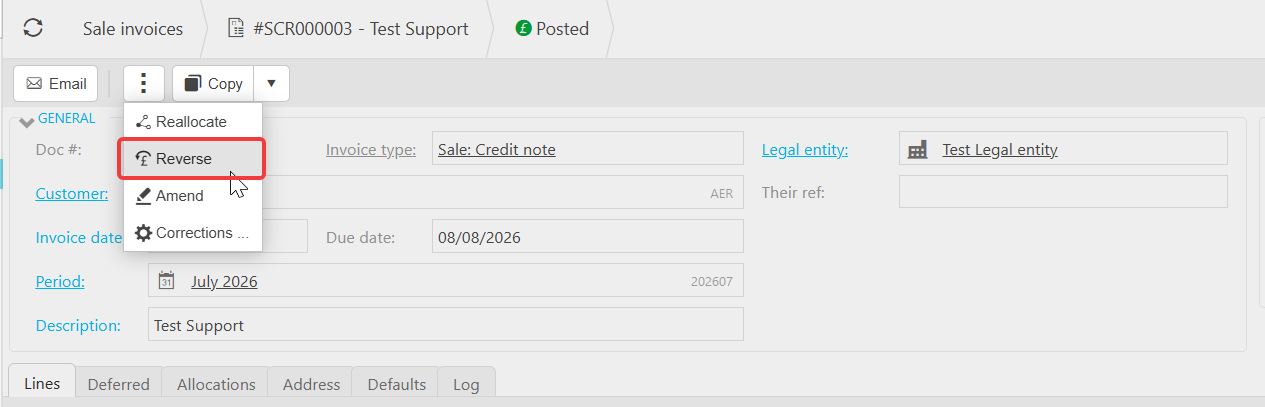
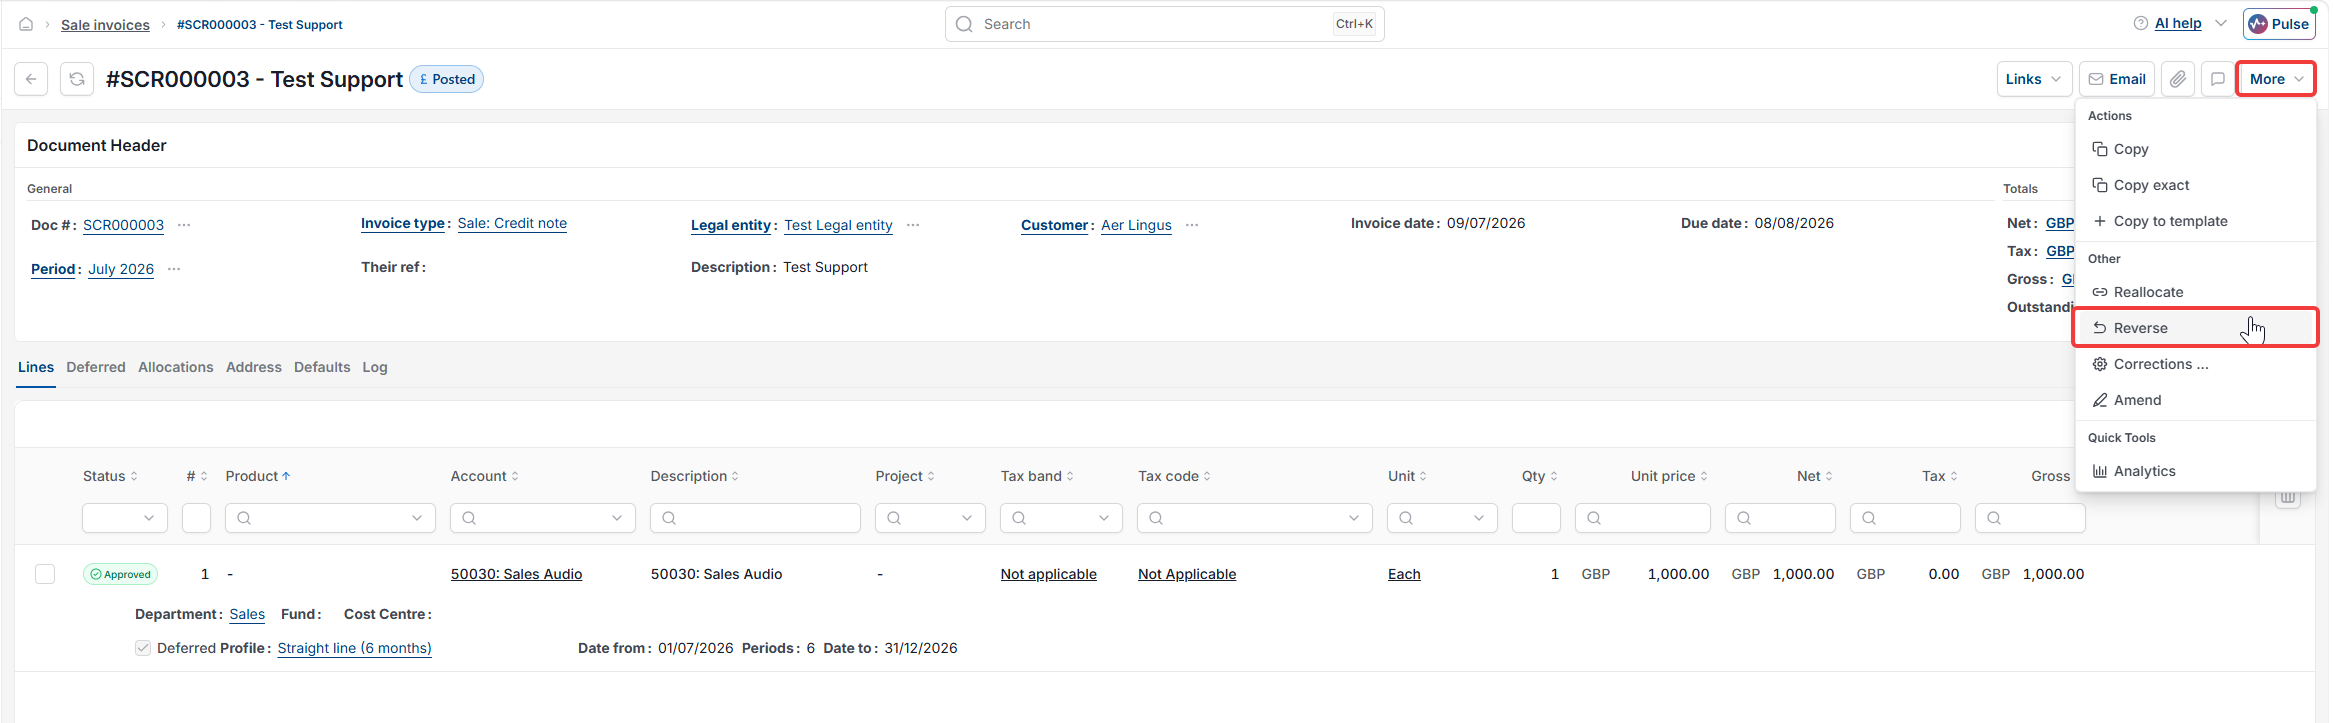
- Go to 'Sales' in the main menu and open 'Sale invoices'
- Find the posted sales credit note you want to reverse. Sales credit notes appear with the invoice type 'Sale: Credit note'
- Open the credit note, then click the three-dot button (⋮) in the top toolbar or the More drop down menu, depending on your screen
- Select 'Reverse'
- In the 'Reverse Sale: Credit note' window, confirm the 'Period' – this defaults to the current period but can be changed
- Enter a 'Reason' for the reversal
- Click 'Submit'.
Reversing a purchase credit note (Purchase Ledger)
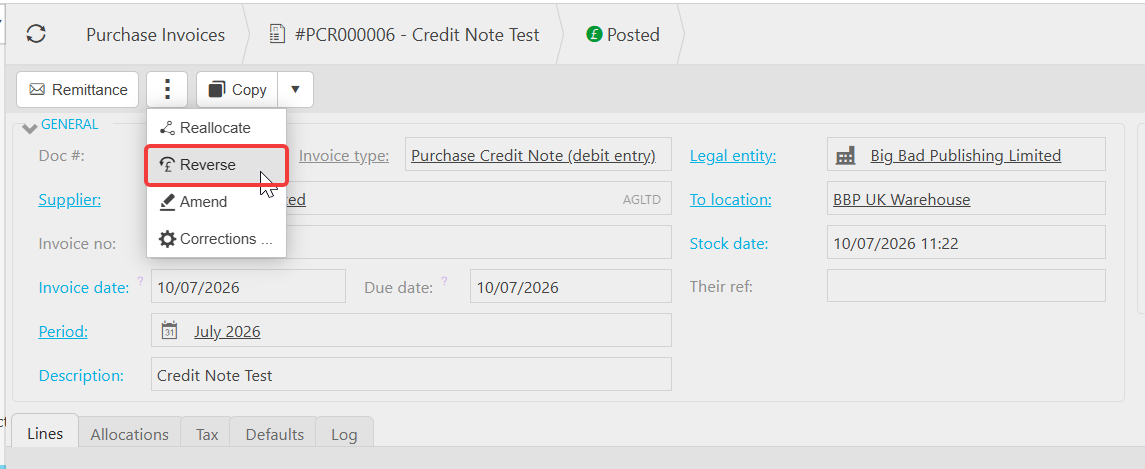
- Go to 'Purchases' in the main menu and open 'Purchase invoices'
- Find the posted purchase credit note you want to reverse
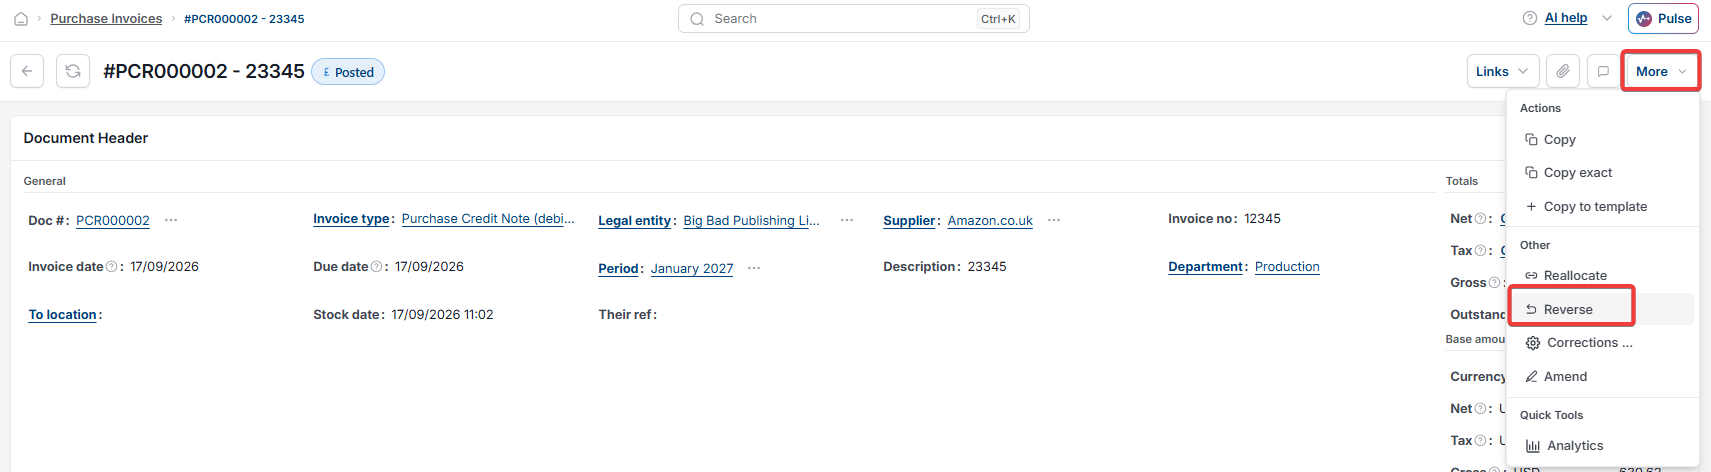
- Open the credit note, then click the three-dot button (⋮) in the top toolbar or the More drop down menu, depending on your screen
- Select 'Reverse'
- Confirm the 'Period' and enter a 'Reason'
- Click 'Submit'.
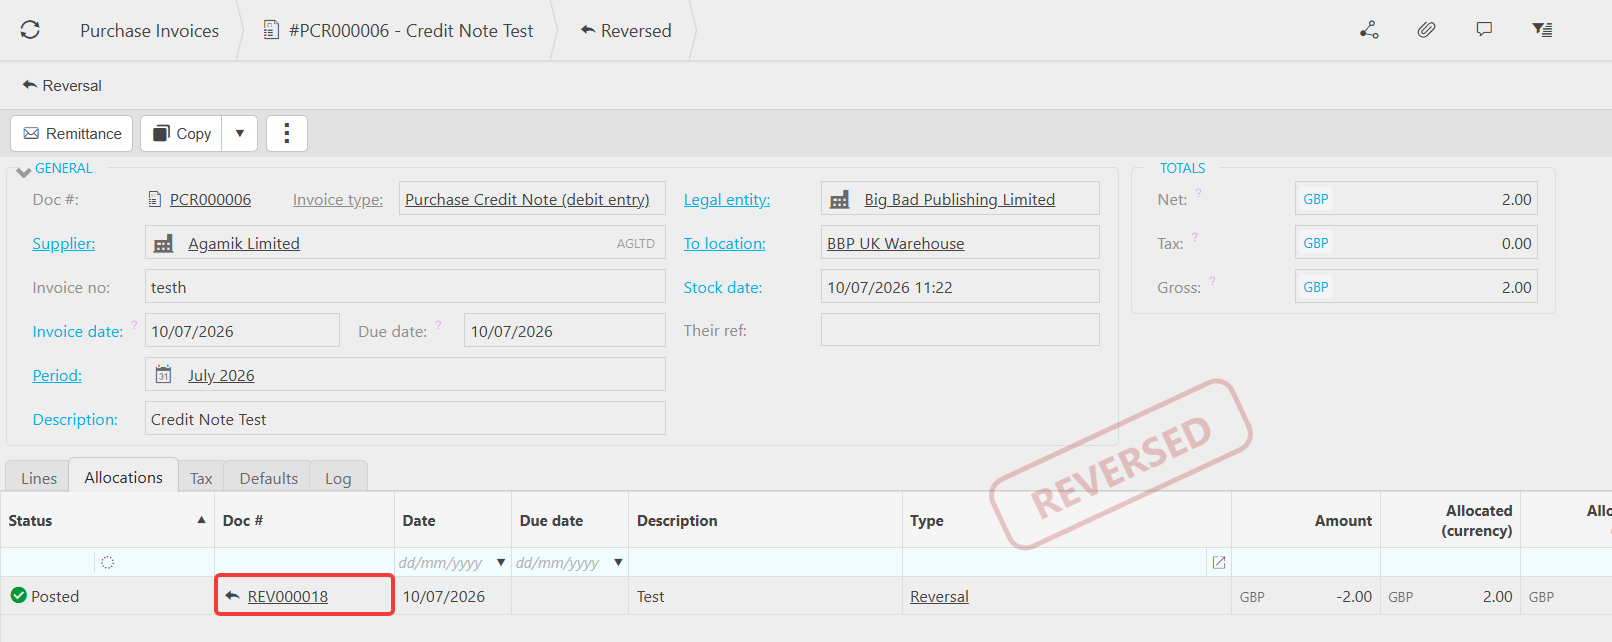
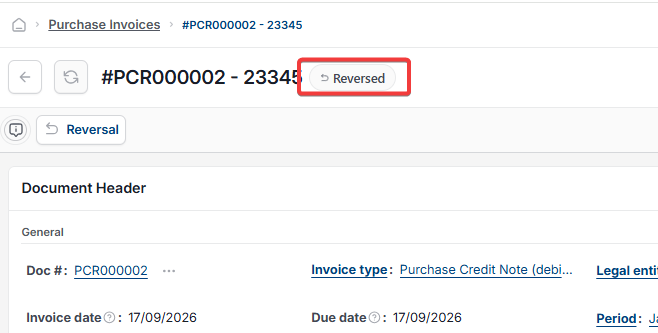
In both the Sales Ledger and the Purchase Ledger, iplicit creates a reversal document and updates the original credit note's status to 'Reversed'. The reversed document is stamped 'REVERSED' and remains visible for your records – it is not deleted.
What happens after reversing a credit note
The original credit note stays in the system with its status changed to 'Reversed', whether it was a sales credit note or a purchase credit note. iplicit does not delete the document.
Reverse credit note
Cancel credit note
Undo credit note
Delete credit note
Credit note reversal
Void credit note
Reverse sales credit note
Reverse purchase credit note