

This article covers enabling and using prepayments on an expense document, so a cost can be spread (deferred) across multiple accounting periods instead of hitting one period in full. It applies to expense document types including 'Expense - Personal' and 'Expense - Credit card'. If you're looking to enable prepayments on a purchase invoice instead, see How do I enable prepayments on a document.
Enable the prepayment setting on the expense document type
Prepayments must be switched on for each expense document type you want to use them with — it is not a global setting.
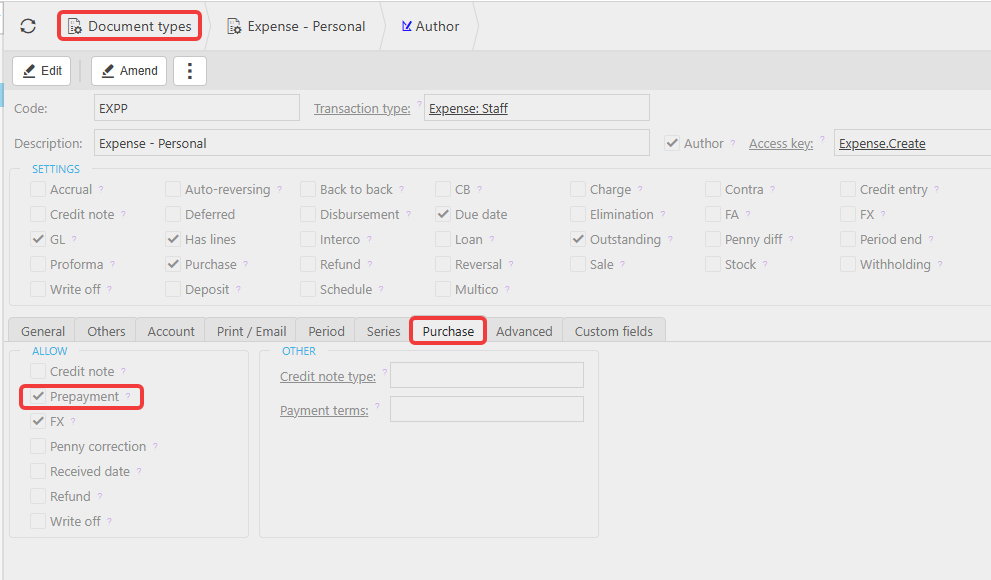
- Go to 'Document types'.
- Select the expense document type, for example 'Expense - Personal' or 'Expense - Credit card'.
- Open the 'Purchase' tab.
- Tick 'Prepayment'.
- Save the document type.
Repeat this for every expense document type that needs prepayments enabled.
Add the expense document type to the prepayment automation
Enabling the setting on the document type is not enough on its own. iplicit uses an automation to release the prepayment journals each period, so each expense document type also needs adding to that automation, or the journals won't post.
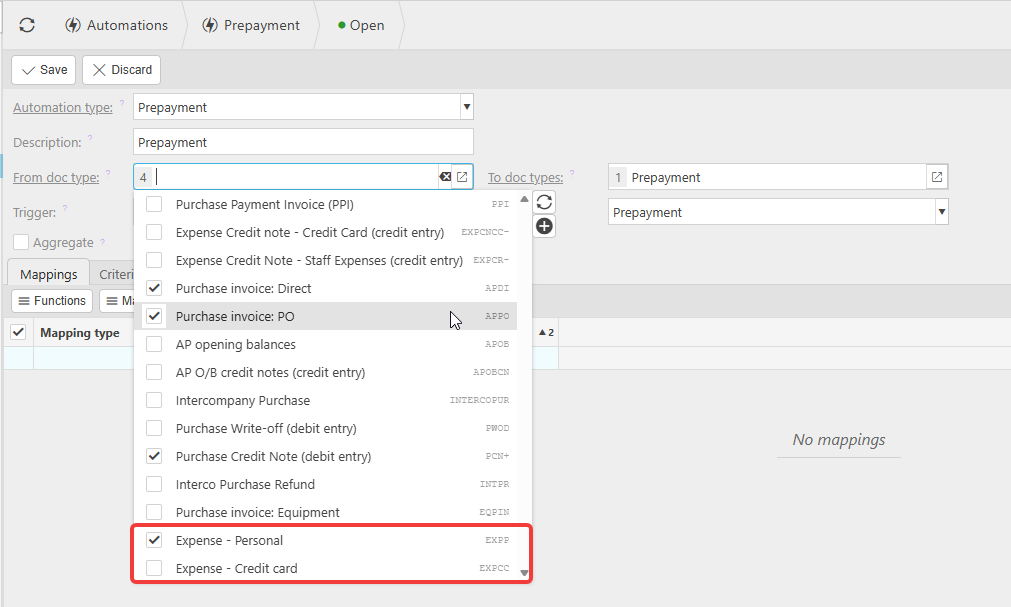
- Go to 'Automations'.
- Open the 'Prepayment' automation.
- Under 'From doc types', tick each expense document type enabled above.
- Save the automation.
Confirm the nominal account allows prepayments
The account used on the expense line also needs the deferred/prepayment setting enabled, or the prepayment option won't appear when entering the expense.
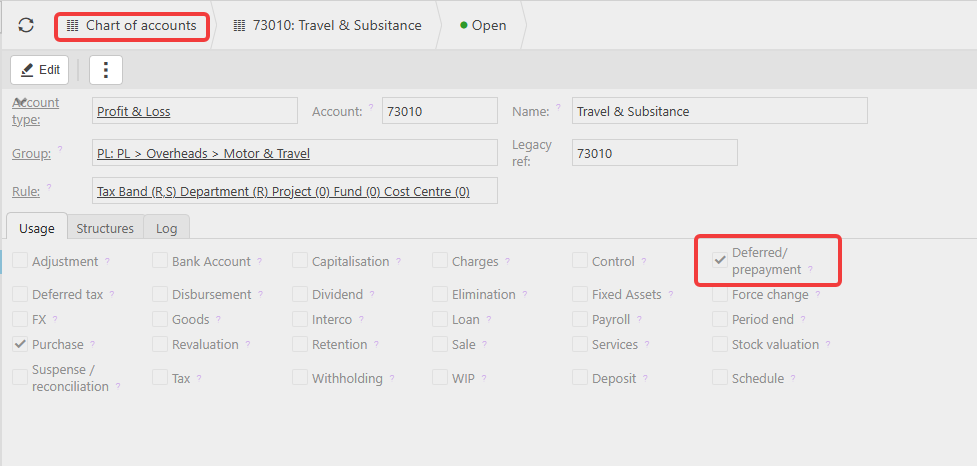
- Go to 'Chart of accounts'.
- Select the account.
- Open the 'Usage' tab.
- Confirm 'Deferred/prepayment' is ticked. If it isn't, tick it and save.
Applying the prepayment on the expense line
Once the document type, automation and account are configured, the prepayment option becomes available when entering an expense against that account.
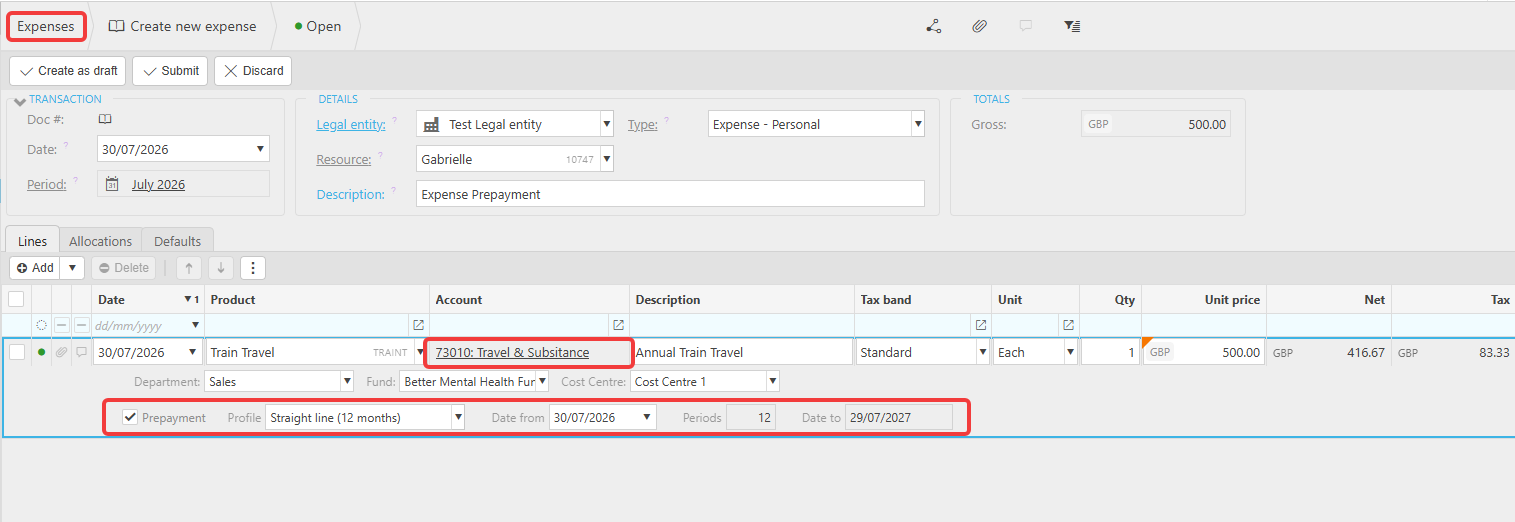
- Create a new expense using a document type with prepayments enabled.
- Add a line and select an account with 'Deferred/prepayment' turned on.
- Tick 'Prepayment' on the line.
- Choose a profile, for example 'Straight line', to spread the cost evenly.
- Set the 'Date from' and enter the number of periods to spread over, for example 12 for a year. The 'Date to' fills in automatically.
- Submit or post the expense as usual.
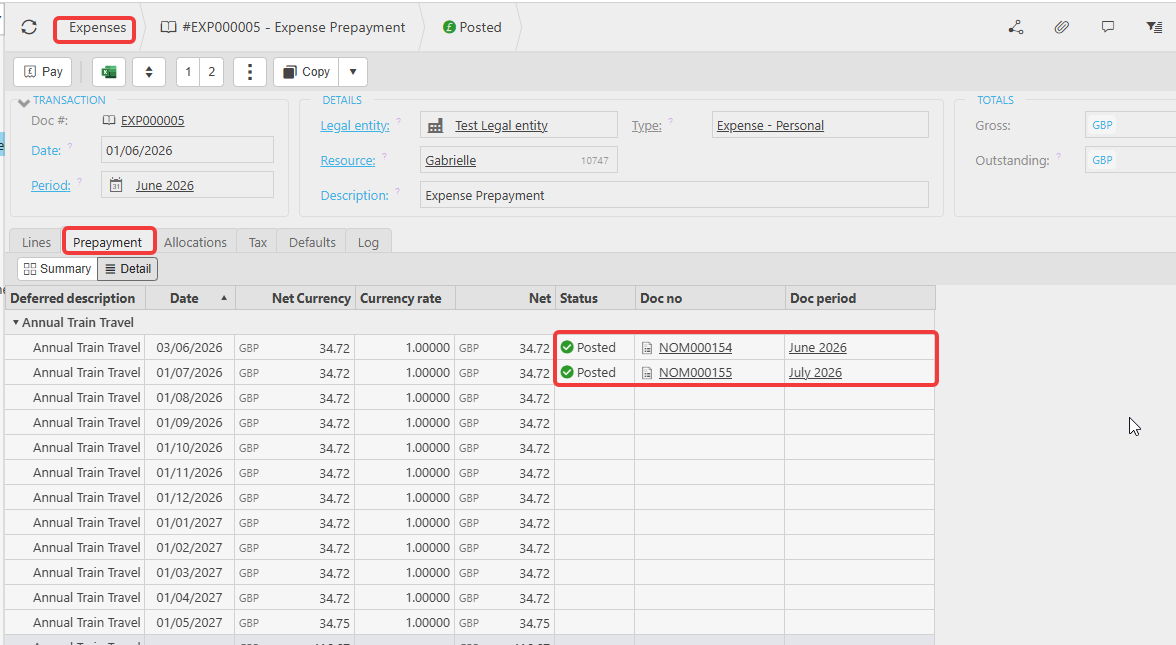
Once posted, open the expense and go to the 'Prepayment' tab to see the schedule. Each period shows a status — 'Posted' means the automation has already released that period's journal.
Expense prepayment setup
Enable prepayment on expense
Prepayment on expense credit card
Prepayment option missing on expense
Defer an expense
Spread an expense over periods
Amortise expense cost
Expense prepayment schedule