

This article covers how an individual user links their iplicit account to an SSO provider, once that provider has been enabled for the environment. This is the self-service method - a user linking their own account. For an administrator linking many users at once, see 'How to bulk-link users to SSO using the SSO Link Wizard' or 'How to link a new user to SSO'. SSO must already be enabled for your environment before this will work - see 'Enabling SSO for iplicit login'.
Before you start
SSO linking only works if an administrator has already enabled at least one SSO provider for your iplicit environment. If no 'Link' option appears against any provider on the Security page, SSO likely hasn't been enabled yet - check with your iplicit administrator.
Linking your account
To link your iplicit account to an SSO provider:
- Log in to iplicit with your existing username and password
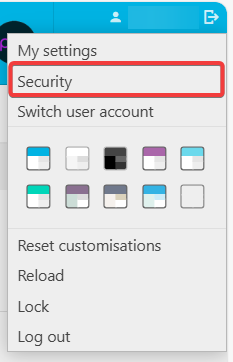
- Select your name in the top right-hand corner
- Select 'Security'
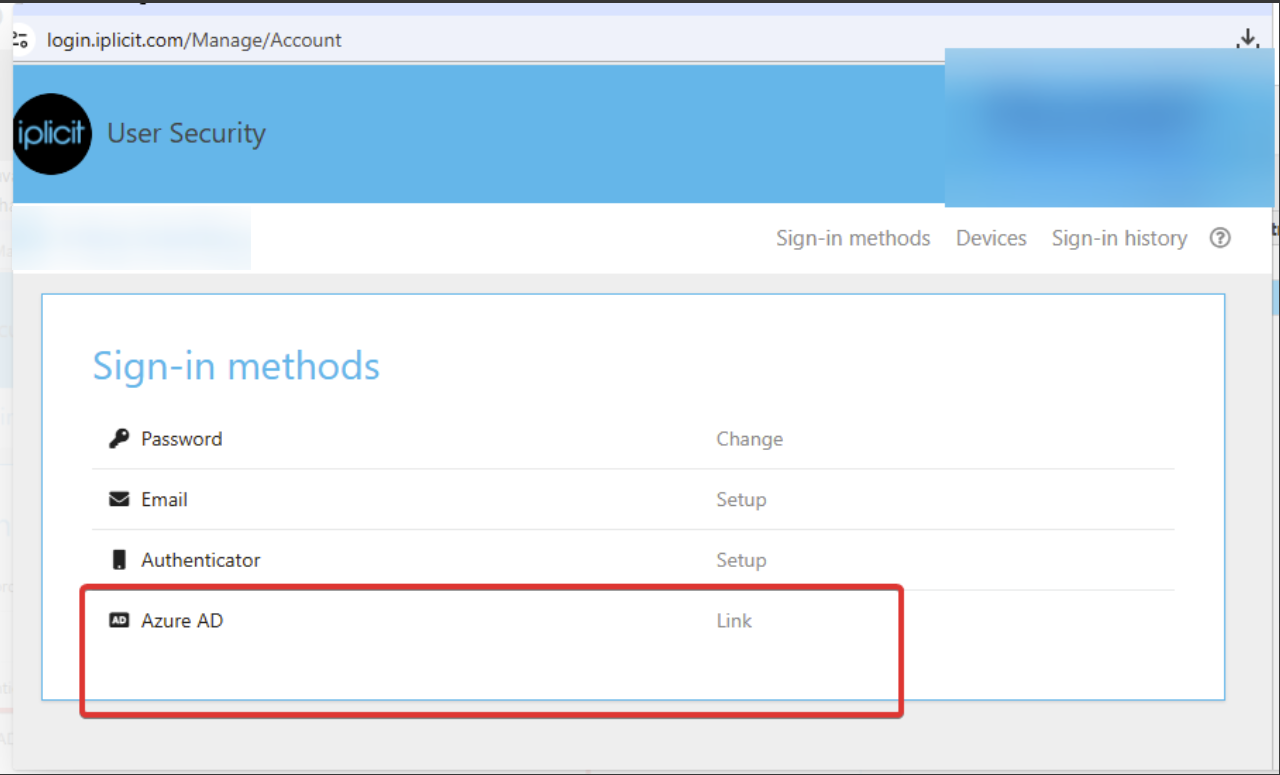
- Find your SSO provider under the sign-in methods section
- Select 'Link' against that provider
You're then redirected to your organisation's sign-in page for that provider - this is your Microsoft, Google, or OneLogin login screen, not an iplicit screen. Enter your usual sign-in details for that provider to complete the link.
Logging in after linking
Once your account is linked, log out of your current session. The next time you go to log in, an SSO sign-in button appears for your provider, and you can use that instead of your username and password. See 'How to log in to iplicit via SSO' for that process.
Link SSO account
Connect SSO
SSO security settings
Link Microsoft account
Link OneLogin account
SSO not linked