

This article covers the one-off setup needed before you can create a Multi-Co journal in iplicit. A Multi-Co journal lets a single manual journal complete postings across multiple legal entities through an Intercompany account. Once this setup is complete, see 'How to create a Multi-Co journal' for the day-to-day process.
Unlocking the Multi-Co Journal document type
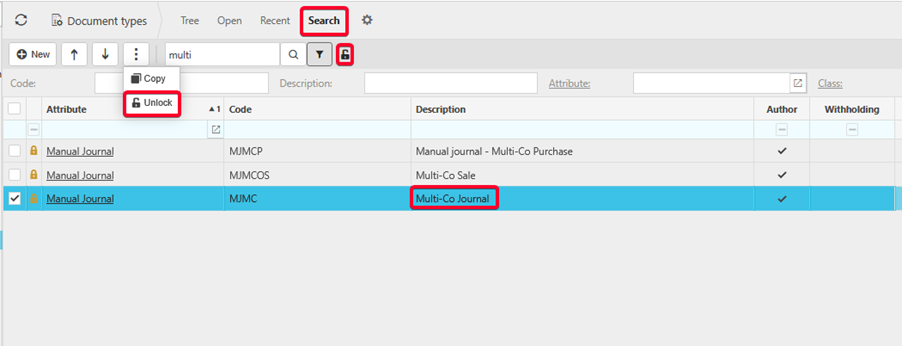
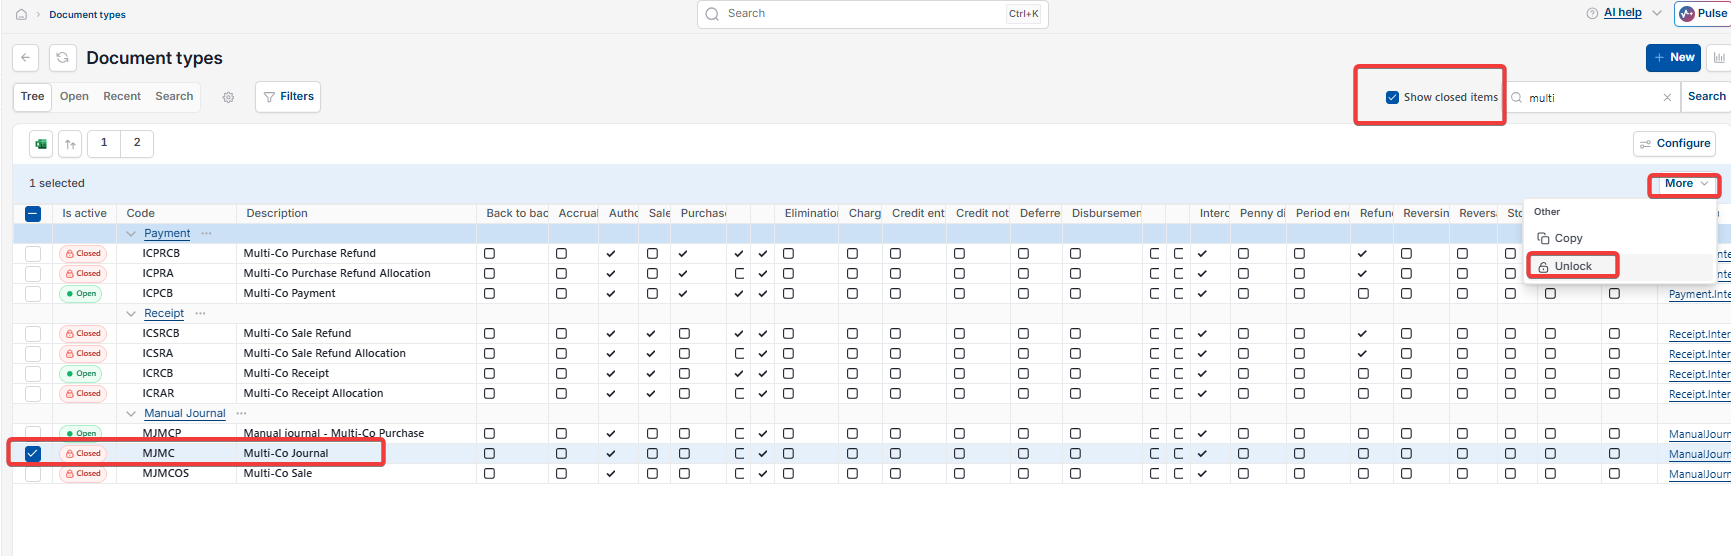
- Search for 'Document types' and search within it for 'multi'
- Select the toggle that brings locked items into view – depending on your version, this is either a green circle icon you select to switch it to a lock, or a 'Show closed items' tickbox
- Select 'Multi-Co Journal'
- Open the menu that lets you unlock it – depending on your version, this is either an ellipsis icon or a 'More' dropdown – and select 'Unlock'.
Setting the document series and template option
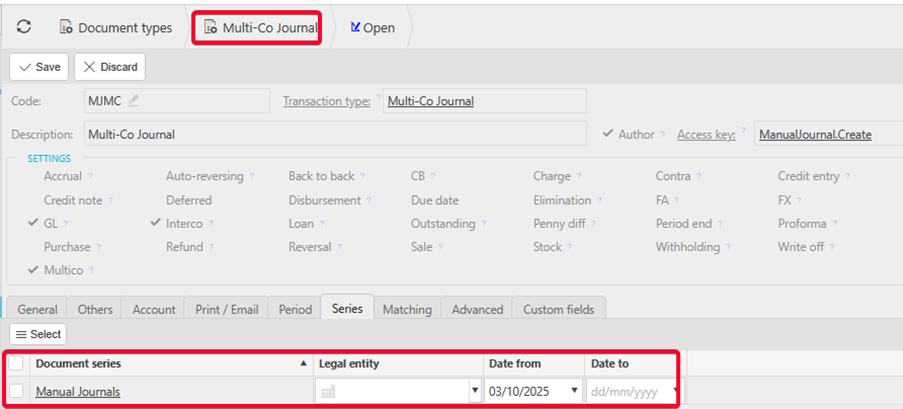
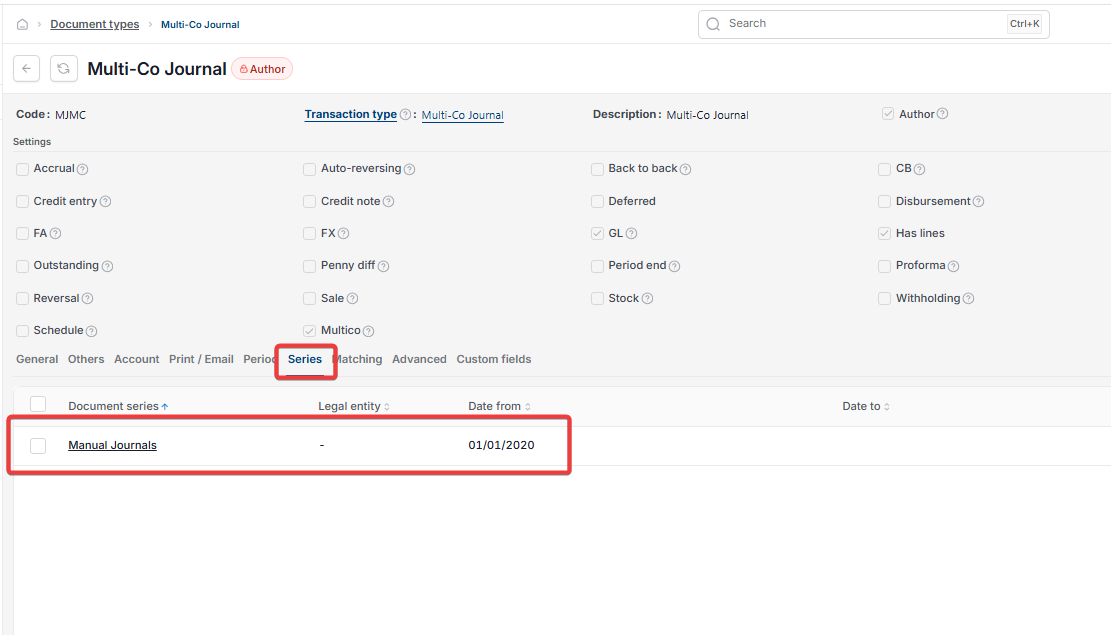
- On the unlocked 'Multi-Co Journal' document type, confirm 'Interco' and 'Multico' are ticked in the settings at the top of the record
- Link the 'Manual Journals' document series on the 'Series' tab
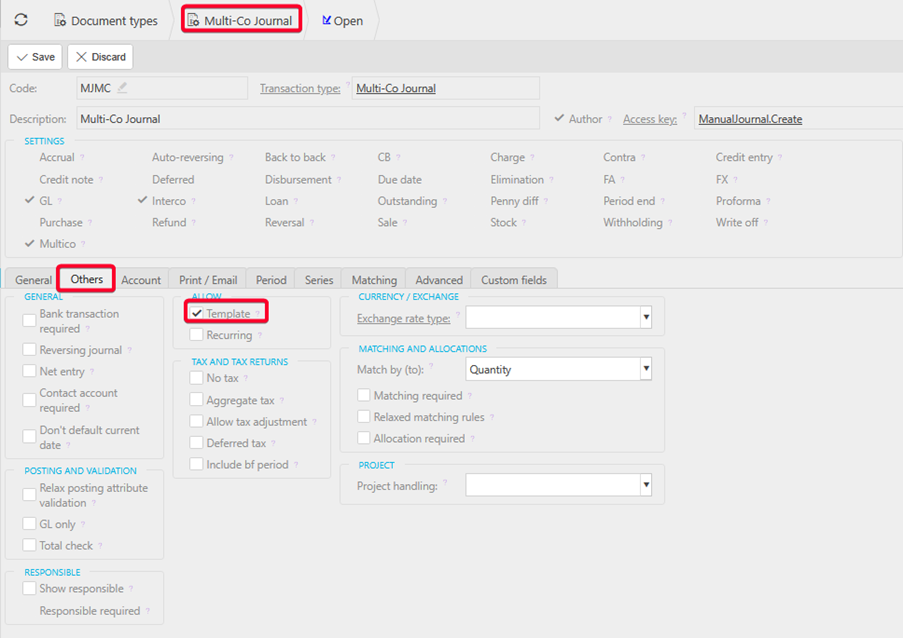
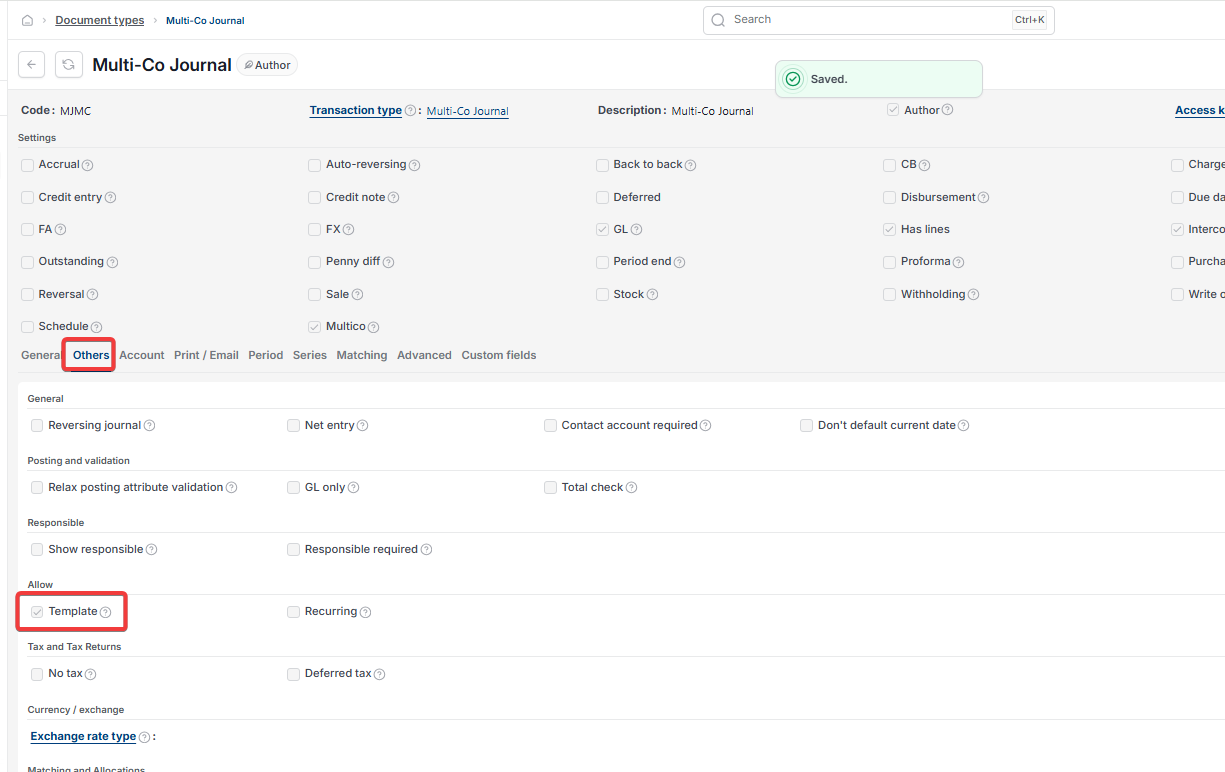
- Open the 'Others' tab and tick 'Template'.
Setting up an Intercompany Balances account
A Multi-Co journal needs a dedicated account to move balances from the legal entity creating the journal to the destination legal entities.
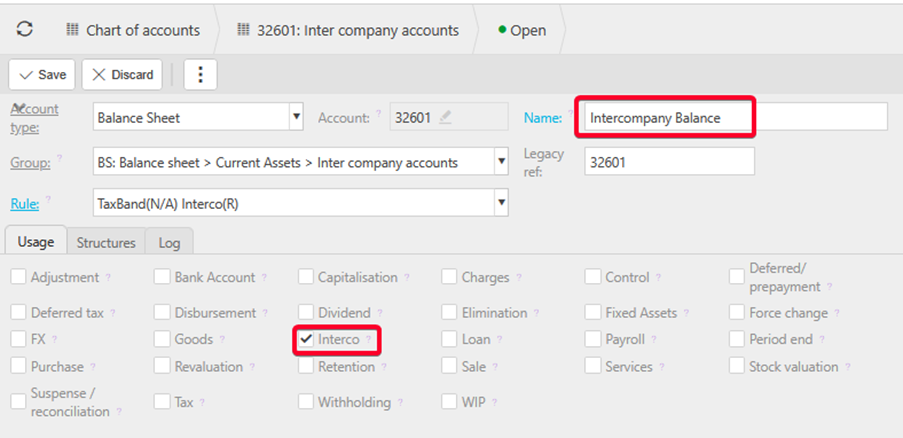
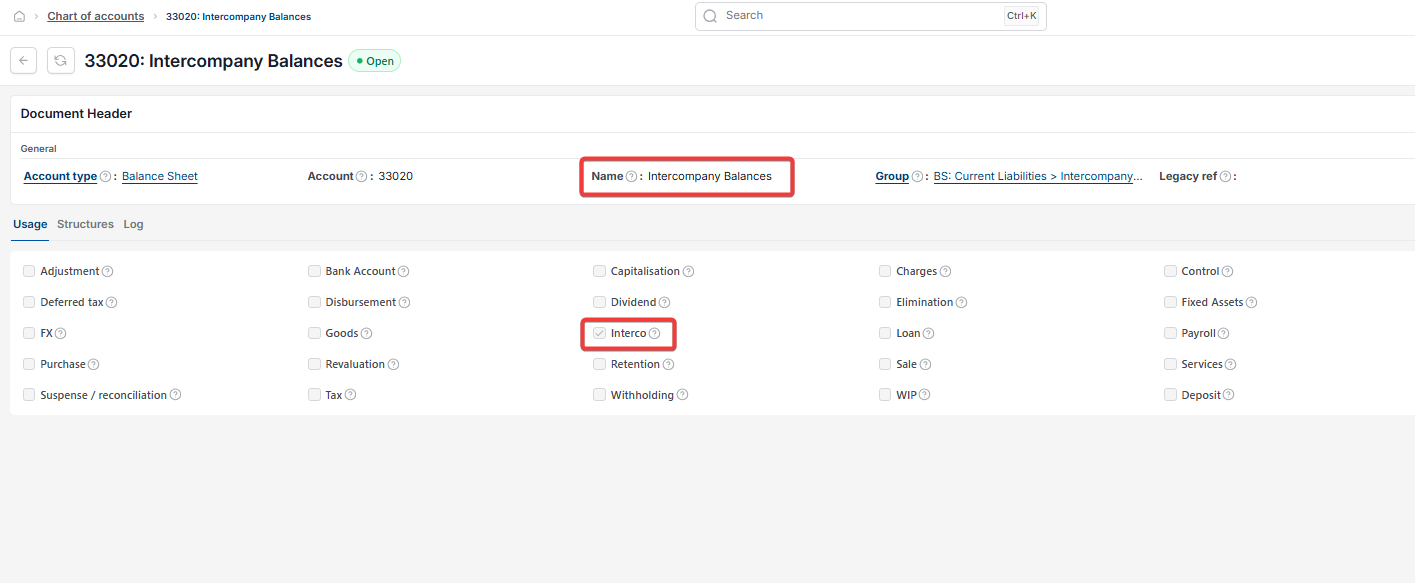
- In 'Chart of accounts', create or open the account you'll use for this, for example 'Intercompany Balance'
- Confirm it's a balance sheet account
- Tick 'Interco' on its 'Usage' tab
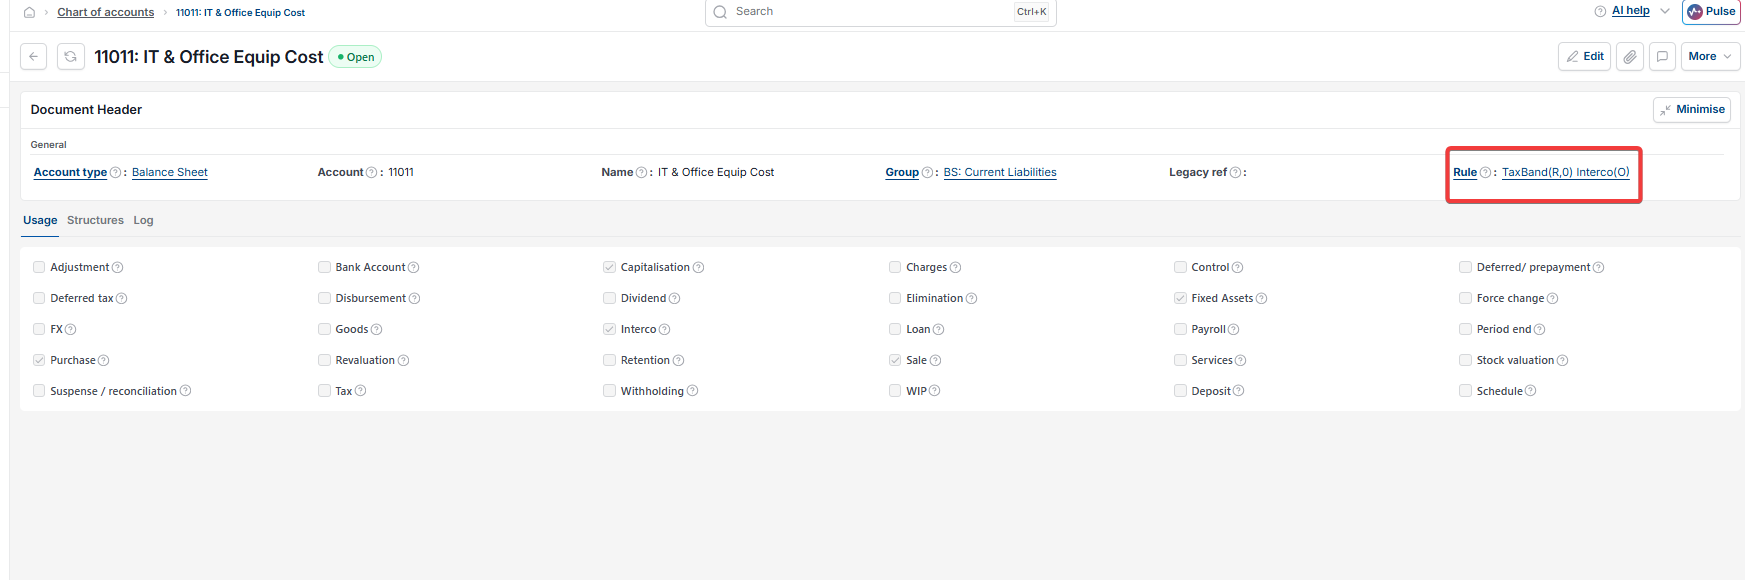
- Confirm its chart of account rule includes the 'InterCo' attribute set to required – if the rule doesn't exist yet, create one requiring 'Tax Band' and 'InterCo'.
Configuring the Multi-Co Journal account default
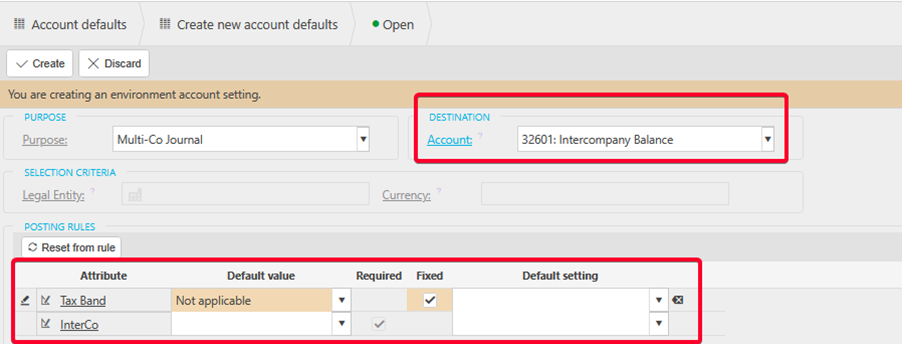
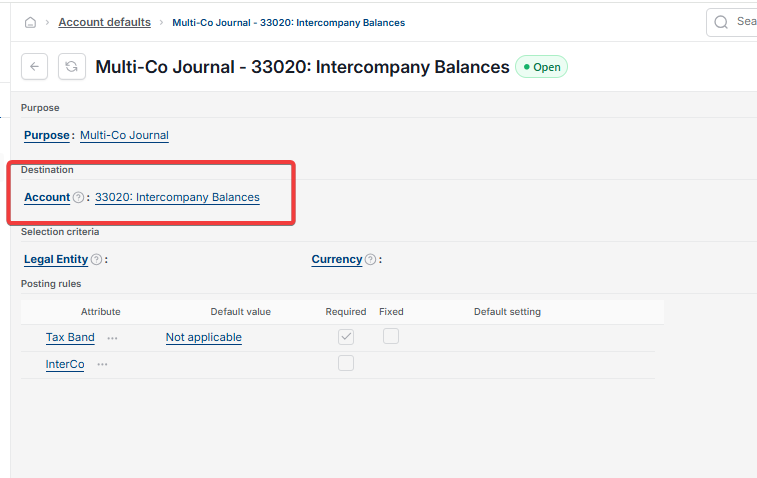
- Search for 'Account defaults' and search within it for 'Multi-Co Journal'
- If a record already exists, open it; if not, select 'New' and set 'Purpose' to 'Multi-Co Journal'
- Set the 'Destination' account to the Intercompany Balances account you set up above.
Creating the Multi-Co Journal automation
The automation itself already exists in iplicit – this step is about selecting it and setting how it runs.
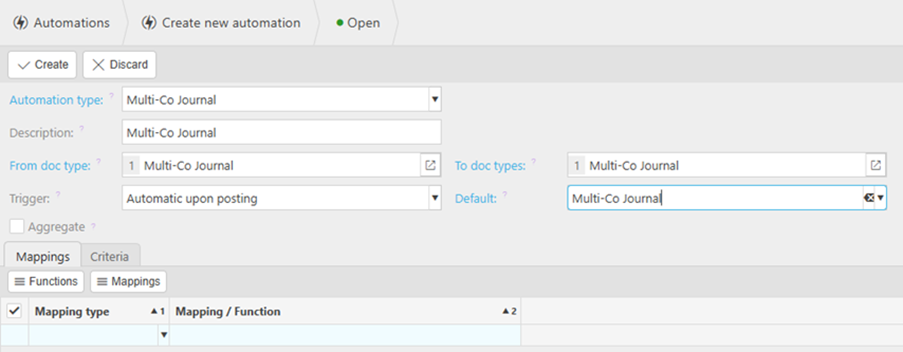
- Search for 'Automations' and select 'New'
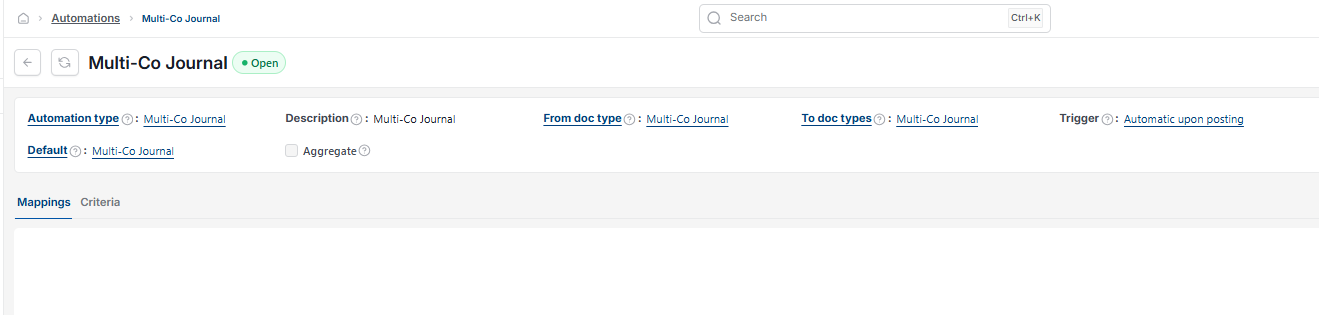
- Set 'Automation type' to 'Multi-Co Journal'
- Confirm 'From doc type' and 'To doc types' are both set to 'Multi-Co Journal'
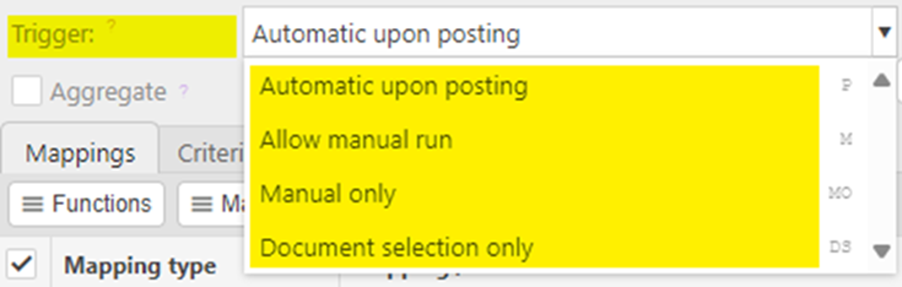
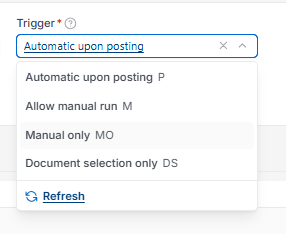
- On the 'Trigger' field, select 'Automatic upon posting' if you want the automation to run as soon as the journal posts to the General Ledger
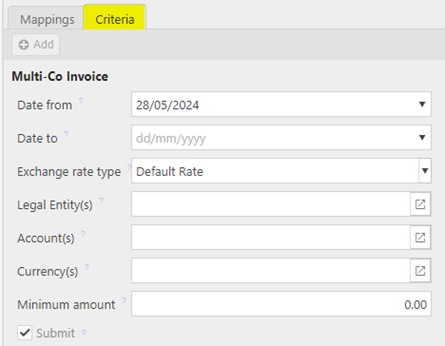
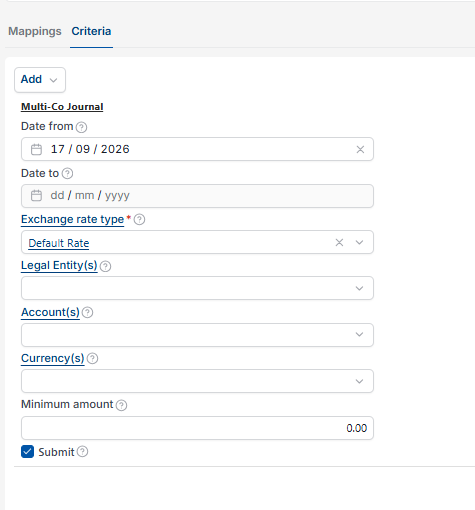
- Open the 'Criteria' tab and tick 'Submit' if you want the generated journals to submit for authorisation automatically, or leave it unticked to leave them as drafts for manual review.
The Criteria tab may show 'Multi-Co Invoice' as its heading even when you're configuring a Multi-Co Journal automation – this is expected, and doesn't mean the wrong automation type has been selected.
Setting Interco to optional on your Chart of Account rules
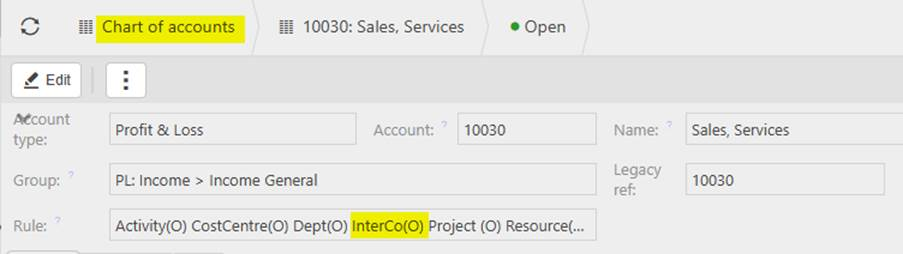
Every account used on a Multi-Co journal needs a chart of account rule with the 'InterCo' attribute set to optional, not required. See 'How the Interco setting works on accounts and chart of account rules' for the full detail on this setting.
Enabling Interco for each Legal Entity
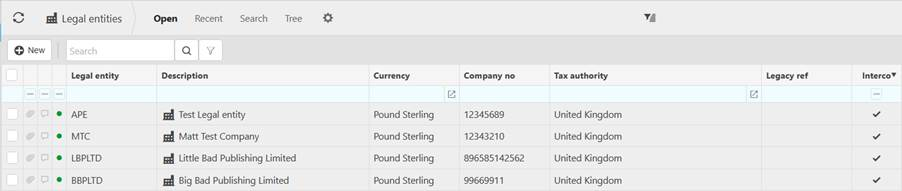
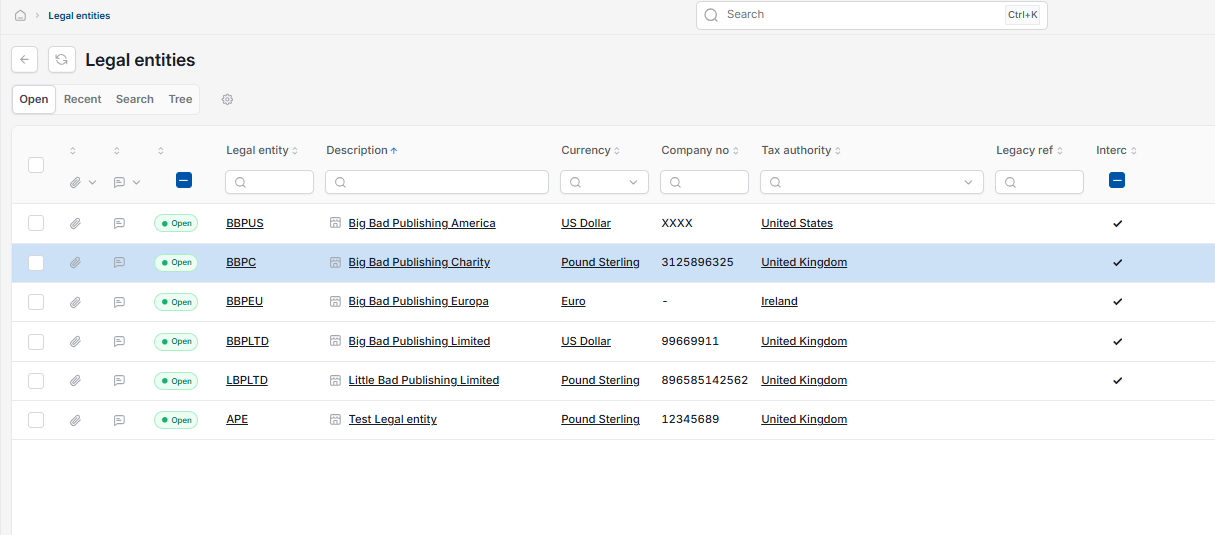
Every legal entity you plan to use with Multi-Co journals needs Interco enabled and its allowed partner entities selected.
- Search for 'Legal Entities' and open the one you want to enable
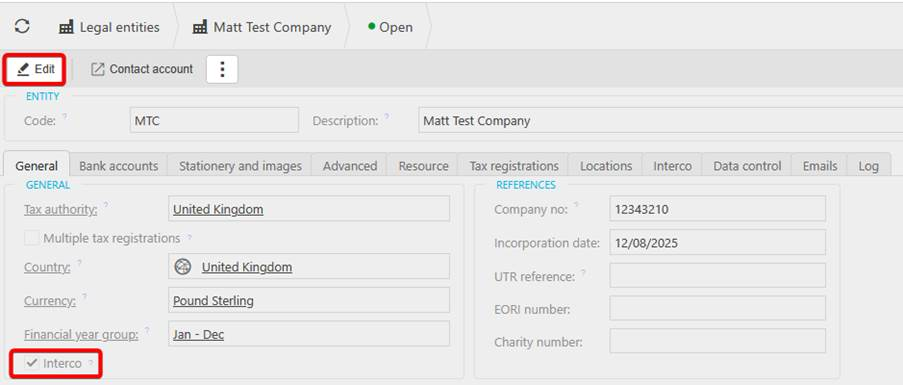
- Select 'Edit'
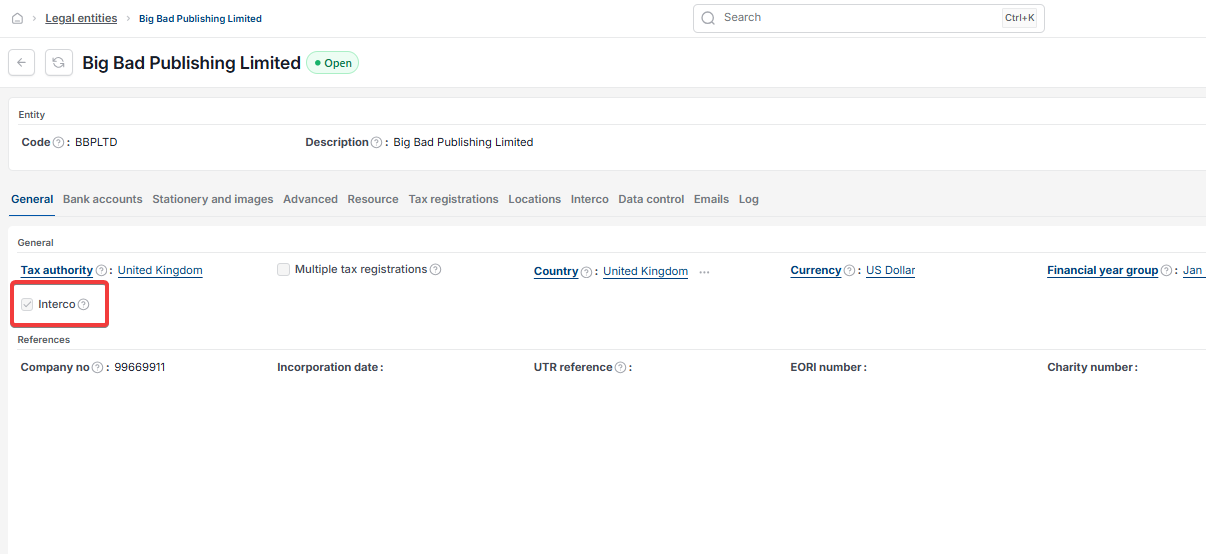
- On the 'General' tab, tick 'Interco'
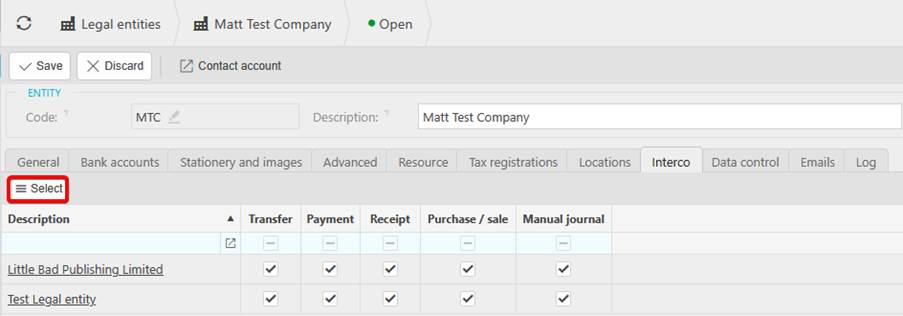
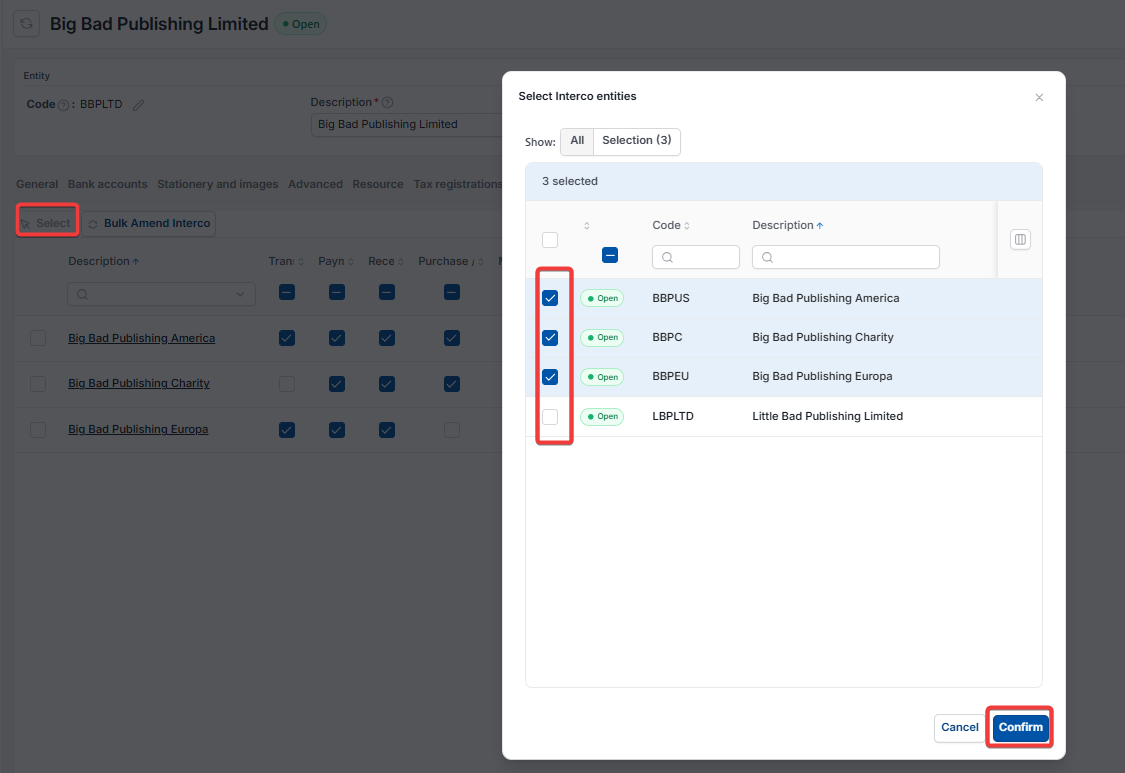
- On the 'Interco' tab, select 'Select'
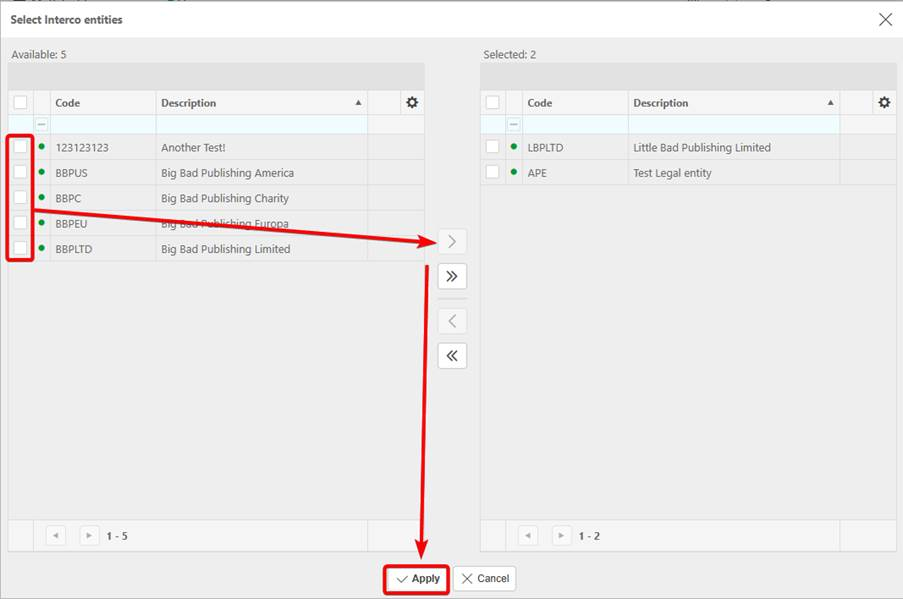
- Choose the legal entities this one is allowed to post intercompany transactions against, then select 'Apply'
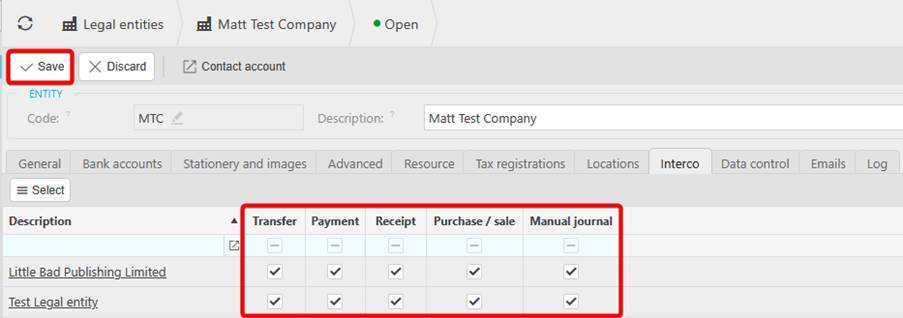
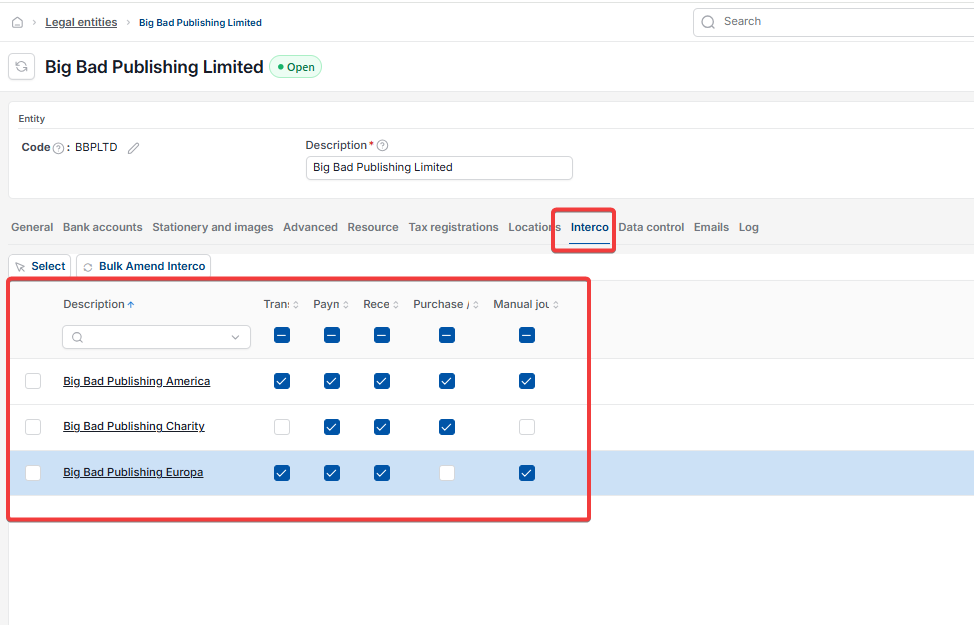
- Tick which transaction types are allowed with each selected legal entity – transfers, payments, receipts, purchases and sales, or manual journals
- Select 'Save'
- Repeat for every legal entity involved.
Multi company journal setup
Configure multi co iplicit
Cross entity posting setup
Multi co document type
Interco balances account setup