

This article covers using the iplicit Excel add-in once it's installed - both the built-in options and custom functions for building your own reports. If you haven't installed the add-in yet, see 'How to set up the iplicit Excel add-in'.
Using the built-in options
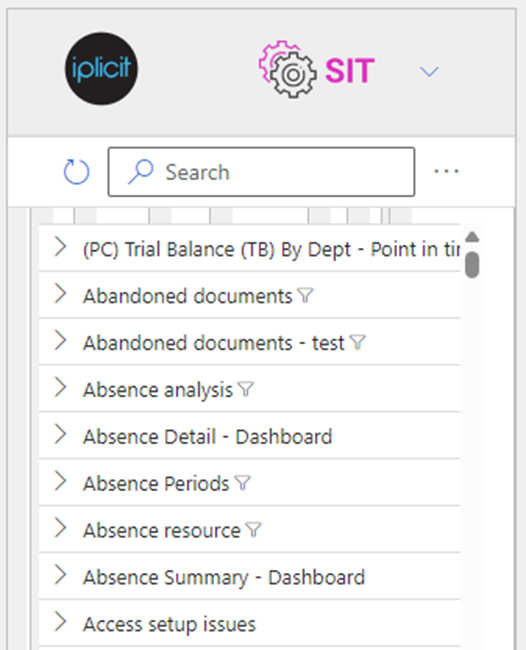
Once the add-in is installed, a column of options appears on the right-hand side of your spreadsheet. Selecting an option, together with your chosen criteria such as legal entity, pulls the matching data from your iplicit environment straight into the spreadsheet.
For example, to pull data by legal entity:
- Select 'Legal Entities' from the add-in options
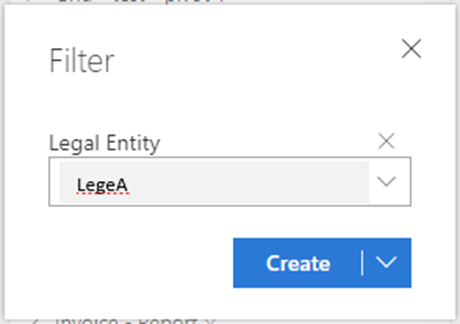
- Enter the legal entity in the popup that appears
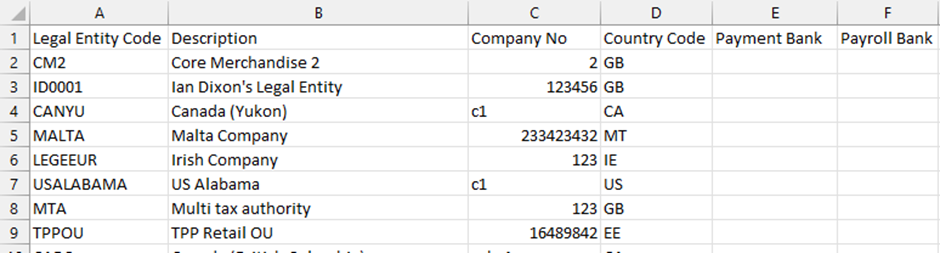
The resulting data appears directly in the spreadsheet.
Using custom functions
Custom functions let you build a fully bespoke report by entering iplicit data directly into individual cells, rather than using the built-in options. For example, the function IP.GLBaseAmount pulls a general ledger base amount into a single cell.
To add a custom function to a spreadsheet:
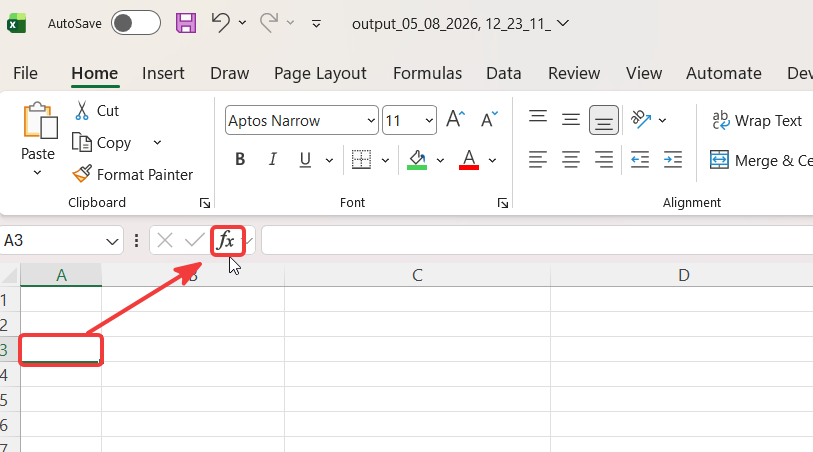
- Select the cell where the result should appear
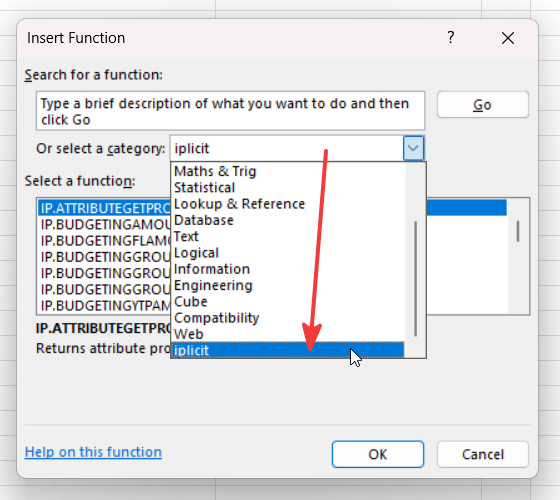
- Select the 'fx' option
- Select the iplicit category, then choose the custom function you need, and select 'OK'
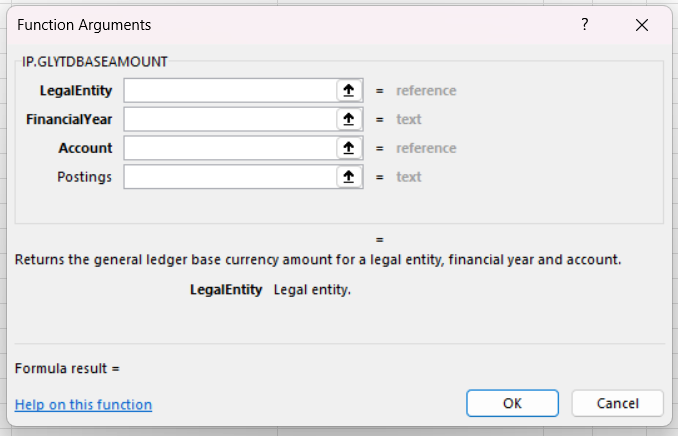
- Enter the arguments the function needs, then select 'OK'
The result appears in the selected cell.
If a user doesn't have the correct permissions, "You do not have permission to use iplicit Excel functions" appears instead of a result - see 'How to set up the iplicit Excel add-in' for the permission required. For more information about what custom functions are available, please see 'User Guide - Custom Functions'.
Excel add-in options
Excel custom functions
IP.GLBaseAmount
Pull iplicit data into Excel
Excel add-in report
Legal entity Excel report