

This article covers how to block and lock a user account in iplicit when someone leaves the company, using the 'User Accounts' screen. Blocking and then locking an account prevents login while preserving every action that user has taken in iplicit.
We do not recommend deleting user accounts. Locking preserves the account and all of its history, including captured documents and authorisations, which remain attached to the locked account for audit purposes. Deleting does not do this.
Blocking a user account in User Accounts
Blocking prevents a user from logging in to iplicit. The account remains active and you can unblock the user at any time. Blocked user accounts continue to be included in billing.
A user can be blocked in two ways:
- Manually, by an administrator – for example, to pause access while an employee is on extended leave, while a security concern is being investigated, or as the first step when someone has left the company
- Automatically, by iplicit – for example, after too many failed login attempts.
To block a user manually:
- Navigate to the 'User Accounts' screen
- Double-click the relevant user
- Select 'Block login access'
- Enter a brief, meaningful reason – for example, 'Blocked by Mary due to resignation 1 January 2026'
- Select 'Apply'.
Blocking login access for a user on the 'User Accounts' screen.
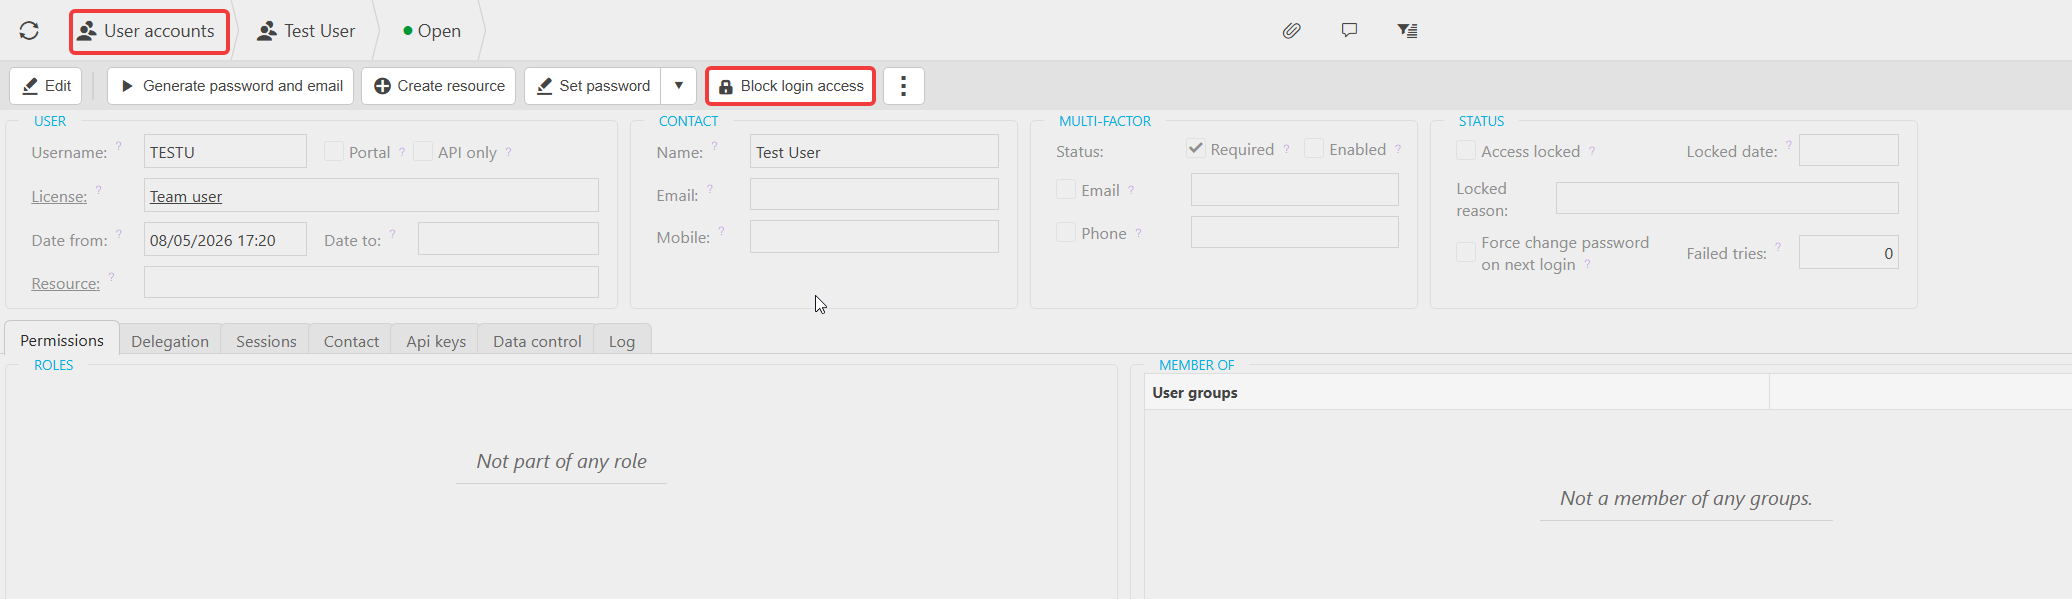
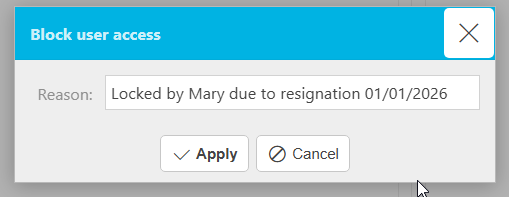
Blocking login access for a user on the 'User Accounts' screen.
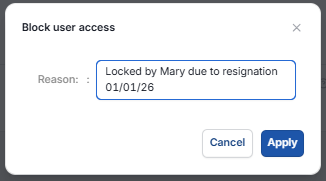
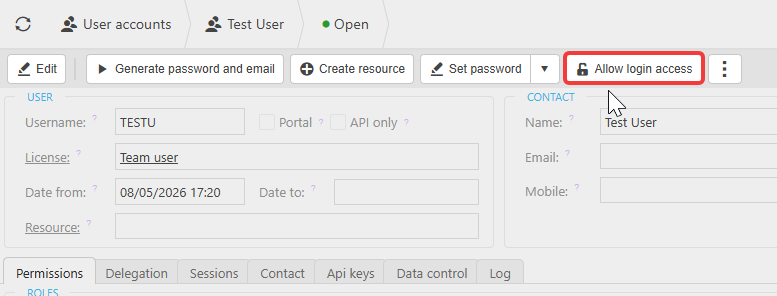
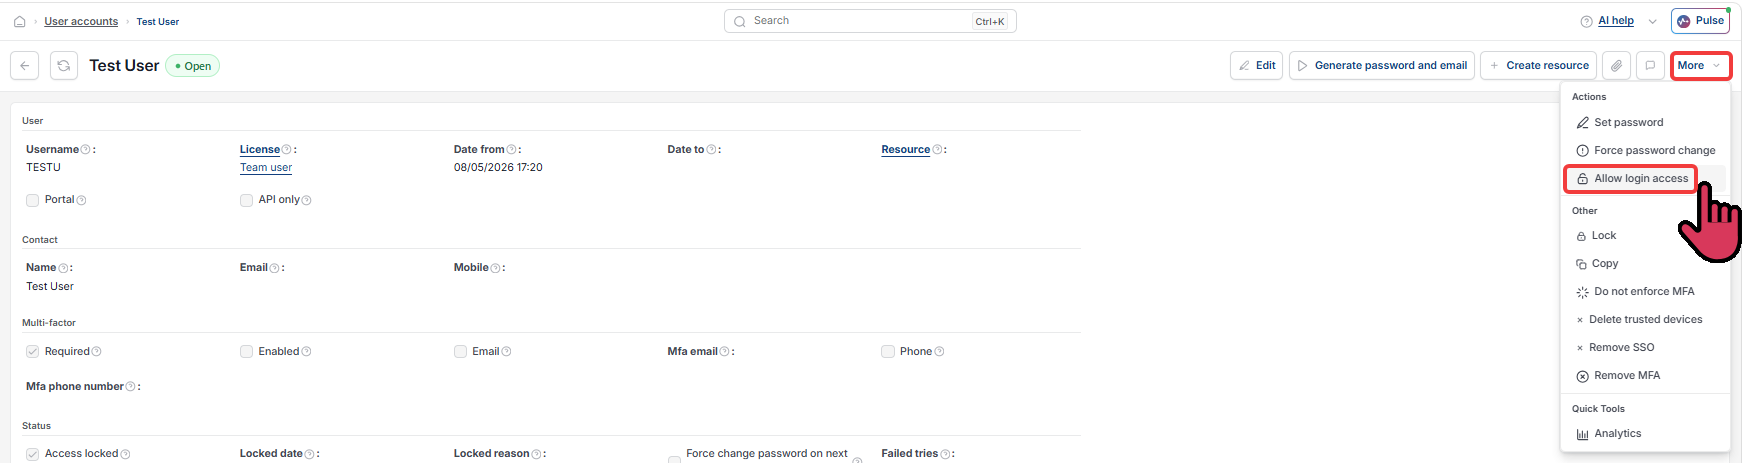
To restore access, select 'Allow login access' on the same user.
Restoring login access for a blocked user.
Restoring login access for a blocked user.
Locking a user account in User Accounts
Lock an account when someone has left the company and is no longer an active user. We recommend blocking the account first, then locking it.
Locking moves the account to an inactive state, which means:
- The user can no longer log in (blocked access)
- The user account no longer counts towards your billing
- The user account no longer appears in selection menus throughout iplicit
- The user account is removed from the default 'User Accounts' view.
To lock a user:
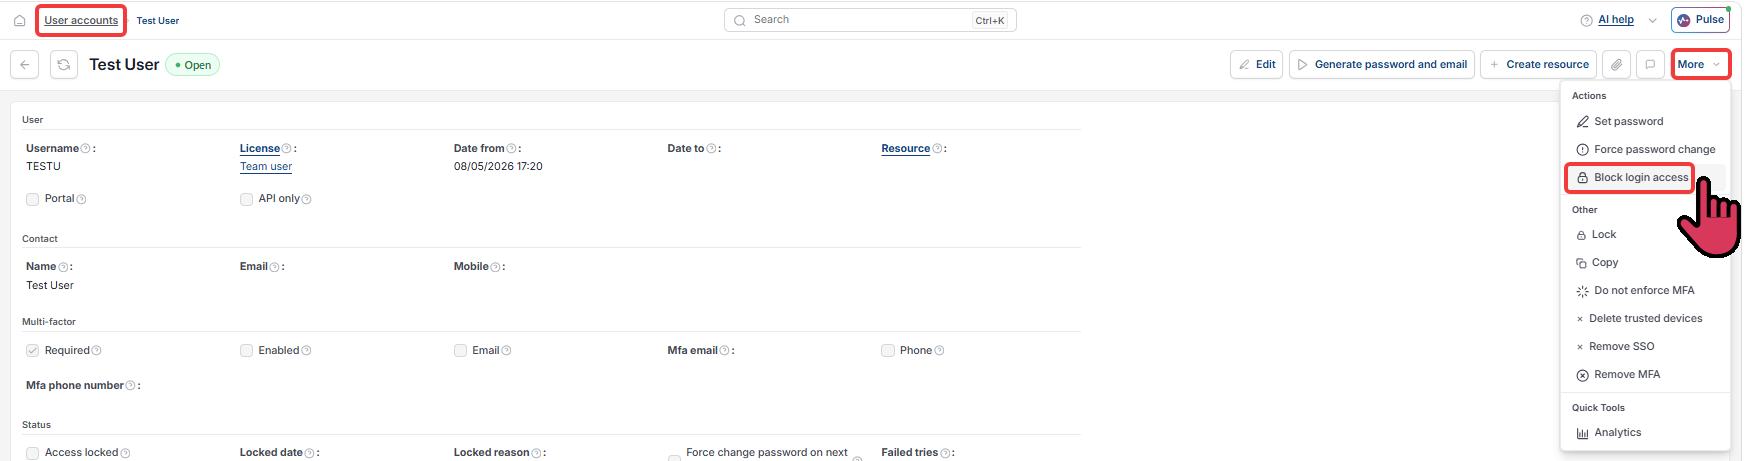
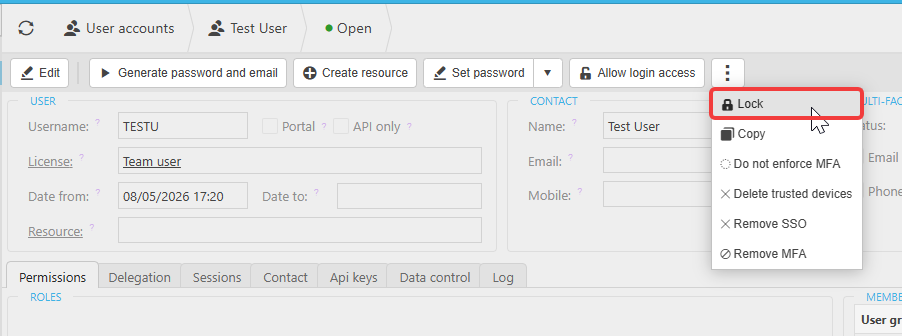
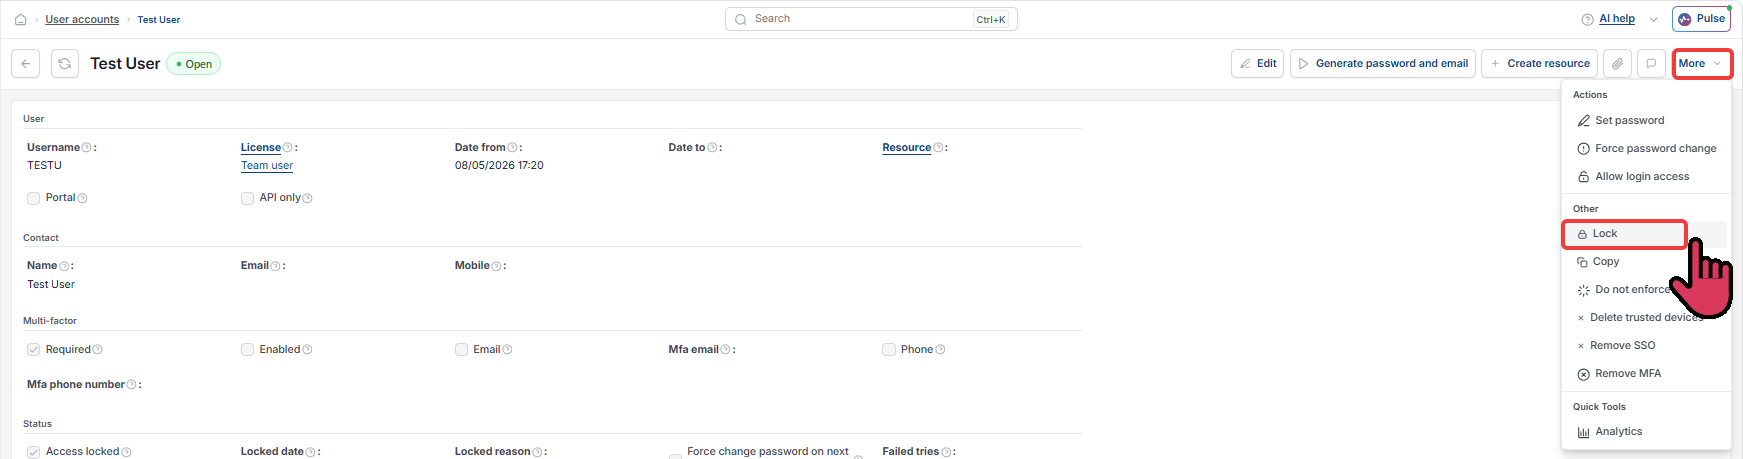
- Open the additional actions menu in the user account – shown as a three-dot icon or the 'More' dropdown, depending on your version of iplicit
- Select 'Lock'.
Locking a user from the menu in the user account.
Locking a user from the menu in the user account.
Once the user account has been locked
Notify our accounts team at accounts@iplicit.com so we can update your records. Only locked accounts are excluded from your active user count for billing purposes.
Why we do not recommend deleting user accounts in iplicit
Deleting an account breaks the link between the user and everything they did in the system. This is why we do not recommend deleting user accounts when someone leaves.
iplicit retains the following against a locked user:
- Documents captured or uploaded
- Authorisations made
- Communication logs
- Audit trail entries
- Any other actions taken while the account was active.
Reports, audit history and approval records remain complete and accurate after the user has left.
Watch: blocking and locking a user account
The video below walks through the full process of blocking and locking a user account in iplicit. It shows where to find the options and what each action looks like in the 'User Accounts' view.
For more detail, see the user guide: 'User Account | iplicit'.
Block user account access
Remove a user
User leaves company
Disable a user account
Delete user
Employee left organisation
Lock a user account
Deactivate a user
Stop a user logging in